Guide to the Metz Flashgun SCA Modular System

This guide explains what the Metz SCA system is, the difference between its main versions, how to select and install SCA adapters, how to use TTL and manual flash control, high-speed sync, off-camera options, and common troubleshooting tips.

Metz SCA Flash

1. What the SCA system does

Metz designed the System Connector Adapter (SCA) to make their flashes adaptable across many camera brands. Instead of buying a different flash for each brand, you pair a Metz flash with an SCA adapter that “translates” the electrical contacts and control signals. That way, a single Metz unit can work with Nikon, Canon, Minolta, Leica, and many more — while still providing TTL or other camera-specific functions.

Metz SCA 3000 and SCA 300 modules side by side

2. Main SCA families

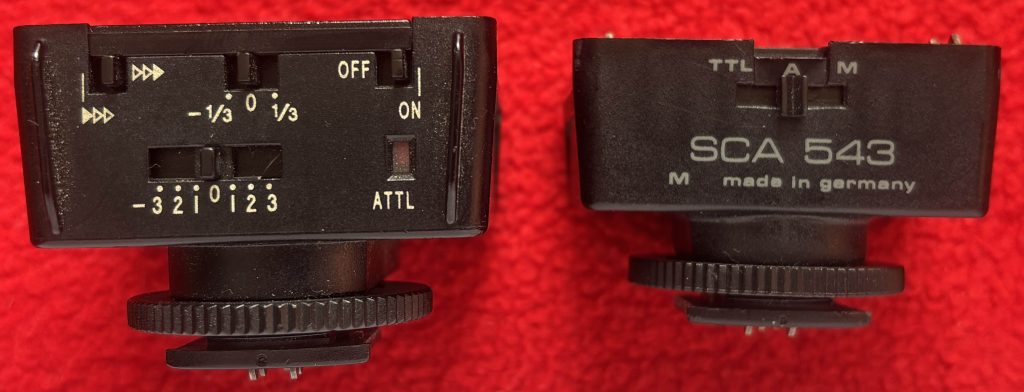
  • SCA 300 – the original series, developed during the film SLR era. These adapters allow TTL and basic communication but don’t support newer digital protocols.
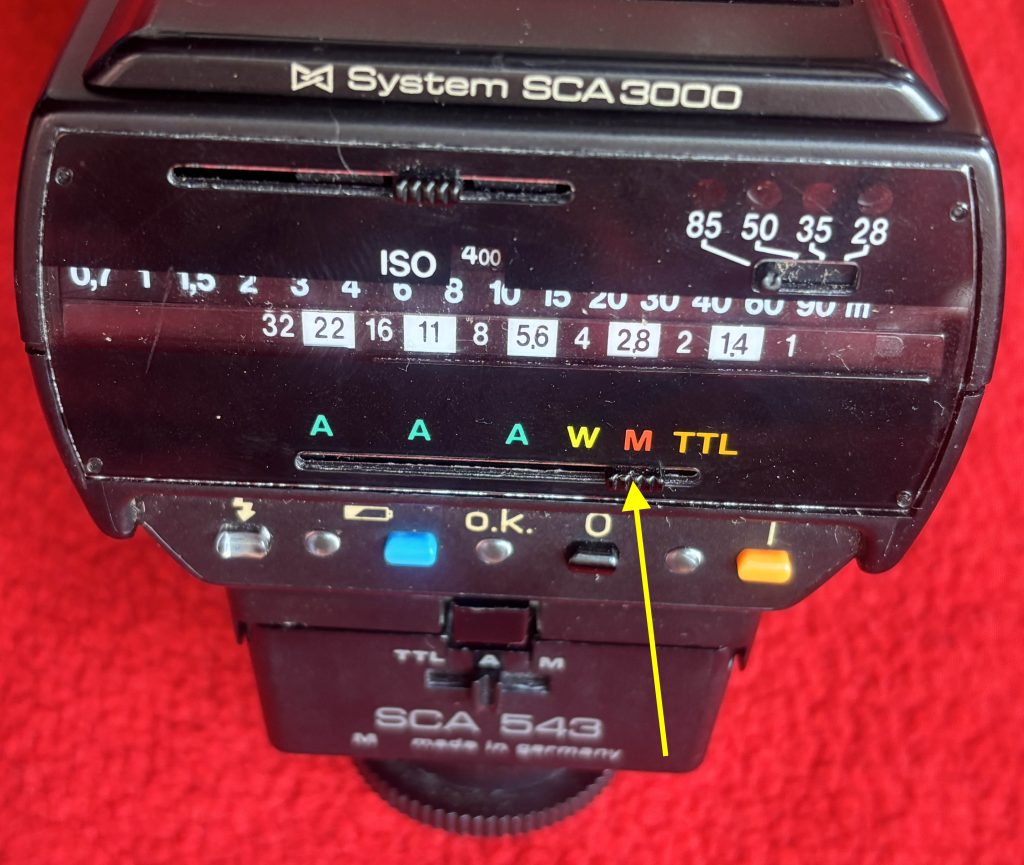
  • SCA 3000 – the updated family for the digital age. These modules handle modern TTL systems (E-TTL, i-TTL, etc.) and sometimes add features like high-speed sync. Versions are marked M3, M5, M6, etc., with higher numbers usually indicating newer firmware.
  • Other SCA branches – Metz also released other system connectors (e.g., SCA-500) for special applications, but the bulk of modern use involves the 3000 series.
Metz SCA 3000 and SCA 300 modules side by side (photo from top)

3. Choosing the right adapter

  1. Check your flash model (e.g., 54 MZ-4i, 58 AF-1).
  2. Look up Metz’s compatibility charts — these list which adapter matches which camera brand and model, plus what features will work.
  3. Pay attention to version codes — if your camera is recent, you may need an adapter with updated firmware (e.g., SCA 3102 M6 instead of M3).
Adaptor compatibility chart

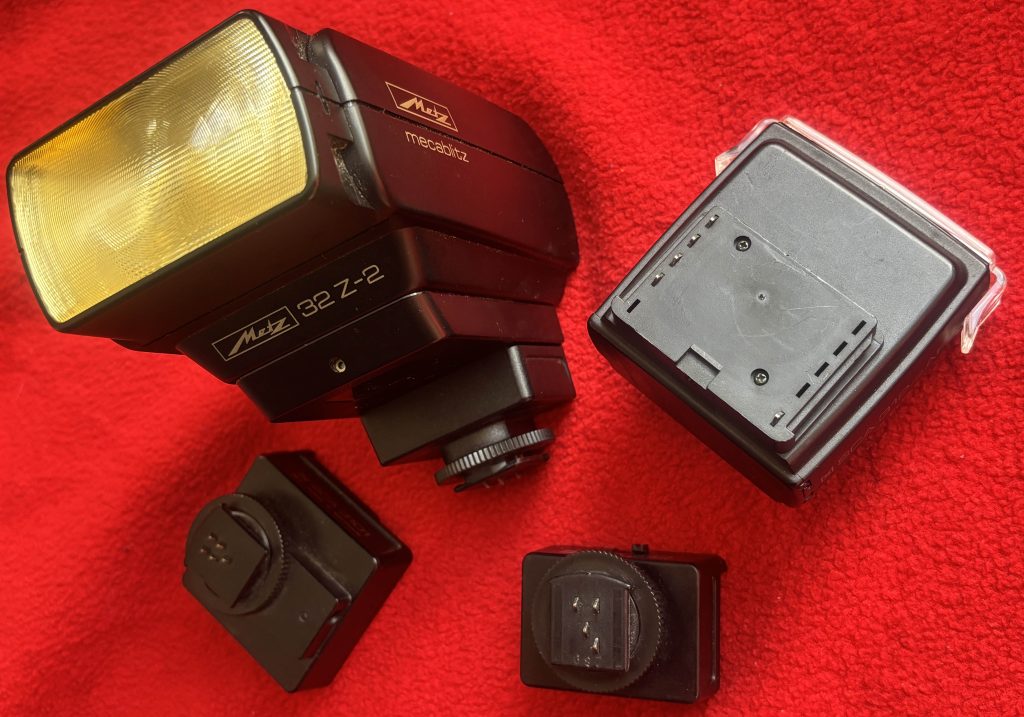
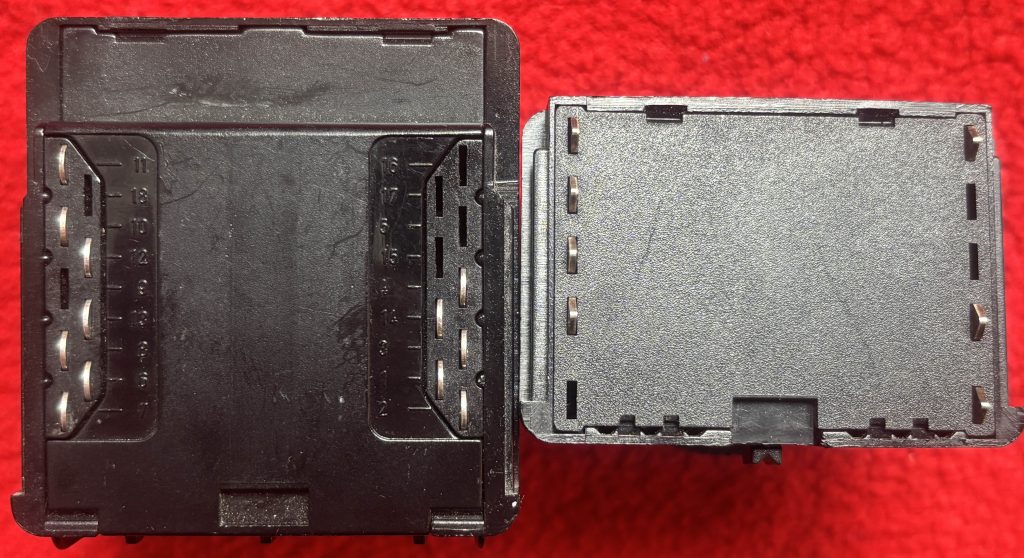
4.  Attaching the system

  • Switch off both flash and camera before connecting.
  • Slide the adapter into the flash’s detachable base until it clicks.
  • Mount the assembled unit on the camera hot shoe and lock it in place.
  • Power up the camera first, then the flash. On most cameras, the flash-ready indicator should appear in the viewfinder or LCD if the setup is correct.

5. TTL flash operation

With the proper adapter, your camera can control flash exposure through its native TTL system. Flash exposure compensation (FEC) is often set on the camera, though some Metz units allow adjustment on the flash itself. If exposures are slightly off, dial in a correction using the camera’s controls.

6. Manual control

Even with no adapter at all, Metz flashes can be used in manual mode. Here you choose the power output (full, 1/2, 1/4, down to 1/128) and set the zoom head as needed. Manual is the most predictable approach when working with studio lights or third-party triggers.

Manual switch on rear of SCA flash

7. High-speed sync and sync limits

  • If your flash + adapter + camera all support high-speed sync, you can shoot above the camera’s normal sync speed (e.g., 1/500s).
  • If not, you’ll be limited to the standard X-sync speed (usually between 1/60s and 1/250s). Check the compatibility chart to confirm.

8. Off-camera options

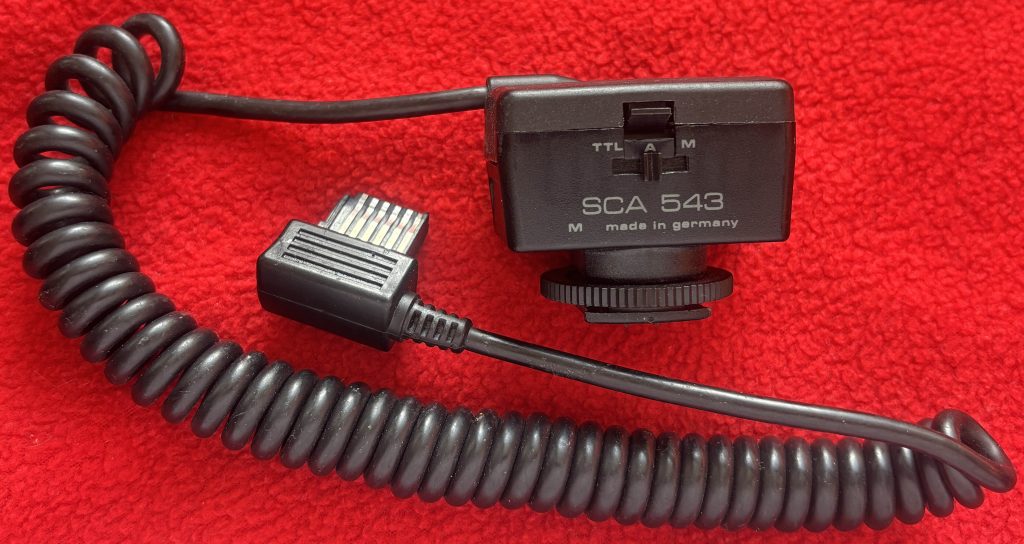
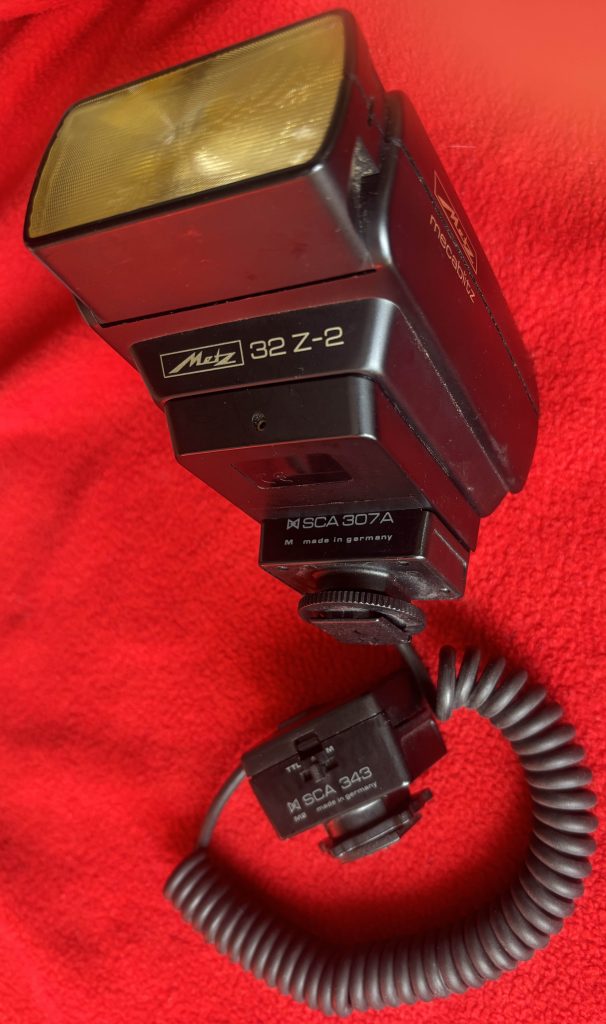
  • Wired: Metz made SCA extension cords so you can keep TTL communication even with the flash off-camera. One type has a plug at one end to fit Metz hammerhead flash units, the other (SCA 307A) has a male module connector on one end and a female module connector on the other and is used for all hot shoe Metz flash off camera.
  • Optical/radio: Many Metz flashes have an optical slave mode. For radio triggers, most photographers use them in manual mode unless the trigger system specifically supports Metz TTL (rare).
SCA extension cord for Metz Hammer head flash guns
SCA extension cord for Metz hot shoe mount flash guns

9. Troubleshooting checklist

  • Make sure you’re using the correct adapter family and version.
  • Always power down before connecting or removing modules.
  • Test the flash in manual mode at your camera’s sync speed to confirm the basic connection works.
  • Clean the contacts with a cotton bud and alcohol if the flash misfires.
  • Be cautious with older Metz flashes: some output higher trigger voltages that may damage modern cameras unless the SCA adapter regulates it.

10. Care and storage

Avoid stress on the camera hot shoe if you’re using a heavy Metz flash use a bracket or cable.

Keep adapters in labeled pouches so you don’t mix them up.

Don’t store the flash with batteries installed for long periods – leaking batteries will ruin the contacts inside your flashgun..

See a full range of Metz flashguns and accessories here


Digiscoping – bird photography with spotting scopes

Wildlife photographers often wish they owned a longer lens of 500mm or so to taking close ups of birds and other smaller creatures. And often they may  already have such a lens in the form of a spotting scope. By attaching the camera to the rear end of the spotting scope you create a lens with a similar  magnification to that of around 800mm
This technique is referred to as digiscoping.

camera on spotting scope

You need to buy an adaptor to attach the camera to your spotting scope. These are often specific to the spotting scope and with the exception of a few

camera brand adaptors, they usually all have a T2 mount thread at the camera end. So you buy the adaptor, attach it to the scope and then screw in a T2  adaptor that’s specific to your camera mount. We have the T2 camera mounts here at PhotographyAttic

Camera specific scopes such as the Pentax PF80D need the PF-CA35 which has a direct camera mount.
The Nikon Fieldscope range including the EDIII A need the FSA-L1. Nikon also produce the FSA-L2 for exclusive use on EDG Fieldscopes

Opticron have a wide range of scopes and several adaptor combinations all requiring a T2 mount at the camera end.  See the Opticron Telephotography and Digi-scoping page for more details

Swarovski also have a range of scopes and a really informative page on digiscoping: Equipment – spotting scopes, cameras, etc.  You need a T2 mount with their systems

Barr & Stroud supply a spotting scope adaptor for their Sahara and Bresser Safari spotting scopes. T2 mount required. This adaptor also fits some Helios, Bresser,  Meade and Praktica spotting scopes.

Leica’s DSLR Photo-adaptor allows T2 mounted SLRs to be attached to the Leica Spotting scopes

T2 adaptors do not have any form of electrical contacts so you have to use your camera’s manual or aperture-priority mode.  As the spotting scope doesn’t  have apertures you just point and shoot and the camera will set the correct shutter speed. You could use the ISO setting to adjust shutter speed and increase the ISO for a faster shutter speed.

Focusing is manual. Focus the scope like you normally would but take more care on accurate point as the lack of depth of field will mean you have to be spot on to get a sharp photo. Also the increased magnification will make it difficult to hand hold so it’s better to use a tripod.

Further reading
Peta Pixel have an interesting article comparing the use of a Spotting scope against a Canon Super telephoto


Interesting Camera Concepts 1: Digibinos

In this occasional series we’ll take a look at design concepts that have tried to revolutionize the way we take photos. The first in the series looks at digibinos. A hybrid product combining binoculars with a digital camera.  Pentax came up with the innovation announcing their DB-100 model in March 2002.

Pentax DB-100 digibinos

Having a camera combined with binoculars wasn’t a new thing. Tasco produced a 110 film version back in the early 80s. It wasn’t a success, and neither was the Pentax .

What the Pentax had was interesting – a pair of 7x magnification binoculars and a digital camera with a focal length of 280mm (on a 35mm camera). What let it down was the low resolution of the camera at just 0.8Mp and the build quality. For £300 it felt like you were getting a cheap digital camera with a budget pair of binoculars that didn’t have the flexibility of normal compact binoculars. You could adjust the size for different width eyes by push pulling the case, but they didn’t feel as comfortable as ordinary binoculars.

The LCD viewing screen was also smaller than digital cameras at the time.

I was taking photos remotely the other day and used binoculars to view the distant scene. It made me think that having a camera built in would be a good thing…but I’d want the clarity and depth seen through the binoculars to be recorded by the camera. I still believe there’s a future for this kind of hybrid technology, but it has to be smarter than the previous attempt.

Pentax DIGIBINO DB-100 Announced – New Story