Shutter speed is the single most critical variable in waterfall photography. It determines not just exposure, but the emotion of the water.
Most guides offer a binary choice: “freeze” the water or “blur” it. This guide focuses on the Texture Spectrum – finding the specific speed that matches the personality of the waterfall you are photographing.
Waterfall Texture Spectrum
Instead of guessing, use this spectrum to decide what story you want to tell.
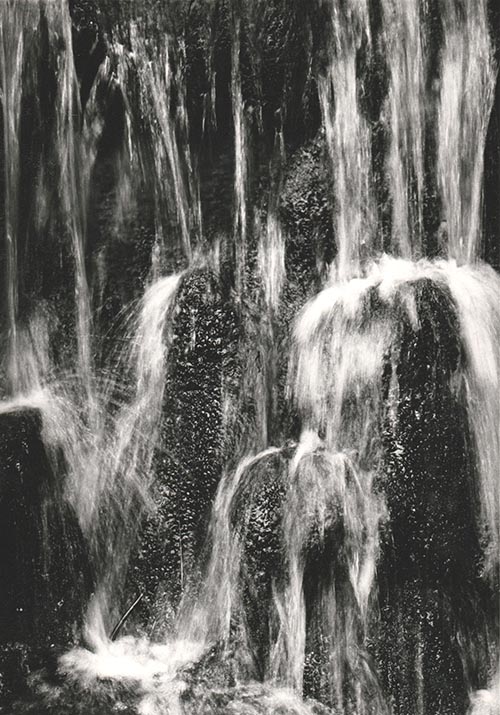
1 : The “Power & Chaos” Zone (1/500s or faster)
The Look: Violent, crisp, and detailed. Every droplet is frozen in mid-air.
Best For: Massive, roaring waterfalls where you want to convey danger or raw power.
Technique:
- Mode: Shutter Priority (Tv or S).
- ISO: You may need to bump ISO to 400 or 800 to maintain this speed in shady glens.
- Burst Mode: Fire a rapid burst. Since water moves chaotically, one frame will often have a better “shape” of splash than the others.

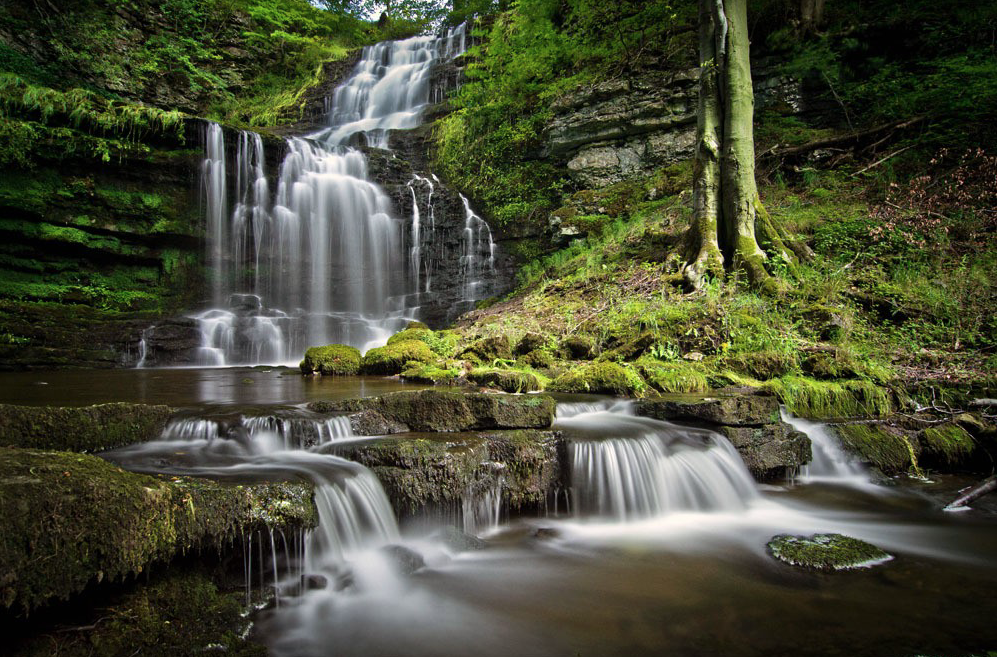
2 : The “Structured Flow” Zone (1/15s – 1/2s)
The Look: This is the underused “Sweet Spot.” The water has motion and direction, but it retains texture. It looks like “stringy muscle” rather than “white milk.” It looks real, but slightly dreamlike.
Best For: Waterfalls with interesting rock formations behind the water, or multi-tiered cascades.
Technique:
- Stability: A tripod is mandatory here. Hand-holding will result in a blurry landscape, not just blurry water.
- Filter: You usually do not need a heavy Neutral Density (ND) filter here; a polarizer is often enough to cut the glare and slow the shutter just enough.
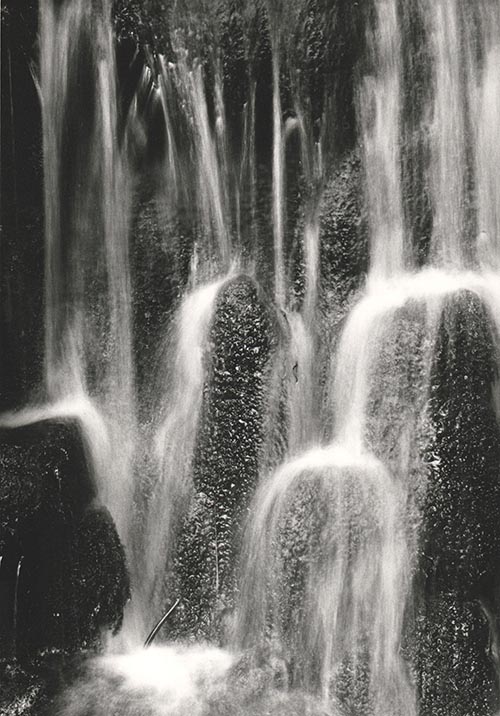
3 : The “Ethereal Silk” Zone (1s – 5s+)
The Look: The classic “calendar” look. The water becomes a solid, smooth white sheet. It creates a sense of peace and abstraction.
Best For: Thin, spindly waterfalls or scenes where you want to simplify a messy composition.
Technique:
- ND Filter: Essential. You cannot achieve a 2-second exposure in daylight without blocking light. A 3-stop (ND8) or 6-stop (ND64) filter is standard.
- Cover the Viewfinder: On DSLR cameras, light can leak in through the viewfinder during long exposures and ruin the shot. Cover it with your thumb or the provided cap.
Pro Tip
If the water is bright white foam, it will lose detail (blow out) very quickly. Underexpose your image by -0.3 or -0.7 EV to protect the highlights in the water.
The Math of Flow
The speed of the water dictates the shutter speed required.
- Fast rushing water needs a faster shutter speed to blur (because it moves across the frame quickly).
- Slow trickling water needs a slower shutter speed to show any motion at all.
If you want to calculate the perfect blur, a good rule of thumb for the “Structured Flow” look is: T=1 / 2 x V
Where T is shutter speed and V is the estimated velocity of water in feet per second. (e.g., if water moves at 15 fps, try 1/30th of a second).
The “Pocket Long Exposure” (Using a Phone)
You don’t need a DSLR to drag the shutter. Modern phones have computational photography tricks that simulate long exposures perfectly without a tripod.
Method A: The iPhone “Live Photo” Hack (Easiest)
This is a hidden feature that mimics a 3-second shutter speed.
1. Turn on Live Photos (the concentric circle icon in the camera app).
2. Take the shot. Hold as still as possible, but a tripod isn’t strictly necessary.
3. Open the Photo in your gallery.
4. Tap the “Live” menu (top left corner) and select “Long Exposure”.
The phone blends the video frames from the Live Photo into a single silky image, effectively creating a ~3-second exposure.
Method B: Android “Pro Mode” (Best Quality)
Most Android flagships (Samsung S-series, Pixel, etc.) have a Pro/Manual mode.
1. Open Camera > More > Pro Mode.
2. Set ISO to 50 (or the lowest possible number).
3. Adjust Shutter Speed: Dial it to 1/10 or 1/4.
4. The “Sunglass Hack”: If the image is completely white (overexposed), hold your sunglasses over the phone lens. This acts as a makeshift Neutral Density filter, cutting the light and allowing you to use slower speeds.
Method C: Third-Party Apps
If your native camera app is limited, use dedicated apps that “stack” images to create blur.
• iOS: Spectre Camera (uses AI to stabilize and blur).
• Android: Camera FV-5 Lite or Motion Cam.
Quick Reference
| Effect Desired | Shutter Speed | ND Filter needed | Best For |
|---|---|---|---|
| Freeze | 1/500s+ | No | Raging power |
| Texture | 1/15sec-1/2sec | Polariser is enough | Rock detail |
| Silky Smooth | 1-5sec | ND8 or ND64 | Calm messy scenes |
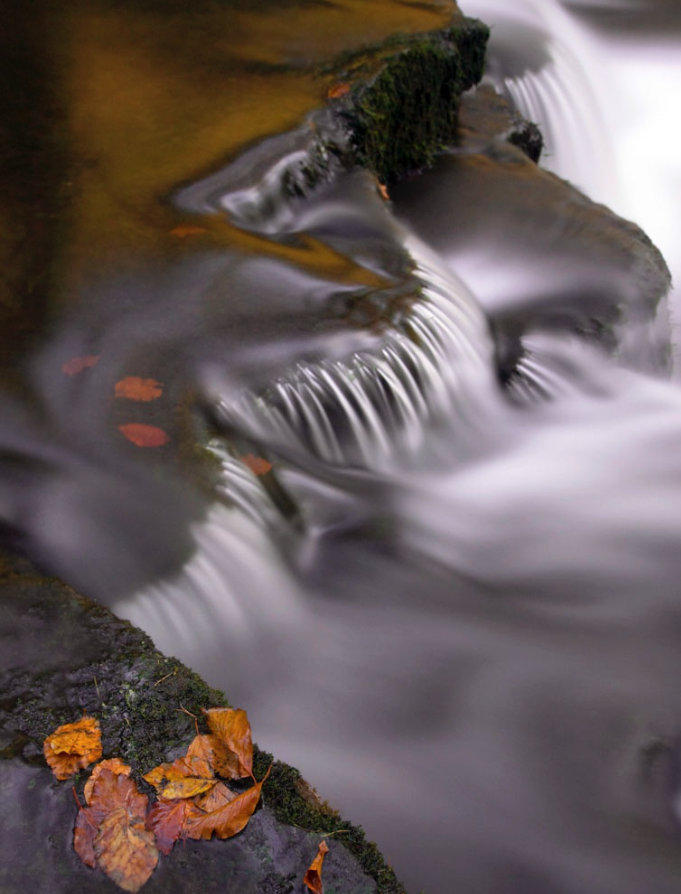
| Abstract Mist | 10s+ | ND1000 (Big Stopper) | Minimalist Art |
Essential Gear for Waterfall Photography
While you can take a snapshot with anything, controlling shutter speed requires specific tools to manage light and stability.
1 : Light Control
This is the most critical section. You cannot achieve slow shutter speeds during the day without these.
• Circular Polarizer (CPL) – The “Must-Have”:
• Why: It cuts the white glare off wet rocks and leaves, letting the deep green and stone colors shine through. It also acts as a weak Neutral Density filter, reducing light by about 1.5 to 2 stops (perfect for the “Structured Flow” look).
• 3-Stop ND Filter (ND8):
• Why: Perfect for shady glens or overcast days. It lets you slow the shutter to around 1/2s or 1s without making the image too dark to compose.
• 6-Stop ND Filter (ND64):
• Why: Essential for brighter conditions or when you want that long, 5s to 10s “silky” exposure.
• Step-Up Rings:
• Tip: Instead of buying filters for every lens size, buy filters for your largest lens (e.g., 77mm or 82mm) and buy cheap step-up rings to fit them onto your smaller lenses.
2 : Stability
Waterfalls are often found in dark canyons or deep woods, meaning exposure times are long. Hand-holding is rarely an option.
• Tripod (Low-Angle Capable):
• Look for a tripod where the center column can be removed or inverted. You often want to shoot from very low (1 foot off the ground) to include foreground rocks in the composition.
• Remote Shutter Release (or App):
• Pressing the camera button introduces vibration. Use a cable release, a wireless remote, or the 2-second self-timer built into your camera.
• L-Bracket (Optional but Recommended):
• Allows you to switch your camera from Landscape to Portrait orientation without flopping the tripod head over to the side (which shifts your centre of gravity and reduces stability).
3 : Spray Management
Waterfalls generate mist. Mist ruins sharpness.
• Microfiber Cloths (Many of them):
• Bring at least 3-4 dry cloths. Once one gets damp from spray, it just smears water across the lens rather than removing it.
• Rocket Blower:
• Use this to blow large droplets off the glass before wiping. Wiping a dusty lens with a cloth can scratch the coating; blowing it off first is safer.
• Shower Cap or Rain Sleeve:
• A cheap hotel shower cap is the perfect emergency rain cover for your camera body if the mist is heavy.
4 : Which Lens
• Wide Angle Zoom (e.g., 16-35mm):
• For capturing the grand scene and emphasizing foreground rocks.
• Telephoto Zoom (e.g., 70-200mm):
• Underrated: Use this to zoom in tight on specific sections of the fall for abstract, intimate textures (isolating just the water and a single fern, for example).
5 : Personal Safety & Comfort
• Good Grip Boots: Wet rocks are treacherous.
• Towel: For drying your hands (or your knees if you are kneeling in mud).
• Bug Spray: Water + Woods = Mosquitoes.
Checklist
| Category | Item |
|---|---|
| Filters | Polariser, ND8, ND64 Big Stopper |
| Support | Tripod with low angle, remote shutter |
| Cleaning | Microfibre Cloths, air blower, lens wipes |
| Protection | Rain Sleeve or Shower Cap |
| Lenses | Wide Angle & Telephoto |
Leave a Reply