Great product photos don’t just show an object — they remove doubt. Whether you’re listing on a marketplace, your own store, or social media, your images answer the buyer’s silent questions: What condition is it in? How big is it? Is it worth the price?
Here’s a clear, strategic guide to photographing items so they sell faster and for more.
1. Start With the Buyer’s Mindset
Before you even pick up your camera, ask:
• What would I want to see before buying this?
• What flaws would worry me?
• What details justify the price?
Think like someone scrolling quickly. Your first image must stop them. The rest must build confidence.
2. Light Is More Important Than Your Camera
You do not need expensive gear. You do need good light.
Best option: Window light
• Place the item near a large window.
• Turn off indoor lights (they create color casts).
• Shoot during bright but indirect daylight.
Avoid:
• Direct overhead lighting (harsh shadows).
• On-camera flash (flattens texture and looks amateur).
• Mixed light sources (yellow + blue tones together).
If shadows are too dark, place a white poster board opposite the window to bounce light back.

Make sure the product is being lit from the front when using window lighting rather than backlit as this will create shadows that hide subject detail.
3. Clean and Prepare the Item
Your camera sees dust you don’t.
• Wipe surfaces thoroughly.
• Remove fingerprints.
• Iron clothing.
• Polish metal.
• Remove stickers unless they add value.
For collectibles or books, clean gently to avoid damage. For electronics, power them on so buyers see they work.

A quick clean before photographing the item will ensure any dust / marks are removed
4. Choose a Background That Supports the Product
The background should never compete with the item.
Safe choices:
• White wall
• Neutral fabric
• Wooden table
• Seamless paper
Avoid:
• Cluttered rooms
• Wrinkled sheets
• Busy patterns
• Dirty surfaces
If you’re selling premium goods, the background should feel premium. If you’re selling everyday items, keep it simple and honest.
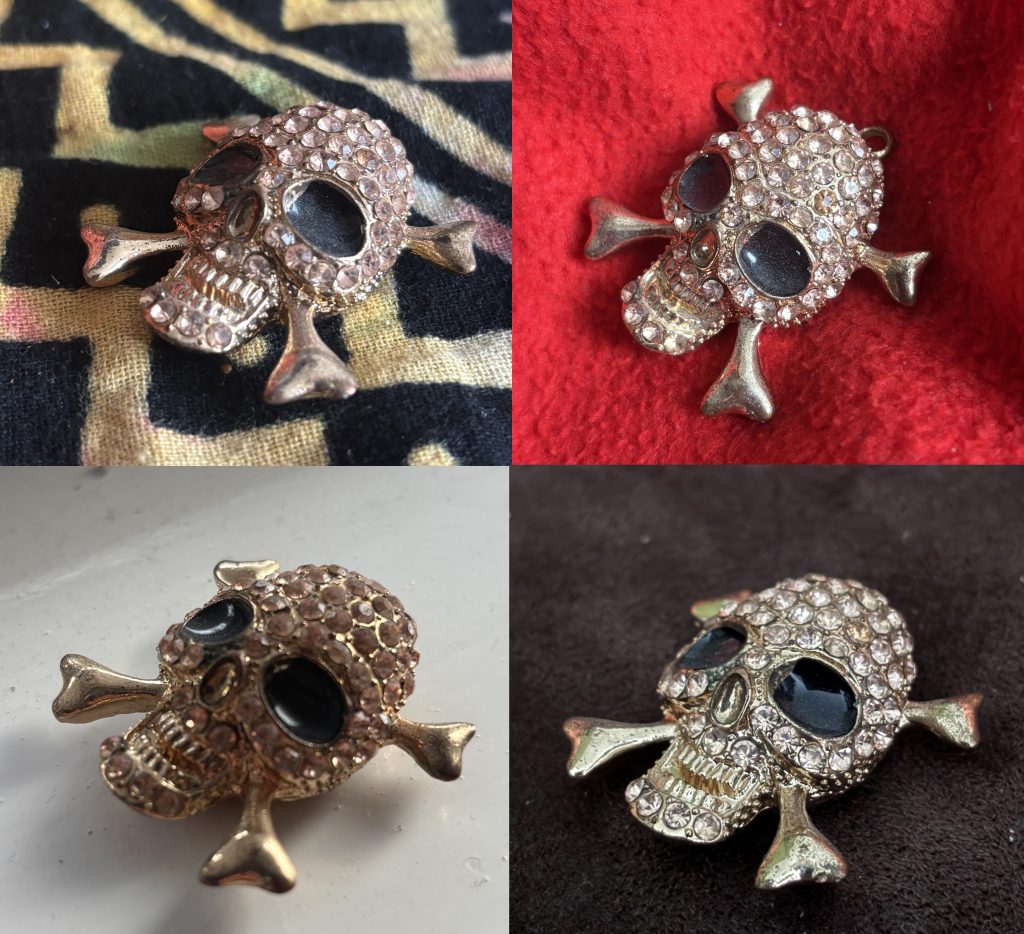
In the above example photos the first has a noisy background to distract. The second has a background that will cause a colour cast. The third is unclean and its lighting creates shadows. The fourth has good neutrality and results in an accurate colour with no distractions.
5. Use a Simple Shot Checklist
Every listing should include:
1. Hero shot – the best, cleanest angle.
2. Front view
3. Back view
4. Side or profile
5. Close-up of key details
6. Close-up of flaws (be transparent)
7. Scale reference (next to a common object or ruler)
8. Label/brand tag
9. Accessories included
More angles = less uncertainty = fewer buyer questions.
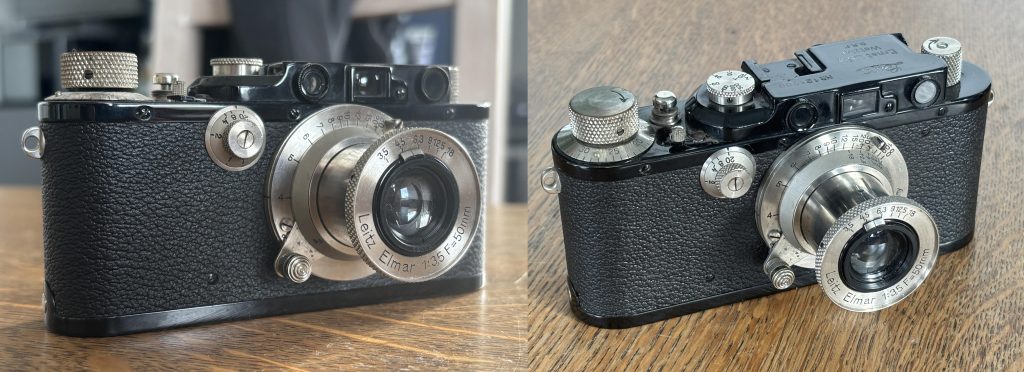
Above left has a cluttered background and low profile, while the camera is sharp there are too many distractions. Right shows a better angle this one is known as the hero shot. If only one photo can be used this gives the best impression of the product.
6. Show Condition Honestly
Trust sells.
If there’s:
• A scratch
• A dent
• Wear on fabric
• Faded print
Photograph it clearly. Buyers who discover flaws after delivery leave bad reviews. Buyers who see them beforehand feel informed.
7. Shoot With Stability
Blurry photos destroy trust.
• Use both hands.
• Rest elbows on a surface.
• Lean against a wall.
• Use a cheap tripod if possible.
• Use your phone’s timer to avoid shake.
Sharpness matters more than fancy depth-of-field.
8. Frame for Platforms
Different platforms favor different crops.
• Square (1:1) works well for most marketplaces.
• Vertical (4:5) works well for social platforms.
• Leave some breathing room so nothing gets cropped in thumbnails.
Always check how your image looks as a tiny preview.
9. Edit Lightly — Don’t Mislead
Editing should correct reality, not change it.
Adjust:
• Brightness
• Contrast
• White balance
• Slight sharpening
Avoid:
• Heavy filters
• Over-saturation
• Removing defects digitally
• Changing color accuracy
If the item is navy blue, it must look navy blue.
10. Create Emotional Context (When Appropriate)
For lifestyle items (clothing, decor, furniture):
Show it in use.
• A chair in a minimal room.
• A jacket worn by a model.
• A lamp turned on in the evening.
Emotion increases perceived value.
For practical items (tools, spare parts), clarity matters more than mood.
11. Match Photography Style to Price Point
Item Type Photo Style
$10 used item Clean, honest, simple
$100 designer piece Styled, elegant, detail-focused
Handmade craft Texture, warmth, storytelling
Tech product Crisp, minimal, functional
Your photo should justify your asking price before a buyer reads the description.
12. Batch Your Workflow
If selling multiple items:
• Photograph everything at once.
• Use the same lighting setup.
• Edit in one session.
• Name files clearly.
Consistency builds brand identity — even if you’re just an individual seller.
13. Small Tricks That Increase Perceived Value
• Shoot slightly above eye level for most objects.
• Use diagonal angles for depth.
• Leave negative space (feels premium).
• Align edges straight.
• Keep horizons level.
Subtle polish creates subconscious trust.
14. Test Before Posting
Ask yourself:
• Would I buy this based on these photos?
• Do the photos answer all obvious questions?
• Is anything confusing?
If buyers need to message you for basic information, your photos didn’t do their job.
Final Thought
Good product photography isn’t about art — it’s about reducing friction. Every photo should:
• Remove doubt
• Build trust
• Highlight value
• Support your price
When your images do those four things, your listings stop competing on price and start competing on presentation.
Leave a Reply