Great product photos don’t just show an object — they remove doubt. Whether you’re listing on a marketplace, your own store, or social media, your images answer the buyer’s silent questions: What condition is it in? How big is it? Is it worth the price?
Here’s a clear, strategic guide to photographing items so they sell faster and for more.
1. Start With the Buyer’s Mindset
Before you even pick up your camera, ask:
• What would I want to see before buying this?
• What flaws would worry me?
• What details justify the price?
Think like someone scrolling quickly. Your first image must stop them. The rest must build confidence.
2. Light Is More Important Than Your Camera
You do not need expensive gear. You do need good light.
Best option: Window light • Place the item near a large window. • Turn off indoor lights (they create color casts). • Shoot during bright but indirect daylight.
Avoid: • Direct overhead lighting (harsh shadows). • On-camera flash (flattens texture and looks amateur). • Mixed light sources (yellow + blue tones together).
If shadows are too dark, place a white poster board opposite the window to bounce light back.
Make sure the product is being lit from the front when using window lighting rather than backlit as this will create shadows that hide subject detail.
3. Clean and Prepare the Item
Your camera sees dust you don’t.
• Wipe surfaces thoroughly.
• Remove fingerprints.
• Iron clothing.
• Polish metal.
• Remove stickers unless they add value.
For collectibles or books, clean gently to avoid damage. For electronics, power them on so buyers see they work.
A quick clean before photographing the item will ensure any dust / marks are removed
4. Choose a Background That Supports the Product
The background should never compete with the item.
Safe choices: • White wall • Neutral fabric • Wooden table • Seamless paper
If you’re selling premium goods, the background should feel premium. If you’re selling everyday items, keep it simple and honest.
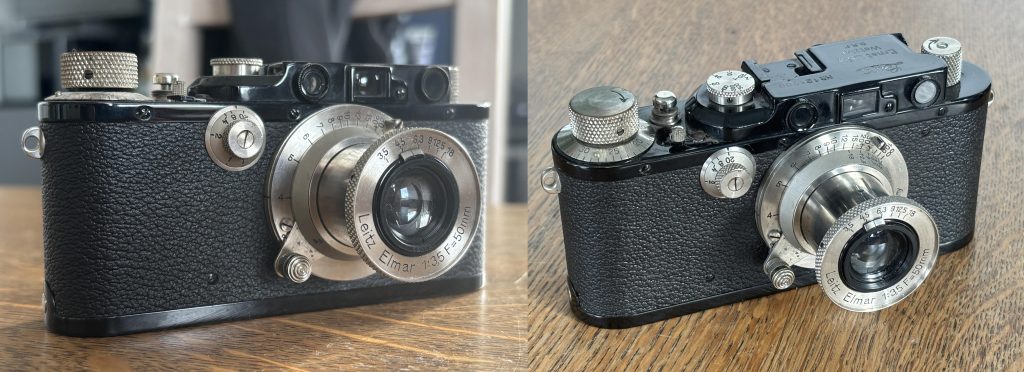
In the above example photos the first has a noisy background to distract. The second has a background that will cause a colour cast. The third is unclean and its lighting creates shadows. The fourth has good neutrality and results in an accurate colour with no distractions.
5. Use a Simple Shot Checklist
Every listing should include:
1. Hero shot – the best, cleanest angle.
2. Front view
3. Back view
4. Side or profile
5. Close-up of key details
6. Close-up of flaws (be transparent)
7. Scale reference (next to a common object or ruler)
8. Label/brand tag
9. Accessories included
More angles = less uncertainty = fewer buyer questions.
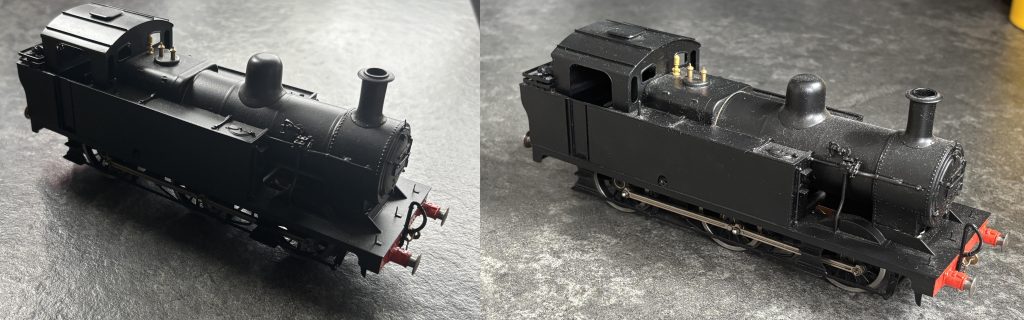
Above left has a cluttered background and low profile, while the camera is sharp there are too many distractions. Right shows a better angle this one is known as the hero shot. If only one photo can be used this gives the best impression of the product.
6. Show Condition Honestly
Trust sells.
If there’s:
• A scratch
• A dent
• Wear on fabric
• Faded print
Photograph it clearly. Buyers who discover flaws after delivery leave bad reviews. Buyers who see them beforehand feel informed.
7. Shoot With Stability
Blurry photos destroy trust.
• Use both hands.
• Rest elbows on a surface.
• Lean against a wall.
• Use a cheap tripod if possible.
• Use your phone’s timer to avoid shake.
Sharpness matters more than fancy depth-of-field.
8. Frame for Platforms
Different platforms favor different crops.
• Square (1:1) works well for most marketplaces.
• Vertical (4:5) works well for social platforms.
• Leave some breathing room so nothing gets cropped in thumbnails.
Always check how your image looks as a tiny preview.
Your photo should justify your asking price before a buyer reads the description.
12. Batch Your Workflow
If selling multiple items:
• Photograph everything at once.
• Use the same lighting setup.
• Edit in one session.
• Name files clearly.
Consistency builds brand identity — even if you’re just an individual seller.
13. Small Tricks That Increase Perceived Value
• Shoot slightly above eye level for most objects. • Use diagonal angles for depth. • Leave negative space (feels premium). • Align edges straight. • Keep horizons level.
Subtle polish creates subconscious trust.
14. Test Before Posting
Ask yourself:
• Would I buy this based on these photos?
• Do the photos answer all obvious questions?
• Is anything confusing?
If buyers need to message you for basic information, your photos didn’t do their job.
Final Thought
Good product photography isn’t about art — it’s about reducing friction. Every photo should:
• Remove doubt
• Build trust
• Highlight value
• Support your price
When your images do those four things, your listings stop competing on price and start competing on presentation.
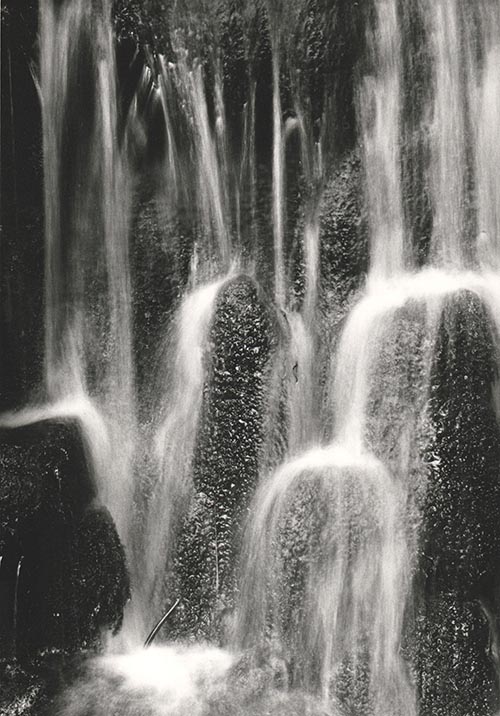
Shutter speed is the single most critical variable in waterfall photography. It determines not just exposure, but the emotion of the water.
Most guides offer a binary choice: “freeze” the water or “blur” it. This guide focuses on the Texture Spectrum – finding the specific speed that matches the personality of the waterfall you are photographing.
Waterfall Texture Spectrum
Instead of guessing, use this spectrum to decide what story you want to tell.
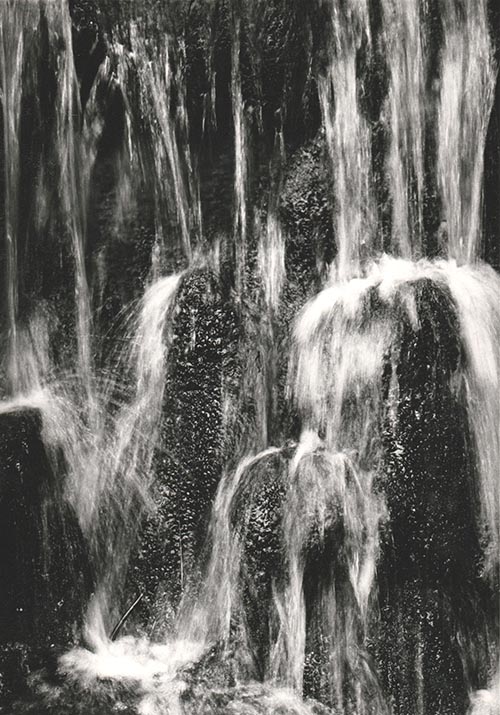
1 : The “Power & Chaos” Zone (1/500s or faster)
The Look: Violent, crisp, and detailed. Every droplet is frozen in mid-air.
Best For: Massive, roaring waterfalls where you want to convey danger or raw power.
Technique:
Mode: Shutter Priority (Tv or S).
ISO: You may need to bump ISO to 400 or 800 to maintain this speed in shady glens.
Burst Mode: Fire a rapid burst. Since water moves chaotically, one frame will often have a better “shape” of splash than the others.
2 : The “Structured Flow” Zone (1/15s – 1/2s)
The Look: This is the underused “Sweet Spot.” The water has motion and direction, but it retains texture. It looks like “stringy muscle” rather than “white milk.” It looks real, but slightly dreamlike.
Best For: Waterfalls with interesting rock formations behind the water, or multi-tiered cascades.
Technique:
Stability: A tripod is mandatory here. Hand-holding will result in a blurry landscape, not just blurry water.
Filter: You usually do not need a heavy Neutral Density (ND) filter here; a polarizer is often enough to cut the glare and slow the shutter just enough.
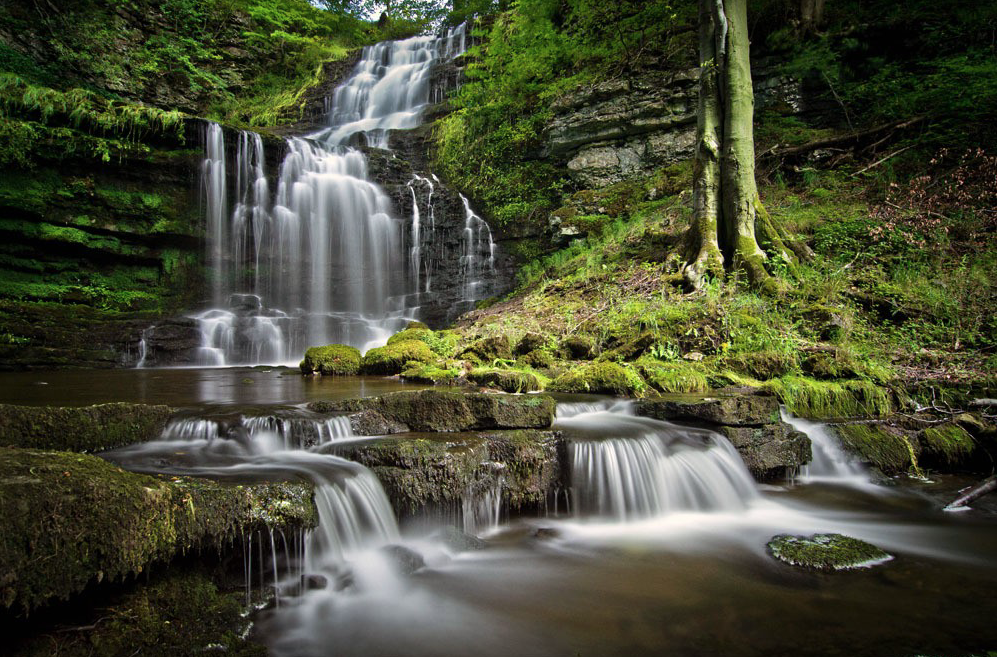
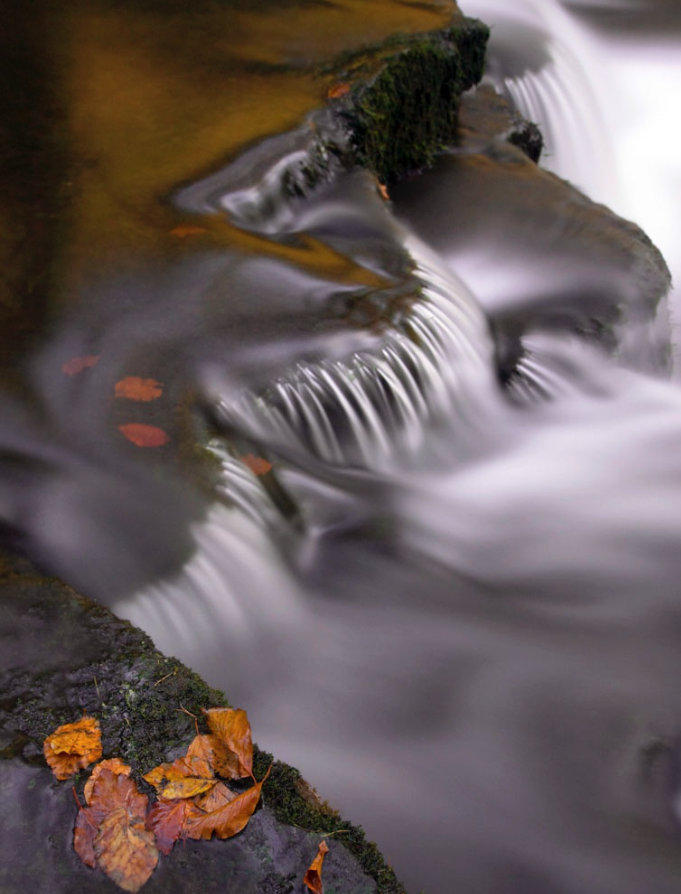
3 : The “Ethereal Silk” Zone (1s – 5s+)
The Look: The classic “calendar” look. The water becomes a solid, smooth white sheet. It creates a sense of peace and abstraction.
Best For: Thin, spindly waterfalls or scenes where you want to simplify a messy composition.
Technique:
ND Filter: Essential. You cannot achieve a 2-second exposure in daylight without blocking light. A 3-stop (ND8) or 6-stop (ND64) filter is standard.
Cover the Viewfinder: On DSLR cameras, light can leak in through the viewfinder during long exposures and ruin the shot. Cover it with your thumb or the provided cap.
Pro Tip If the water is bright white foam, it will lose detail (blow out) very quickly. Underexpose your image by -0.3 or -0.7 EV to protect the highlights in the water.
The Math of Flow
The speed of the water dictates the shutter speed required.
Fast rushing water needs a faster shutter speed to blur (because it moves across the frame quickly).
Slow trickling water needs a slower shutter speed to show any motion at all.
If you want to calculate the perfect blur, a good rule of thumb for the “Structured Flow” look is: T=1 / 2 x V
Where T is shutter speed and V is the estimated velocity of water in feet per second. (e.g., if water moves at 15 fps, try 1/30th of a second).
The “Pocket Long Exposure” (Using a Phone) You don’t need a DSLR to drag the shutter. Modern phones have computational photography tricks that simulate long exposures perfectly without a tripod.
Method A: The iPhone “Live Photo” Hack (Easiest) This is a hidden feature that mimics a 3-second shutter speed. 1. Turn on Live Photos (the concentric circle icon in the camera app). 2. Take the shot. Hold as still as possible, but a tripod isn’t strictly necessary. 3. Open the Photo in your gallery. 4. Tap the “Live” menu (top left corner) and select “Long Exposure”. The phone blends the video frames from the Live Photo into a single silky image, effectively creating a ~3-second exposure.
Method B: Android “Pro Mode” (Best Quality) Most Android flagships (Samsung S-series, Pixel, etc.) have a Pro/Manual mode. 1. Open Camera > More > Pro Mode. 2. Set ISO to 50 (or the lowest possible number). 3. Adjust Shutter Speed: Dial it to 1/10 or 1/4. 4. The “Sunglass Hack”: If the image is completely white (overexposed), hold your sunglasses over the phone lens. This acts as a makeshift Neutral Density filter, cutting the light and allowing you to use slower speeds.
Method C: Third-Party Apps If your native camera app is limited, use dedicated apps that “stack” images to create blur. • iOS: Spectre Camera (uses AI to stabilize and blur). • Android: Camera FV-5 Lite or Motion Cam.
Quick Reference
Effect Desired
Shutter Speed
ND Filter needed
Best For
Freeze
1/500s+
No
Raging power
Texture
1/15sec-1/2sec
Polariser is enough
Rock detail
Silky Smooth
1-5sec
ND8 or ND64
Calm messy scenes
Abstract Mist
10s+
ND1000 (Big Stopper)
Minimalist Art
Essential Gear for Waterfall Photography
While you can take a snapshot with anything, controlling shutter speed requires specific tools to manage light and stability.
1 : Light Control
This is the most critical section. You cannot achieve slow shutter speeds during the day without these.
• Circular Polarizer (CPL) – The “Must-Have”:
• Why: It cuts the white glare off wet rocks and leaves, letting the deep green and stone colors shine through. It also acts as a weak Neutral Density filter, reducing light by about 1.5 to 2 stops (perfect for the “Structured Flow” look).
• 3-Stop ND Filter (ND8):
• Why: Perfect for shady glens or overcast days. It lets you slow the shutter to around 1/2s or 1s without making the image too dark to compose.
• 6-Stop ND Filter (ND64):
• Why: Essential for brighter conditions or when you want that long, 5s to 10s “silky” exposure.
• Step-Up Rings:
• Tip: Instead of buying filters for every lens size, buy filters for your largest lens (e.g., 77mm or 82mm) and buy cheap step-up rings to fit them onto your smaller lenses.
2 : Stability
Waterfalls are often found in dark canyons or deep woods, meaning exposure times are long. Hand-holding is rarely an option.
• Tripod (Low-Angle Capable):
• Look for a tripod where the center column can be removed or inverted. You often want to shoot from very low (1 foot off the ground) to include foreground rocks in the composition.
• Remote Shutter Release (or App):
• Pressing the camera button introduces vibration. Use a cable release, a wireless remote, or the 2-second self-timer built into your camera.
• L-Bracket (Optional but Recommended):
• Allows you to switch your camera from Landscape to Portrait orientation without flopping the tripod head over to the side (which shifts your centre of gravity and reduces stability).
3 : Spray Management
Waterfalls generate mist. Mist ruins sharpness.
• Microfiber Cloths (Many of them):
• Bring at least 3-4 dry cloths. Once one gets damp from spray, it just smears water across the lens rather than removing it.
• Rocket Blower:
• Use this to blow large droplets off the glass before wiping. Wiping a dusty lens with a cloth can scratch the coating; blowing it off first is safer.
• Shower Cap or Rain Sleeve:
• A cheap hotel shower cap is the perfect emergency rain cover for your camera body if the mist is heavy.
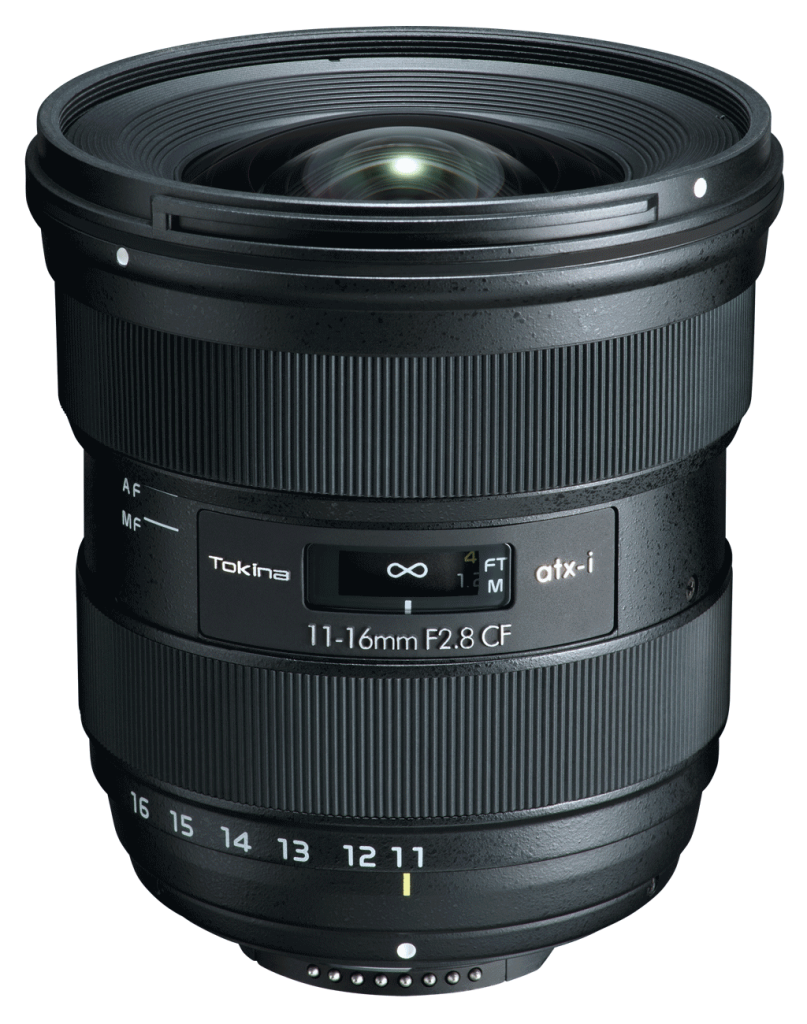
4 : Which Lens
• Wide Angle Zoom (e.g., 16-35mm):
• For capturing the grand scene and emphasizing foreground rocks.
• Telephoto Zoom (e.g., 70-200mm):
• Underrated: Use this to zoom in tight on specific sections of the fall for abstract, intimate textures (isolating just the water and a single fern, for example).
5 : Personal Safety & Comfort
• Good Grip Boots: Wet rocks are treacherous.
• Towel: For drying your hands (or your knees if you are kneeling in mud).
Capturing the aurora borealis is part science, part patience, and part magic. Use this guide to give yourself the best chance of returning home with truly stunning images.
🎒 1. Preparation Before You Go
Check the Forecasts
Aurora activity (Kp Index): Look for Kp 3+ for mid-latitudes; Kp 2+ is often sufficient in the Arctic.
Cloud cover: Clear or mostly clear skies are essential.
Moon phase: New moon or low moonlight reduces sky brightness.
Don’t hold the phone – movement will ruin the shot.
Wipe the lens (phone lenses fog easily).
Avoid digital zoom; move closer instead.
Test different shutter lengths until stars remain sharp.
🌍 TOP TEN LOCATIONS TO PHOTOGRAPH THE NORTHERN LIGHTS These locations offer reliable aurora activity, dark skies, and dramatic landscapes.
1. Tromsø, Norway High aurora frequency, accessible city, incredible fjords. 2. Abisko, Sweden Famous “blue hole” microclimate keeps skies clearer than surrounding regions. 3. Fairbanks, Alaska, USA Strong aurora zone, easy access, long season. 4. Yellowknife, Canada Flat horizons create uncluttered sky views—excellent for wide-angle shots. 5. Reykjavik Region & Þingvellir, Iceland Volcanic landscapes and easy access to dark skies. 6. Finnish Lapland (Rovaniemi, Saariselkä) Snow-covered forests make perfect foregrounds. 7. Svalbard, Norway Auroras even in daylight during polar night. 8. Kangerlussuaq, Greenland Minimal light pollution and frequent clear skies. 9. Murmansk & Kola Peninsula, Russia High latitude with unique Arctic landscapes. 10. Scottish Highlands & Isle of Skye, UK Best low-latitude aurora spot in Europe during strong solar storms.
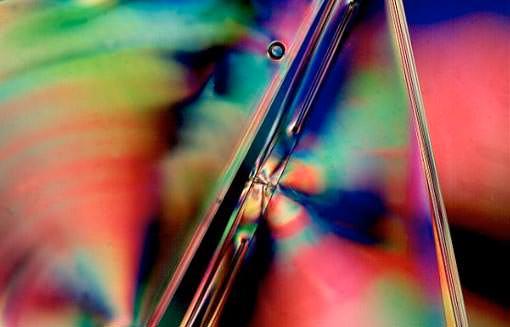
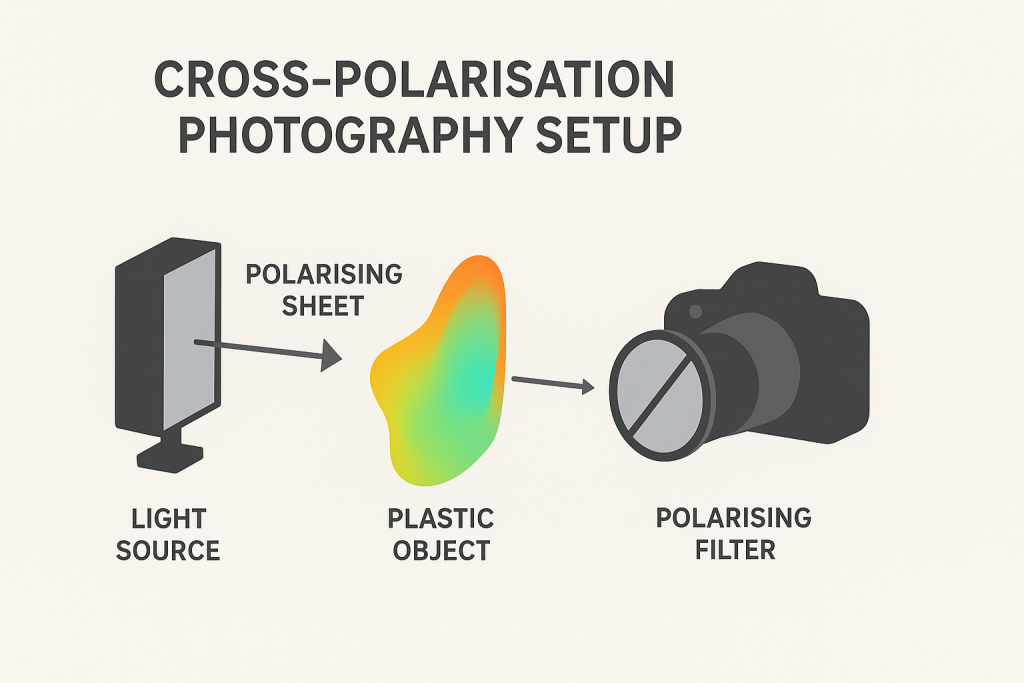
Cross-polarisation (or “cross-pol”) is a photographic technique where two polarising filters – one on the light source and one on the camera – are set at 90° to each other. When aligned correctly, the filters eliminate specular reflections and can reveal birefringence patterns in certain materials.
This guide walks you through exactly how to do it, using both studio and DIY setups.
1. Understanding the Core Concept
Light waves vibrate in all directions. A polarising filter only lets waves through that vibrate in one direction.
Polariser A (on the light): Makes the light “uniform,” allowing only one vibration direction.
Polariser B (on the lens): Blocks that direction and only passes waves vibrating 90° to it.
When the two filters are crossed, reflections vanish—but internal stress patterns inside transparent plastics glow with vivid colours.
Think of it as cancelling the surface glare so you can see the hidden interior world.
2. What You Need
You don’t need a fancy studio. Here are options for every budget:
Essential Equipment
A camera (phone, mirrorless, or DSLR)
A polarising filter for the lens
Circular polariser (CPL) for most photography
A polarising sheet for your light source
Linear polarising film is inexpensive and sold in A4 sheets
Optional but helpful
Two or more small LED panels (or even tablet screens)
Diffuser (white fabric or tracing paper)
Tripod (recommended)
Black background
3. Setting Up the Cross-Pol Lighting
Step A: Polarise your light
Place the polarising sheet in front of your light source.
If your light produces hotspots, add a diffuser behind the polarising film.
Make sure the polarising film covers the light completely – any uncovered portion will leak unfiltered light into your shot.
DIY tip:
A tablet or phone screen already emits polarised light – great for photographing small plastics like cutlery or toys.
4. Prepare Your Camera
Attach the CPL to your camera or phone adapter.
Point the camera at the polarised light.
Rotate the CPL slowly.
You’ll notice the light visibly darkening when the two polarisers reach a 90° relationship.
This is your cross-polarisation achieved.
5. Shooting Techniques
A. For Stress-Pattern Photography
Used with clear or translucent plastics.
Place the plastic object between the light and the camera.
Cross the polarisers (maximum black).
Increase exposure slightly to compensate for light loss.
Fine-tune the angle of the object – some stress patterns appear only at certain orientations.
Use a black or very dark background to intensify colours.
Common objects that reveal stunning patterns:
Sunglasses
Water bottles
Tape dispensers
Plastic spoons
Acrylic sheets
B. For Reflection-Elimination Photography
Used for glossy surfaces, jewellery, metal, and liquids.
Position your subject so the polarised light hits it at ~45°.
Rotate the CPL until reflections disappear.
Adjust your lighting angle if you see “patches” of unpolarised reflections.
This is extremely useful for product photography.
6. Exposure and Camera Settings
Cross-pol setups reduce the amount of light reaching the sensor. To compensate:
Increase ISO moderately (200–800)
Use longer shutter speeds (especially with tripod)
Open your aperture (f/2.8–f/5.6 works well)
Avoid raising ISO too high, as cross-pol images often contain smooth gradients where noise becomes visible.
7. Compositional Tips
Use backlighting for the strongest birefringence effects.
Rotate the subject slowly – stress colours shift dramatically.
Try using two polarised lights for symmetrical objects.
For artistic images, place multiple plastic objects overlapping to create abstract colour fields.
8. Troubleshooting
Problem: Colours look flat or dull
The polarisers may not be perfectly crossed – rotate the CPL again.
Your light source might not be fully covered by polarising film.
Problem: Still seeing reflections
Some reflections can bounce off walls and bypass the film – darken your shooting environment.
Check if any secondary light source is unpolarised.
Problem: Image too dark
Add more light intensity.
Widen your aperture.
Use longer exposure.
Problem: Colour bands too chaotic
Stress in objects varies naturally; try a different piece of plastic or rotate the one you’re using.
9. Creative Experiments
Try these once you’ve mastered the basics:
Cross-Polarised Portraits
This requires larger sheets of polarising film but removes skin shine and gives a matte, painterly look.
Cross-Pol Liquid Photography
Put clear liquids in glass containers – some oils and gels show subtle interference colours.
Scientific Documentation
This technique is used in archaeology and materials analysis to detect manufacturing stress patterns.
10. Final Tips for Better Results
Keep the scene as simple as possible – controlled light is everything.
Always clean your polarisers; smudges will show.
Work slowly: tiny adjustments create dramatic changes.
Embrace the unpredictability – cross-pol is part science, part magic.
You can buy your polarising filter from Photography Attic here: Polarising filters
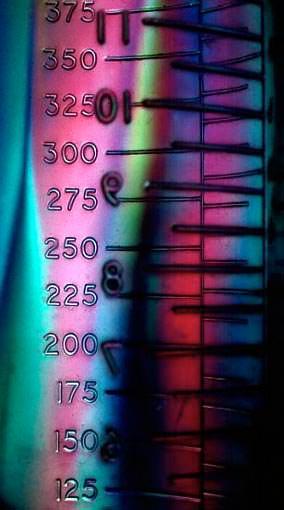
The cross polarising techniques is a simple one to create. Just place a polarising filter in front of the lens and photograph a stiff plastic object in front of an LCD computer screen. To illustrate the tip I attached a Hoyarex Linear Polarising filter* to the front of a digital camera.
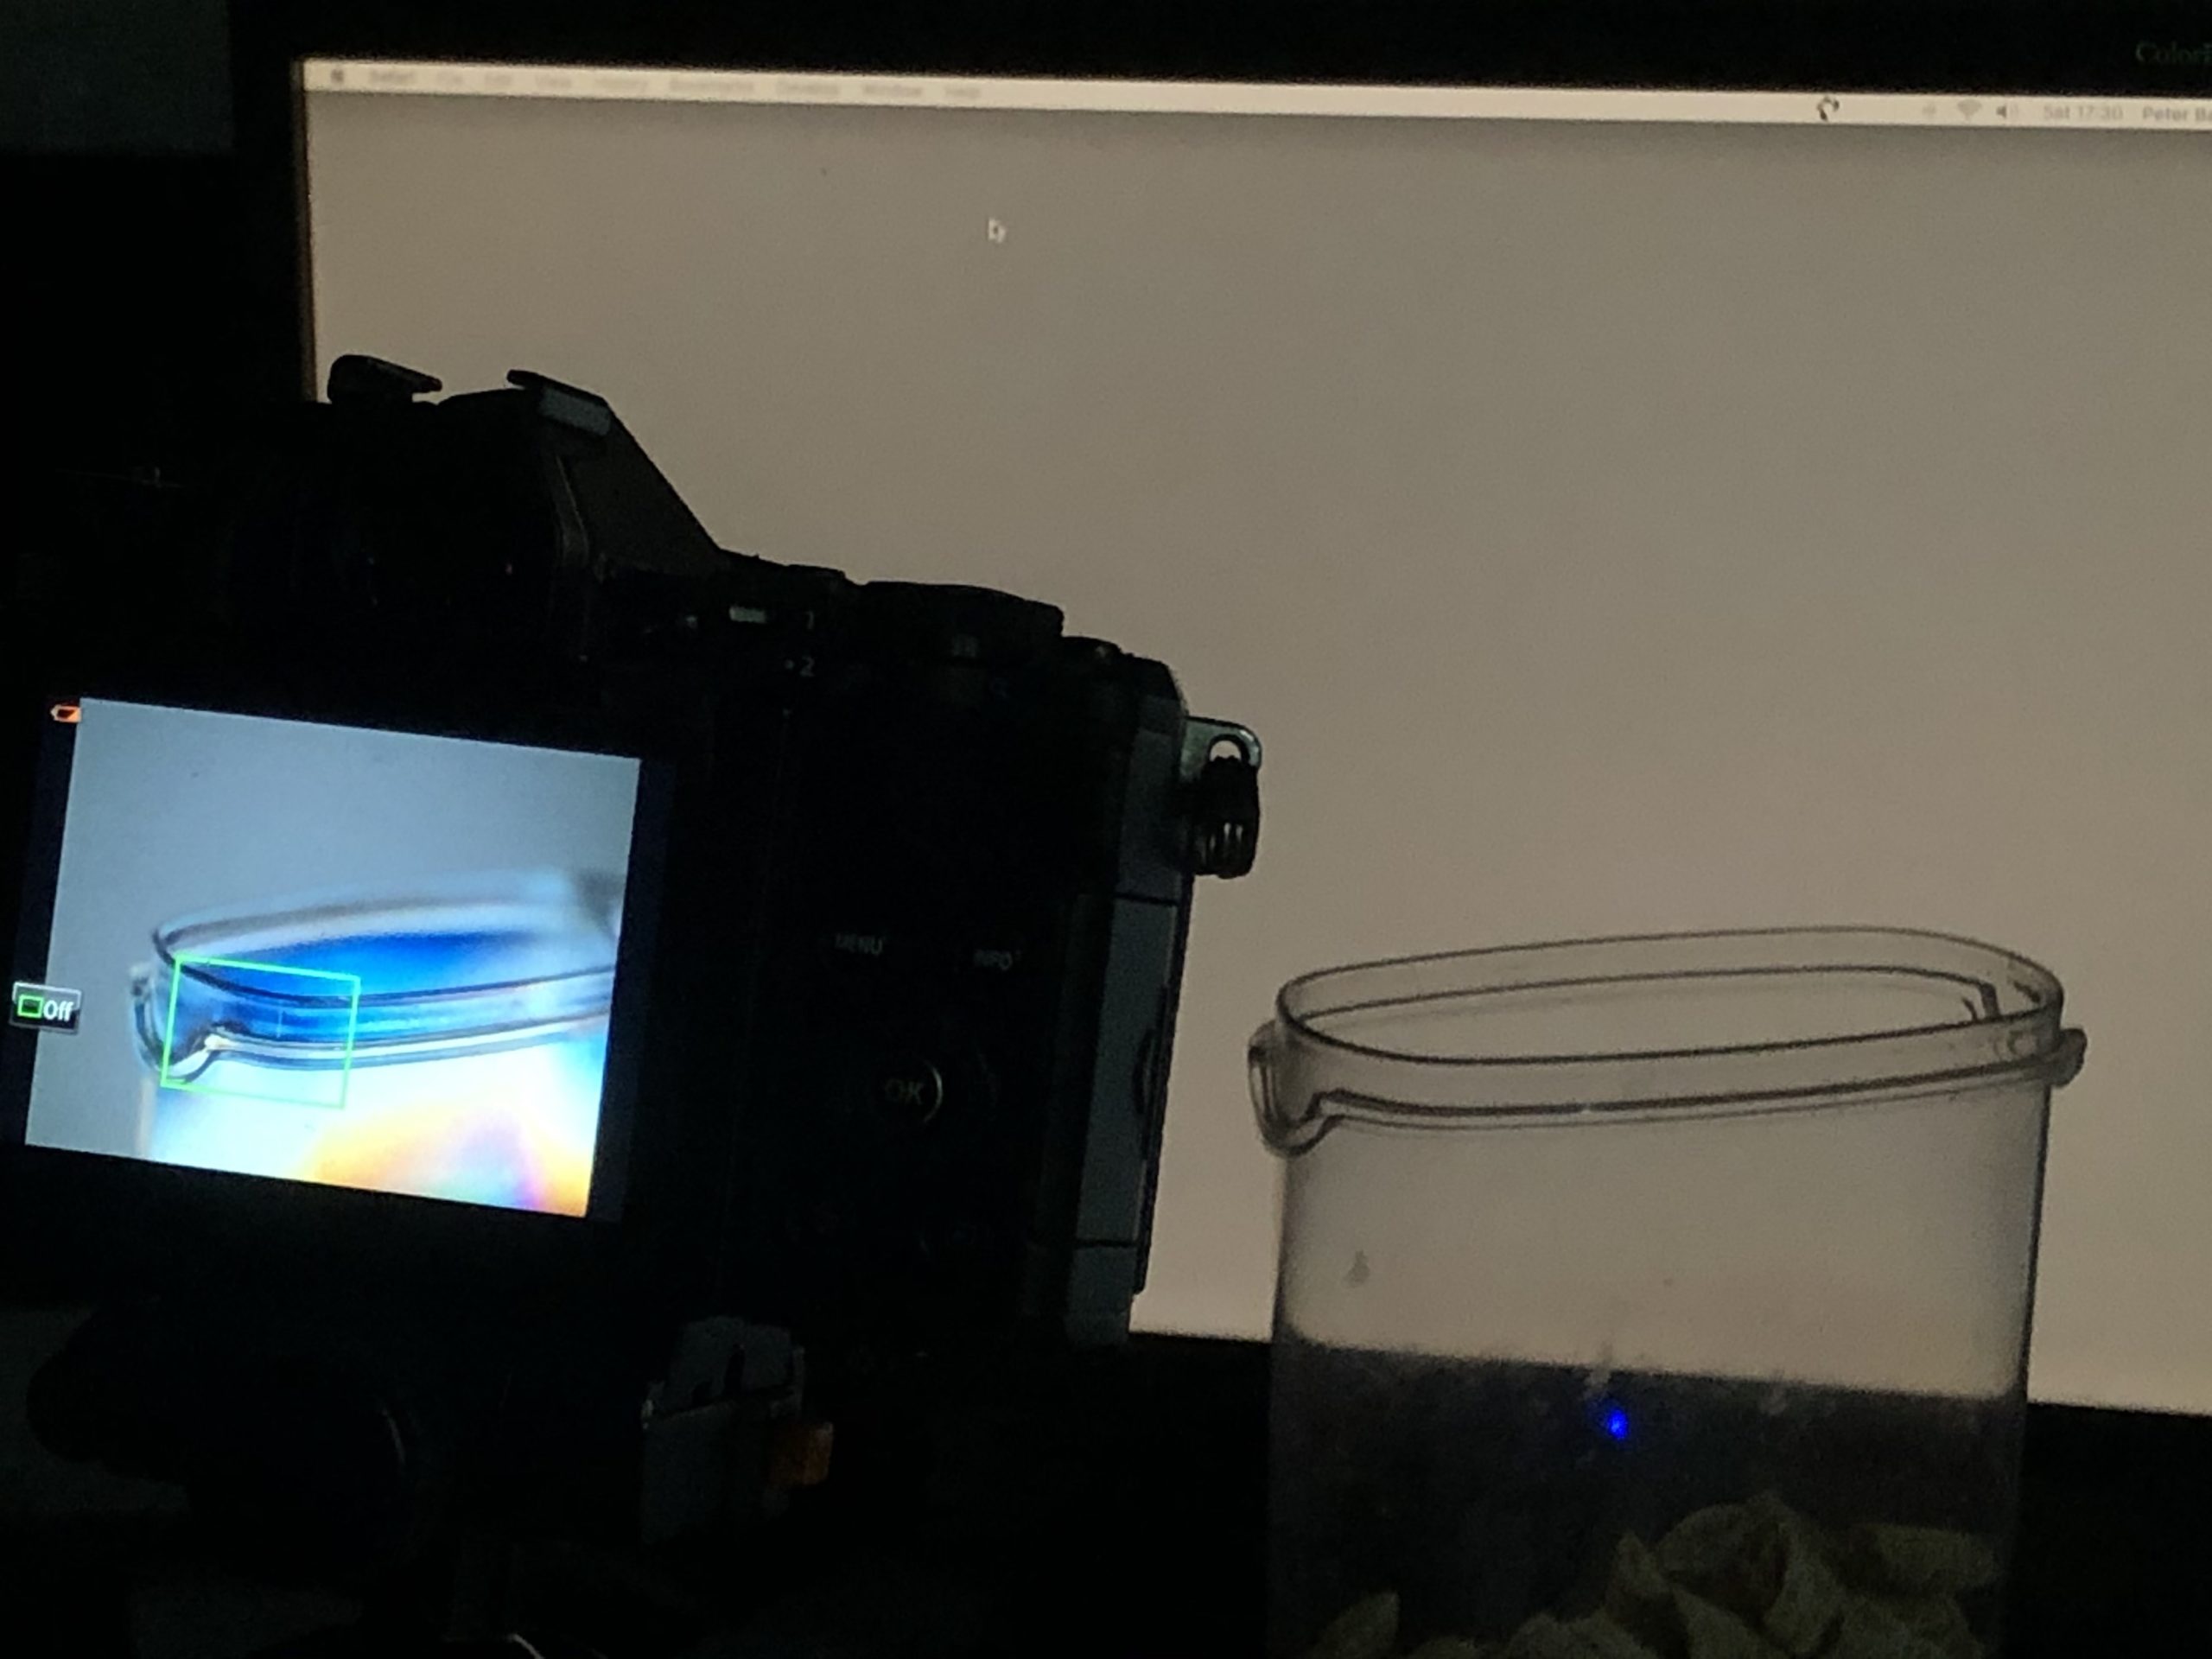
I then positioned a plastic cereal container in front of my computer monitor (make sure the background is neutral grey and not a screen saver ) and mounted the camera on a tripod. You can hand hold if there’s enough light to get a camera shake free photo.
When you rotate the polariser you will see a rainbow of colour with the background colour of the monitor.
As you rotate the colours will become stronger and the background will go black.
I repeated the technique using a plastic wine glass
* Any polarising filter can be used – linear or circular . We have a selection for sale here in both screw in and system filters. Polarising filters for sale. The system filters are more practical as you can use one filter with a variety of lenses with different filter threads. Just get the filter, a holder, and a range of adaptor rings for the holder to attach to different lenses.
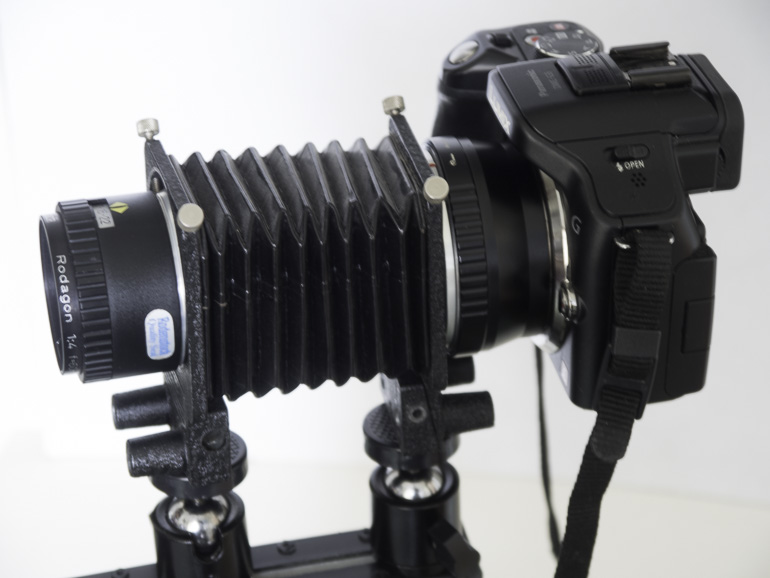
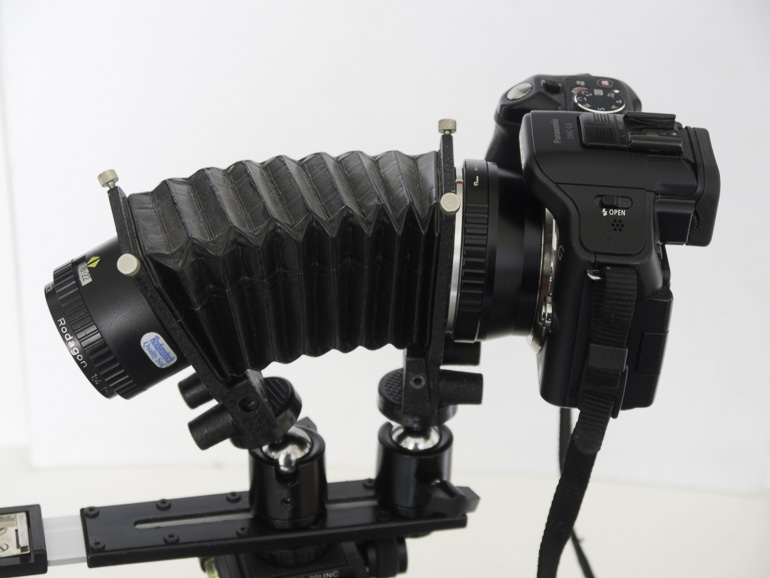
Large format photographers using cameras with bellows have always had the luxury of being able to adjust the lens and/or sensor plane so they are not parallel. This technique is performed to alter the plane of focus. While a conventionally parallel set-up provides front to back sharpness from a focus point parallel to the sensor, the adjusted lens, swung or tilted, places the focus plane at a different angle. This is a very useful technique for landscape photography, allowing sharp focus from close range to infinity, even at wide open apertures. But it’s also incredibly useful for macro photography. With this in mind Photography Attic has taken a set of BPM camera bellows and modified them to create a versatile set of custom bellows with tilt, swing and also shift options.
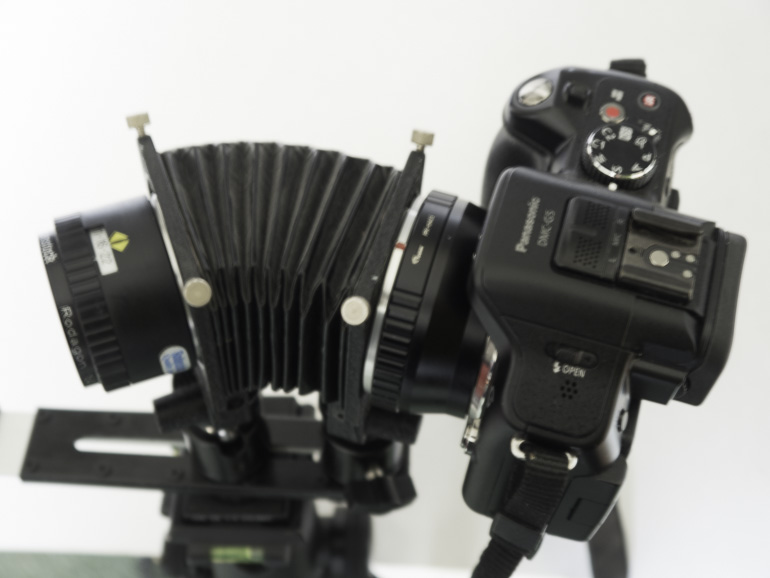
The bellows lens and camera platforms are individually mounted on a pair of small ball & socket heads which can be attached to a straight bracket like the one you would use with a flash gun. You can then slide the ball and socket along the flash bracket to extend the bellows increase magnification. And then tilt the front or rear panel to create the new plane of focus.
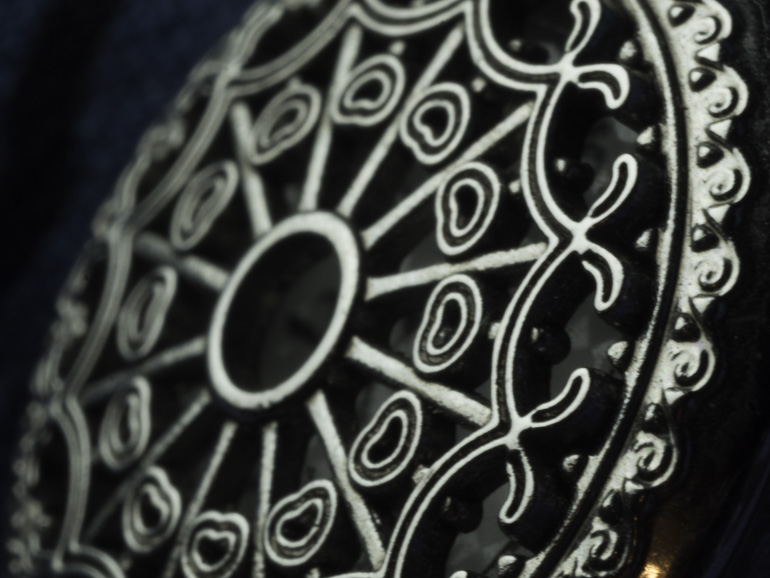
Here’s an example of the tilted bellows in action. A small 25mm pocket watch has been photographed at an angle. Rather than head on and parallel to the camera lens. The lens was then tilted on the camera bellows set up and as a result the widest aperture of f/2.8 can be used with full front to back sharpness. As a comparison a second shot was taken with the lens set conventionally parallel to the film plane. Notice how the sharpness falls off to the rear.
Another option is to use the swing feature. Here the lens is angled in a clockwise or anti clockwise direction to provide sharer front to back focus on an upright subject.
You can also adjust to provide a combination of both tilt and swing when the subject is not horizontal or vertical.
This process is technically known as the Scheimpflug Principle. If you would like to lean more check out the wikipedia page here: Scheimpflug Principle
You can buy a set of modified bellows with tilt shift here:Custom Tilt Shift Bellows You will also need to buy a bracket to mount them on.
An amazing selection of snowflake macro photos and a article showing how to photograph snowflakes can be found on Alexey Kljatov’s ChaoticMind blog
If you have an SLR you can reverse your lens on the body using a reverse adaptor, or reverse a lens on a lens using a coupling ring (which has filter threads on both sides), or use extension tubes, close up lenses, macro lens or bellows. We have all these available on PhotographyAttic. If you cant find what you want contact us with specific requests
There’s an interesting series of videos appeared that were produced by Lee Filters with conversation between the revered landscape photographers, Joe Cornish and David Noton. Epsiode 2 sees them discussing the changes digital photography has made in capturing the moment, and why they still use graduated filters. It’s not like the usual manufacturer produced media as there’s no mention of Lee filters, and well worth a view.
Here’s a list of current used graduated filters for sale on PhotographyAttic:
In the last article we showed you how to make a custom slide duplicator for 35mm negatives and transparencies. And the first problem you will encounter when you start scanning your colour negatives is how to convert the result to a positive digital file.
When you use a proper film scanner it has built in settings that convert the negative to positive automatically, but the digital files from a slide duplicator look just like the original – negative image with an orange colour.
You may think it’s simply a case of pressing the invert button in your image editing software. That does make the photo look positive, but the orange inverts to a blue colour and that needs fixing.
Here’s how I process photos in Lightroom. You can do similar with most image editing programs.
Below is the imported negative in Lightroom. Scroll down to the tone curve. Notice the line in the graph goes from bottom left to top right.
Click on the bottom left corner and drag to top left, then click top right and drag to bottom right. This inverts the image – notice the blue cast.
Using the WB dropper click on a neutral part of the image to adjust the white balance. I chose the black hair of the boy facing us. This makes the colours more natural. Now adjust the tone sliders to beef up contrast darken shadows and brighten highlights.
The result is a fairly good conversion of your digital negative
If you’ve moved over to digital from film, chances are you will have a collection of film based photographs – either negatives or transparencies. If you don’t have a film scanner you can use your digital camera to digitise these old films.
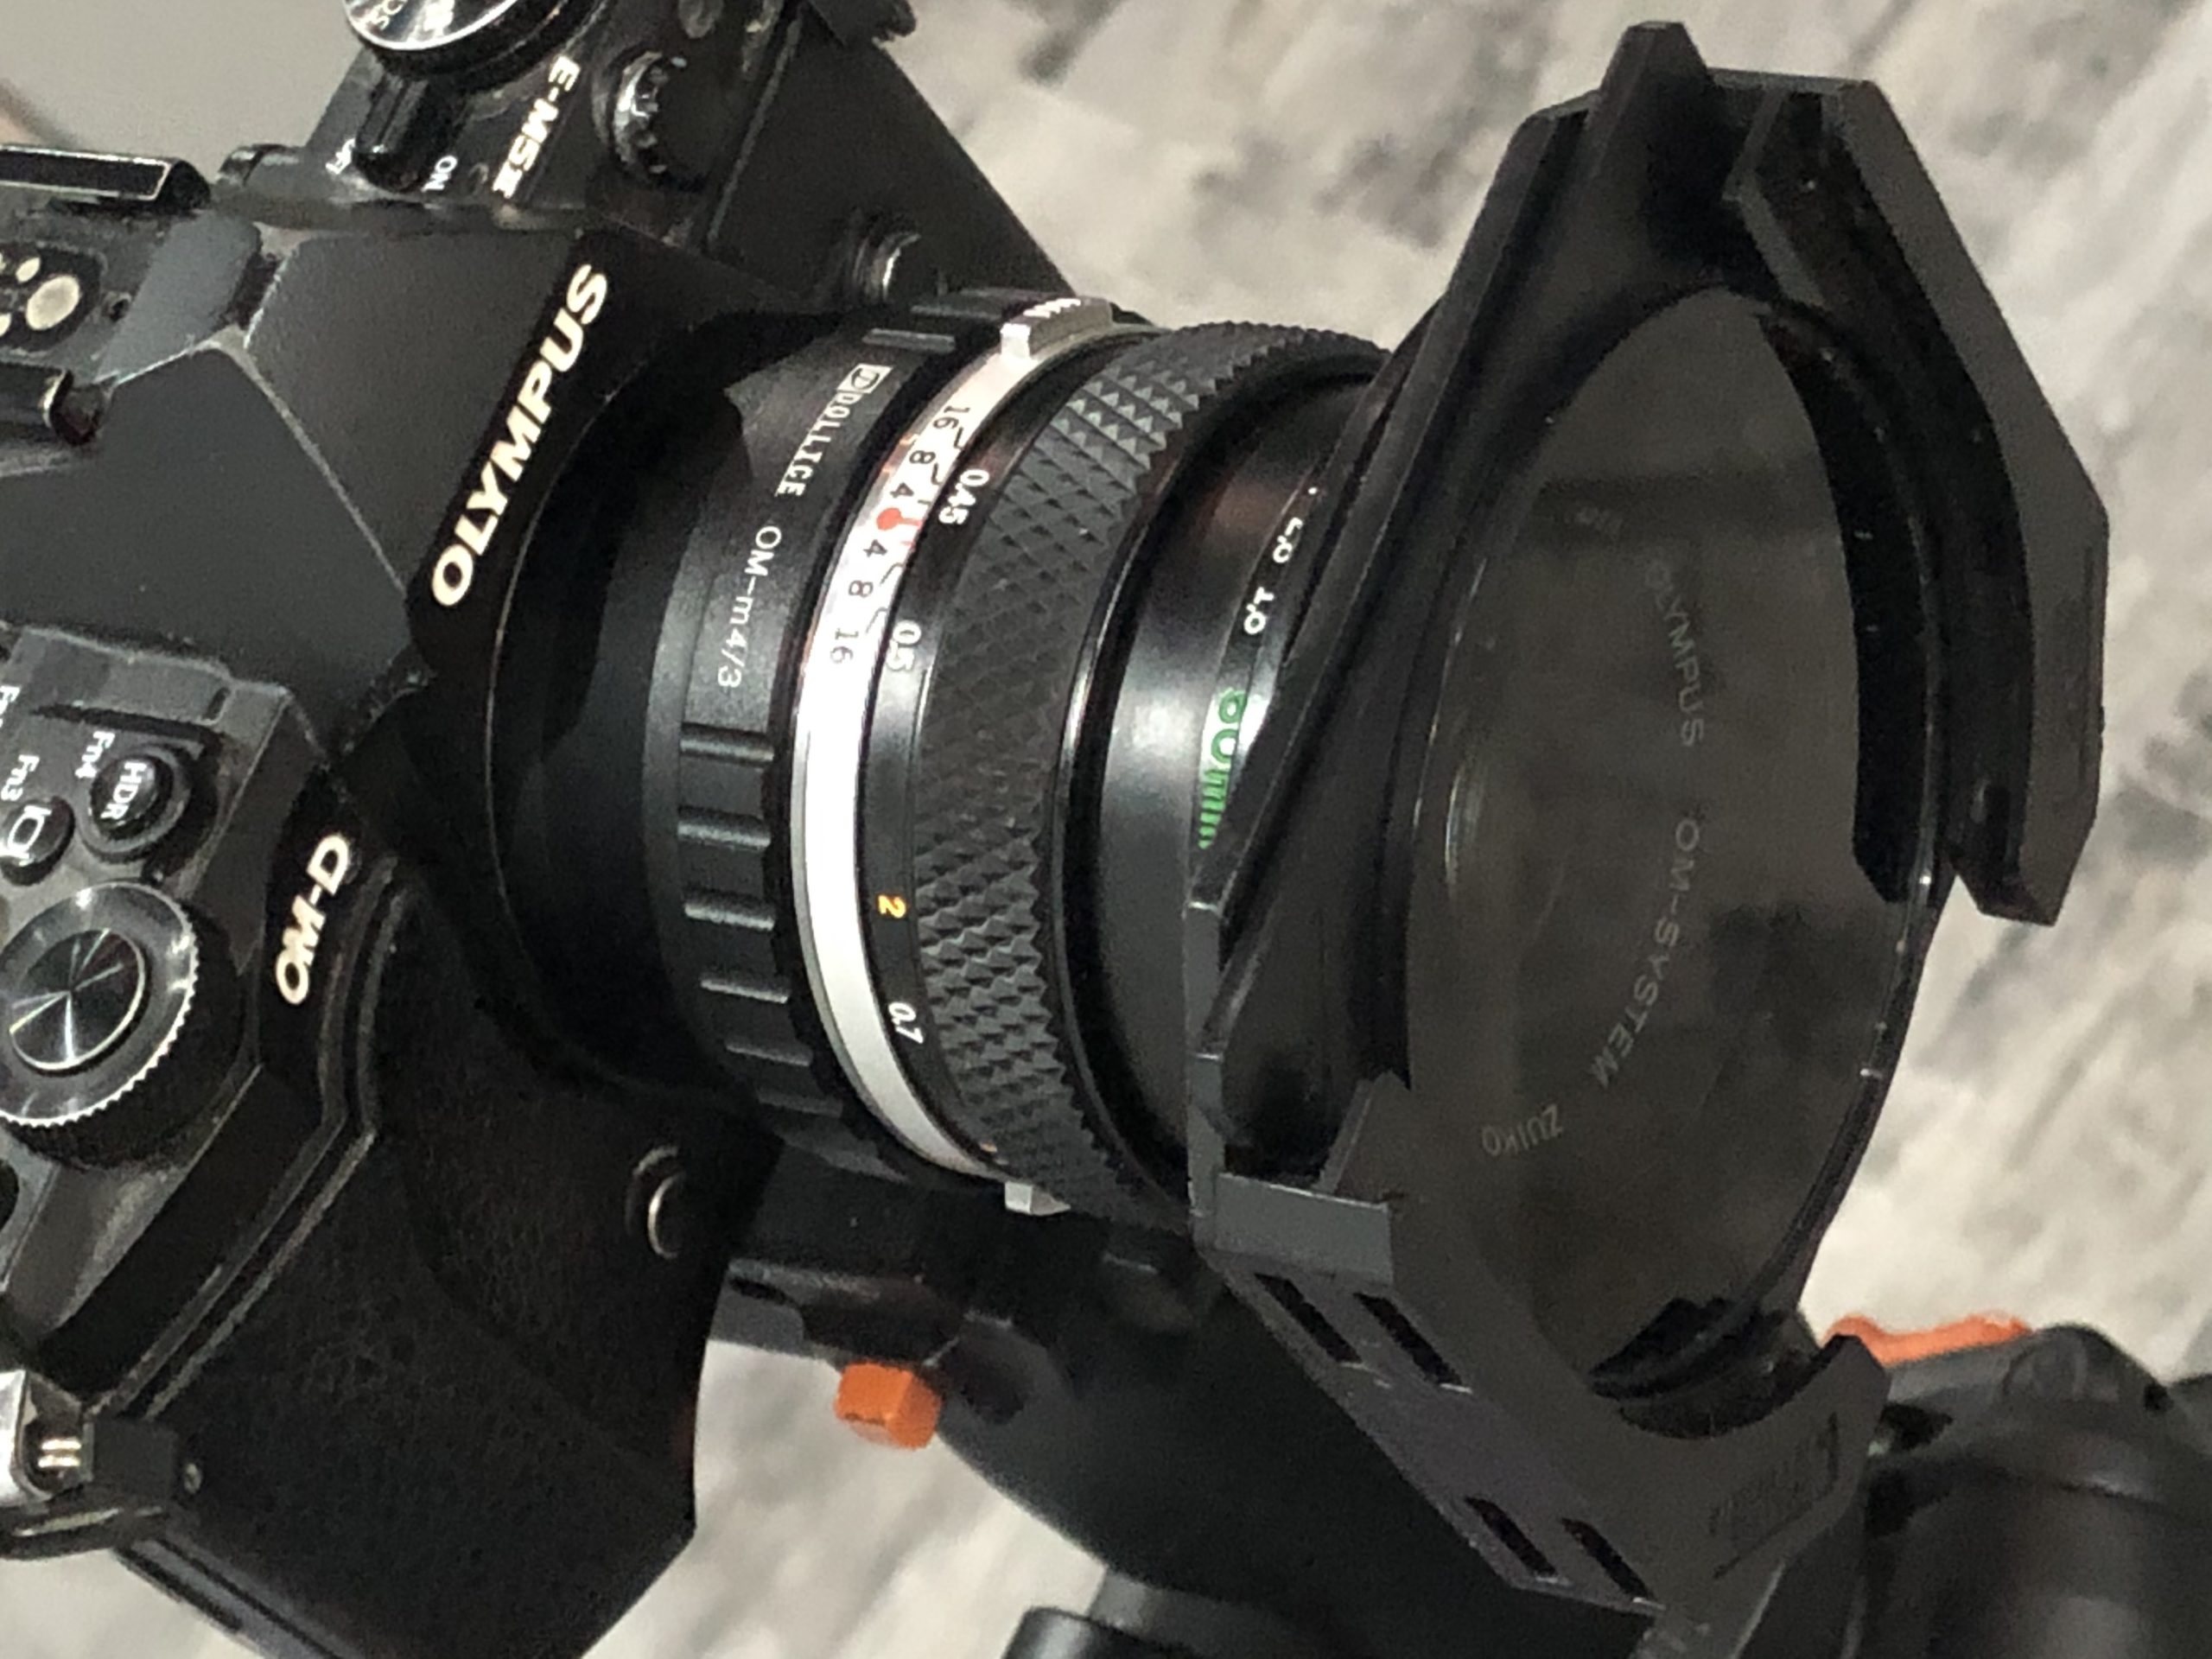
I decided to do that using my Olympus OM-D. The problem I had was that the usual slide copier, such as the Aico Zoom Slide Duplicator or similar products from the likes of Jessop, Ohnar and Kenlock, is that they were designed for full frame cameras. So when the copier is mounted onto an OM-D (using a T2 mount and Adaptor from Micro 4/3 to T2 camera fitting) the image is cropped and you can only copy the centre (or edge if you adjust the frame position). You cannot copy the full frame.
An alternative is to make your own copier. I dug out the Tamron 90mm f/2.5 macro with Pentax K Adaptall 2 attached, and mounted it on the Olympus body using a micro 4/3 to Pentax Adaptor.
Any macro lens with 1:1 capability will be suitable. Attach the macro lens, turn the camera on and move the slide away from the lens until it comes into focus on the camera’s LCD. This give you a rough indication of position needed for the slide/negative.
Cut a piece of tubing (postal tubes are perfect) to the necessary length. Now find a way of attaching the tube to the lens. I used a combination of stepping rings from the 55mm of the Tamron lens up to 58mm which was the external size of the tube. The tube squeezed into the inside of the ring and locked in place. If this hadn’t worked I would have super -glued a 55mm Cokin series A adaptor to the end.
You can now position the slide negative at the other end of the tube. A budget option is to use Blu Tack to hold the slide frame on the front. You could mount negatives in a frame too. As I have a lot to copy I decided to take off the carrier part of the Aico Zoom Slide Duplicator and mount that on the front of the tube. This ensured a faster throughput of film.
The carrier has three small screws holding it in place on the duplicator. These can be loosened so the whole front section slips off. Don’t unscrew fully as the screws are tiny and fiddly to get back in.
With the custom duplicator assembled it’s time to get to work copying. You can use a household lamp as backlight illumination, or a flashgun, or sunlight. You need to diffuse the light so it’s even across the film surface. The slide duplicator carrier has a diffusing plate built in. If you’re just mounting the slide on the front of the tube put a sheet of white cloth, or several layers of tracing paper in between the film and light source.
Use the camera’s zoom focus magnifier if it has one to focus accurately, making sure the film is centered in the frame and not cropped at any edge. Adjust exposure using the LCD as a gauge. Do a few test shots to check focus, framing an exposure before rattling through your library.