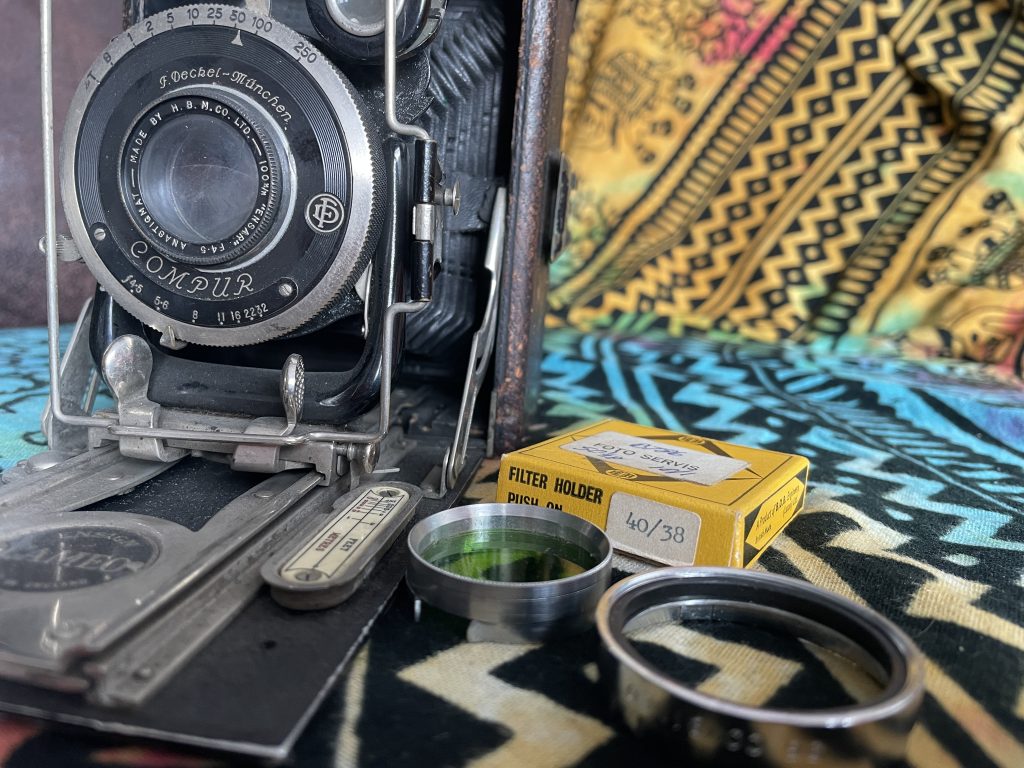
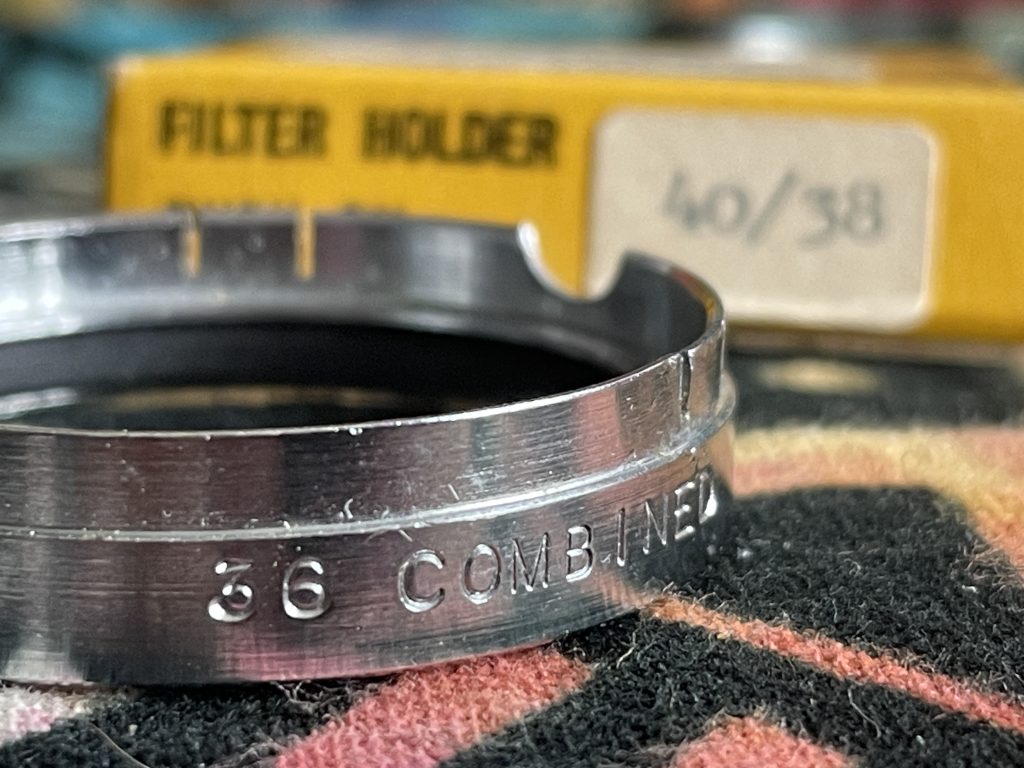
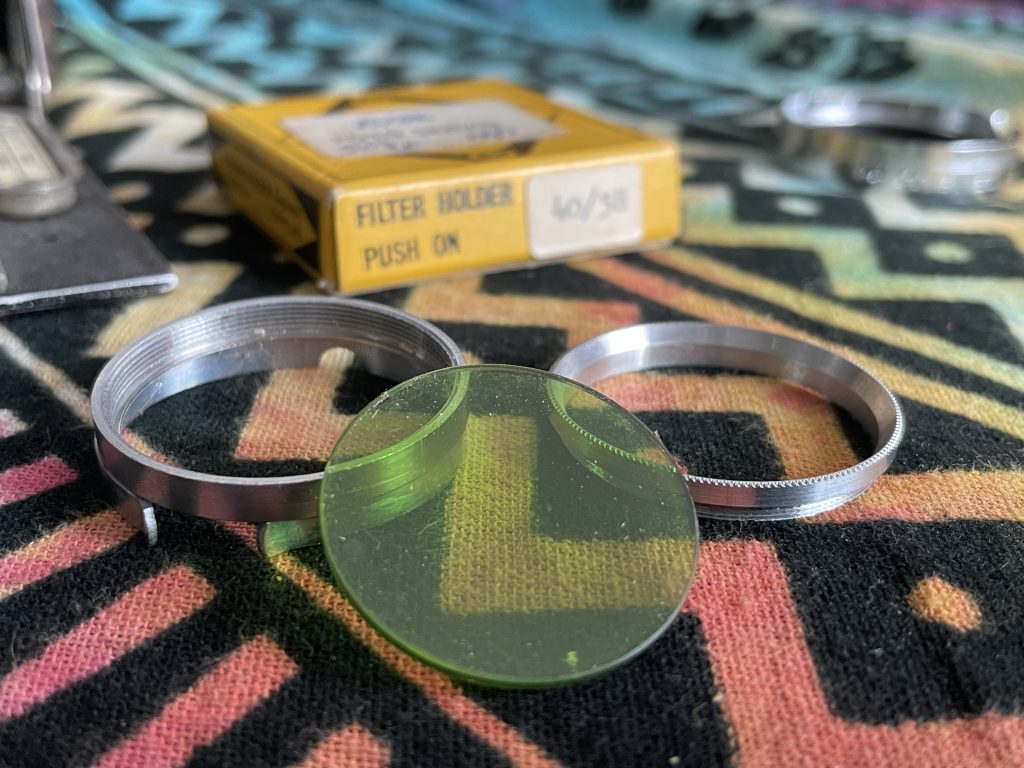
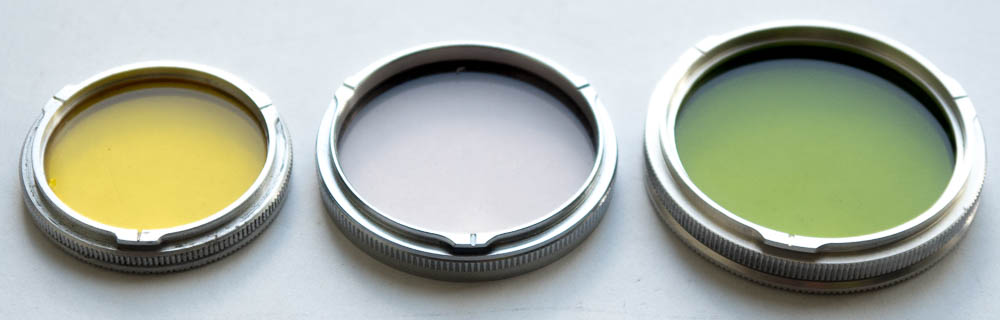
Many vintage cameras had a lens without a filter thread. Manufacturers such as BDB, Leech and Actina created push-on filters for users of that type of camera.
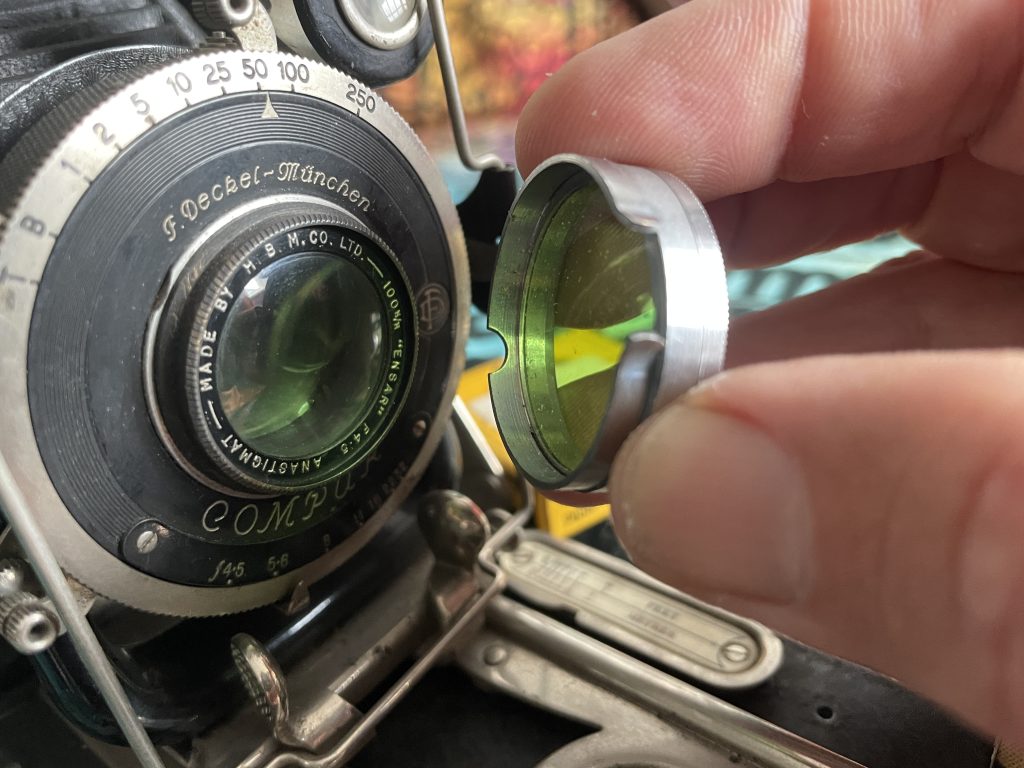
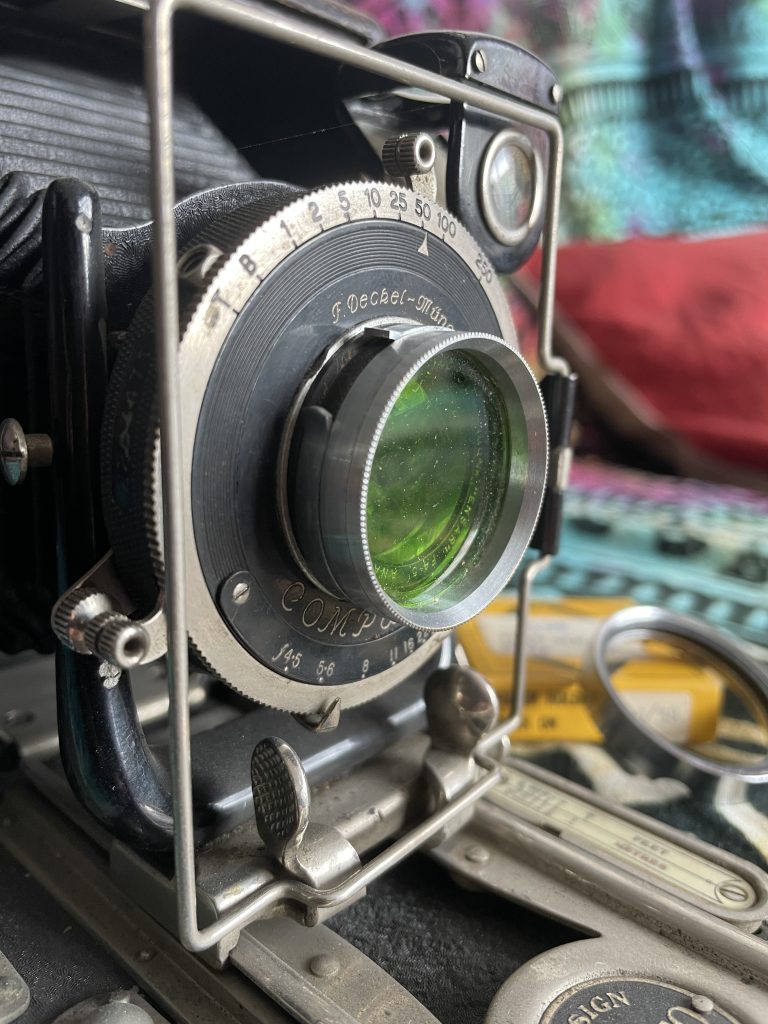
These filters, typical with an aluminium mount, push over the lens and hold in place with a small spring clip.
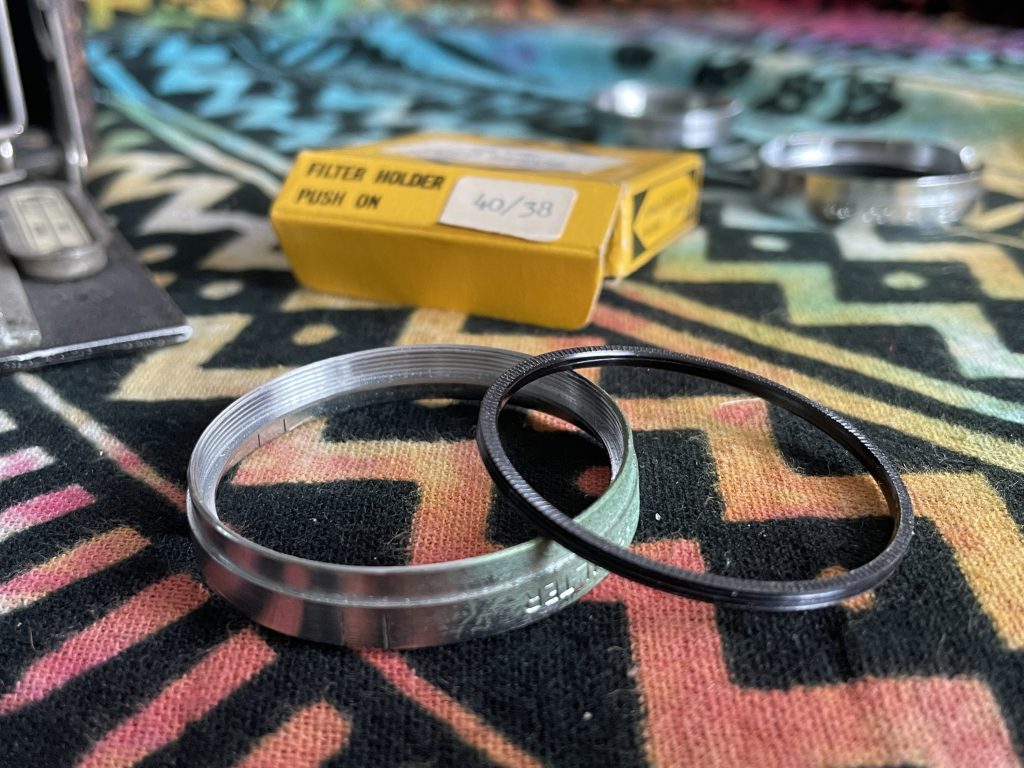
They came without a glass filter and had either a plastic or an aluminium retaining ring to hold the glass or resin circular filter in place.
They’re sold with two measurements in millimetres. The first number is the lens diameter, and the second is the added filter diameter. Usually just the push on size was engraved on the rim of the holder while both numbers appear on the box – eg 40/38.
There used to be a wide variety of glass filters that can still be found in second hand camera shops or auction sites and resin or gel ones can be easily cut to size from cokin or Kodak Wratten style filters so there’s many options to hand.
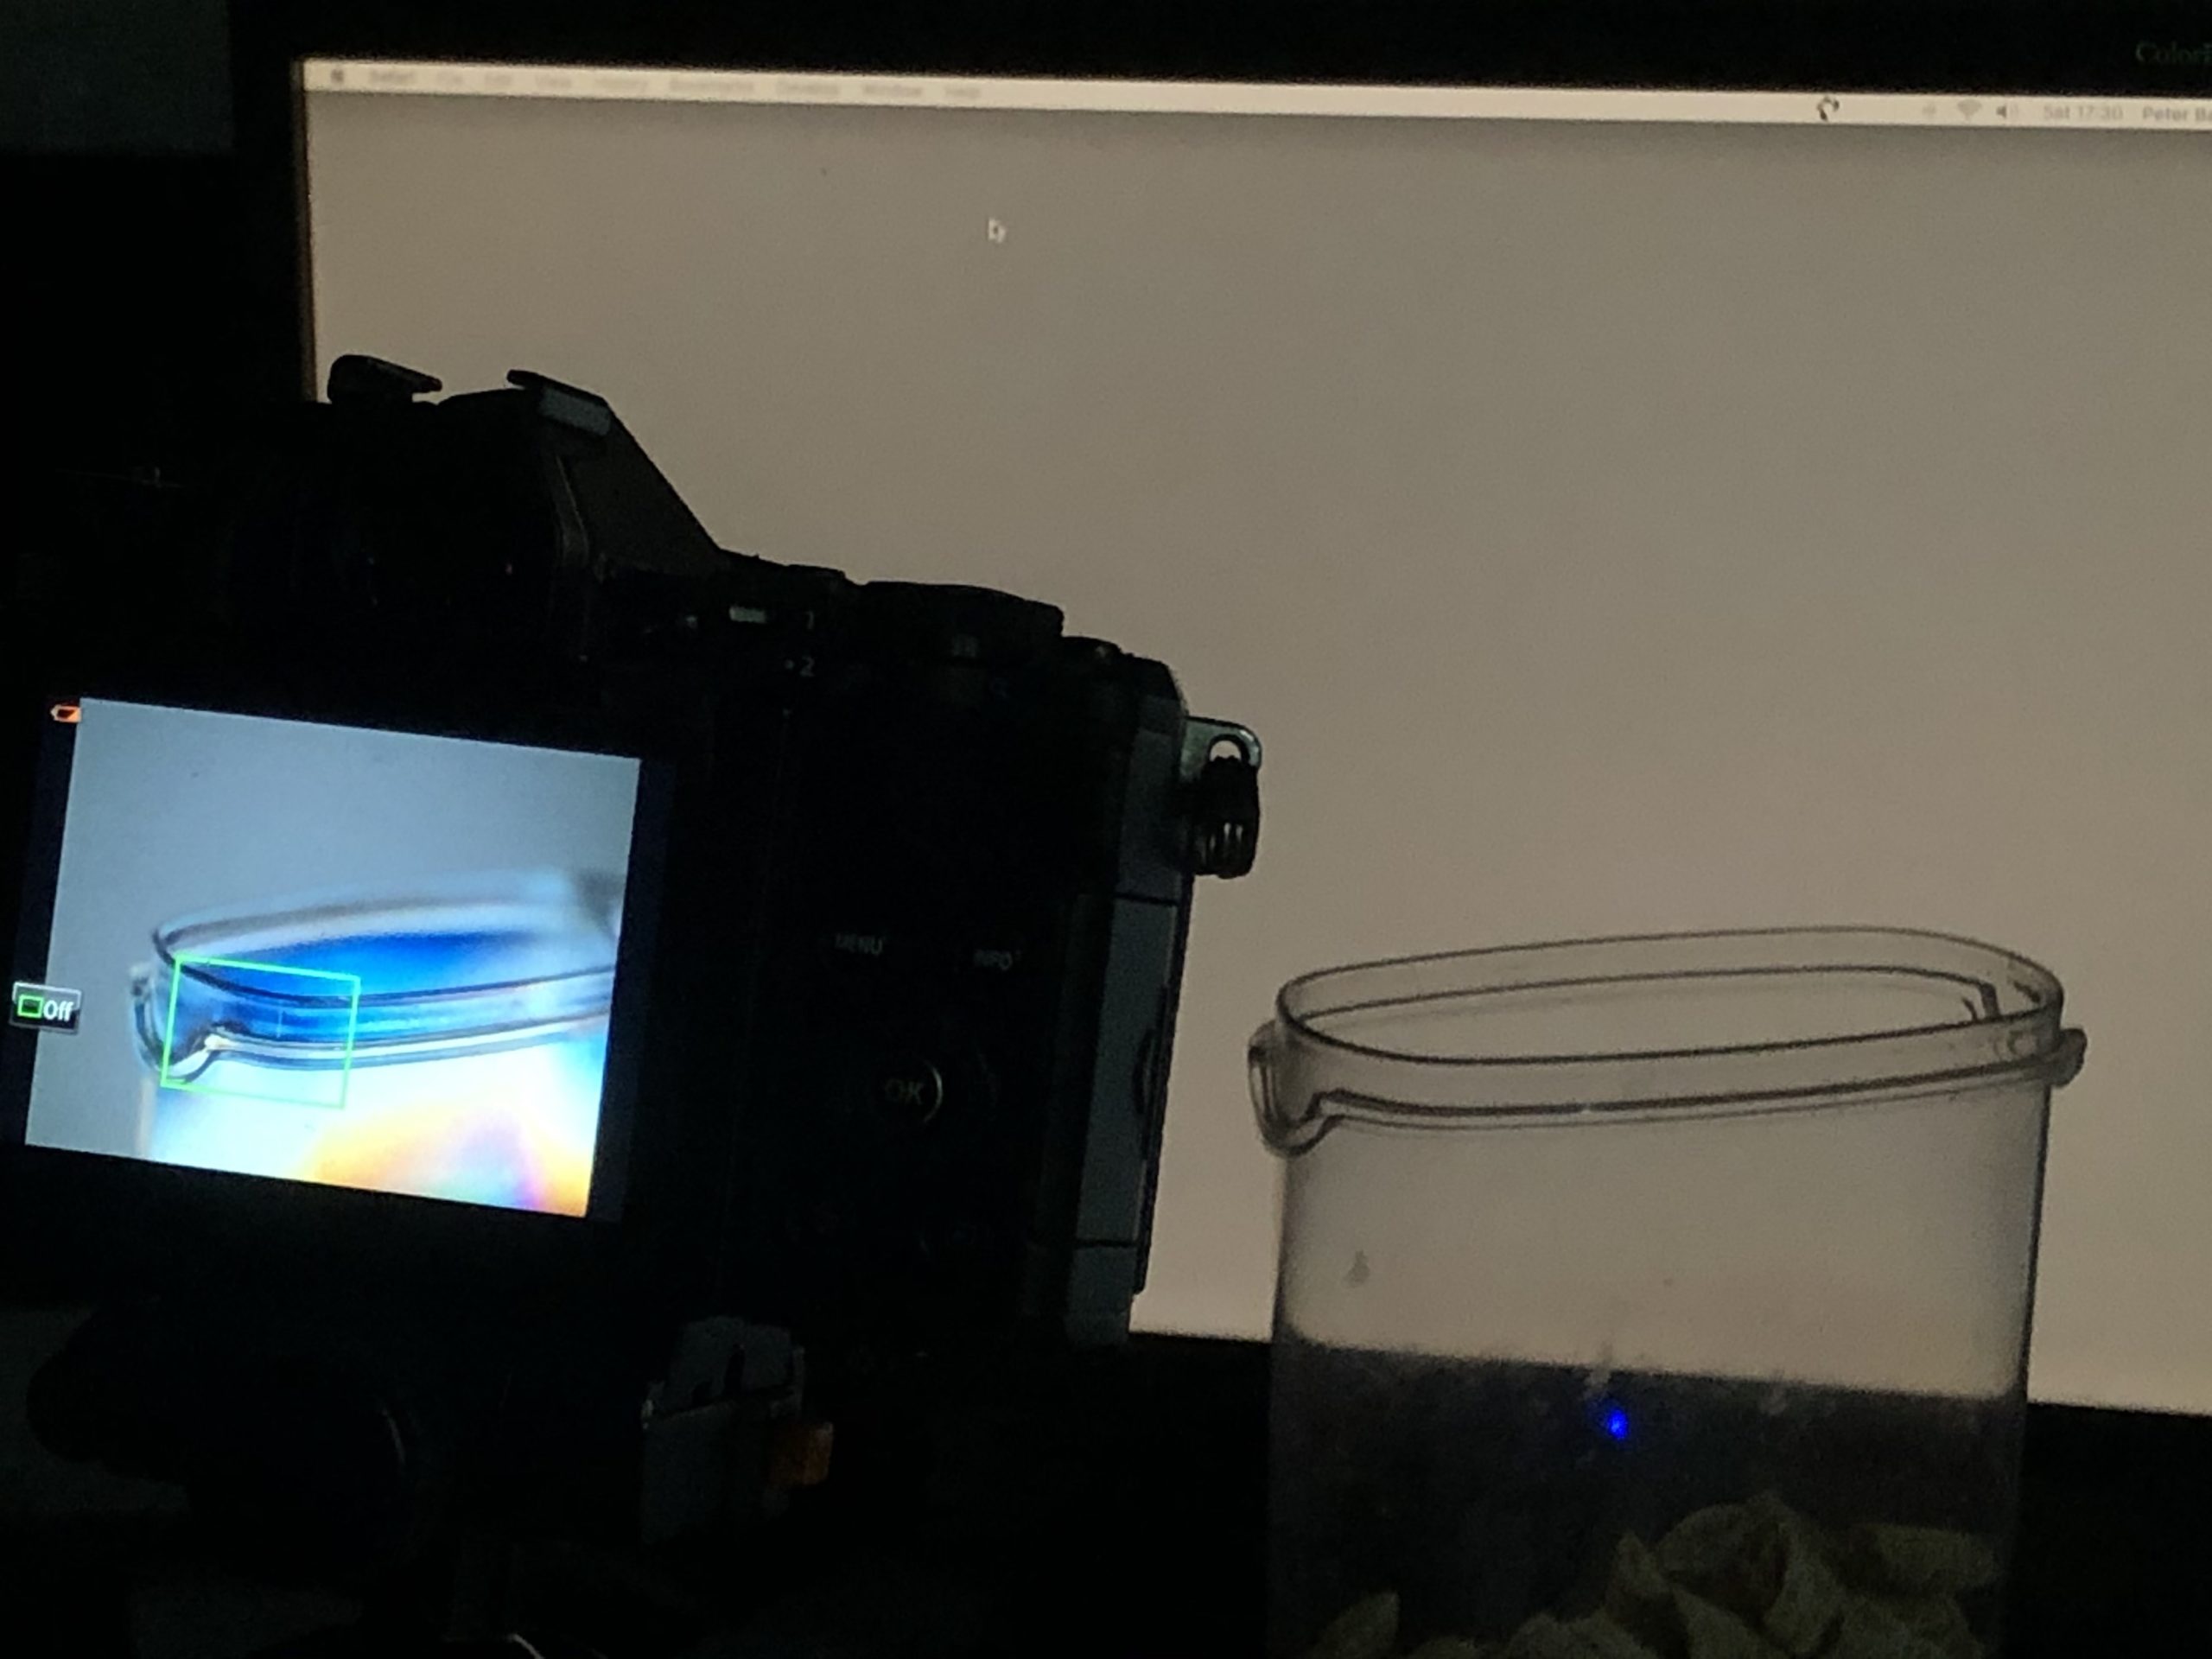
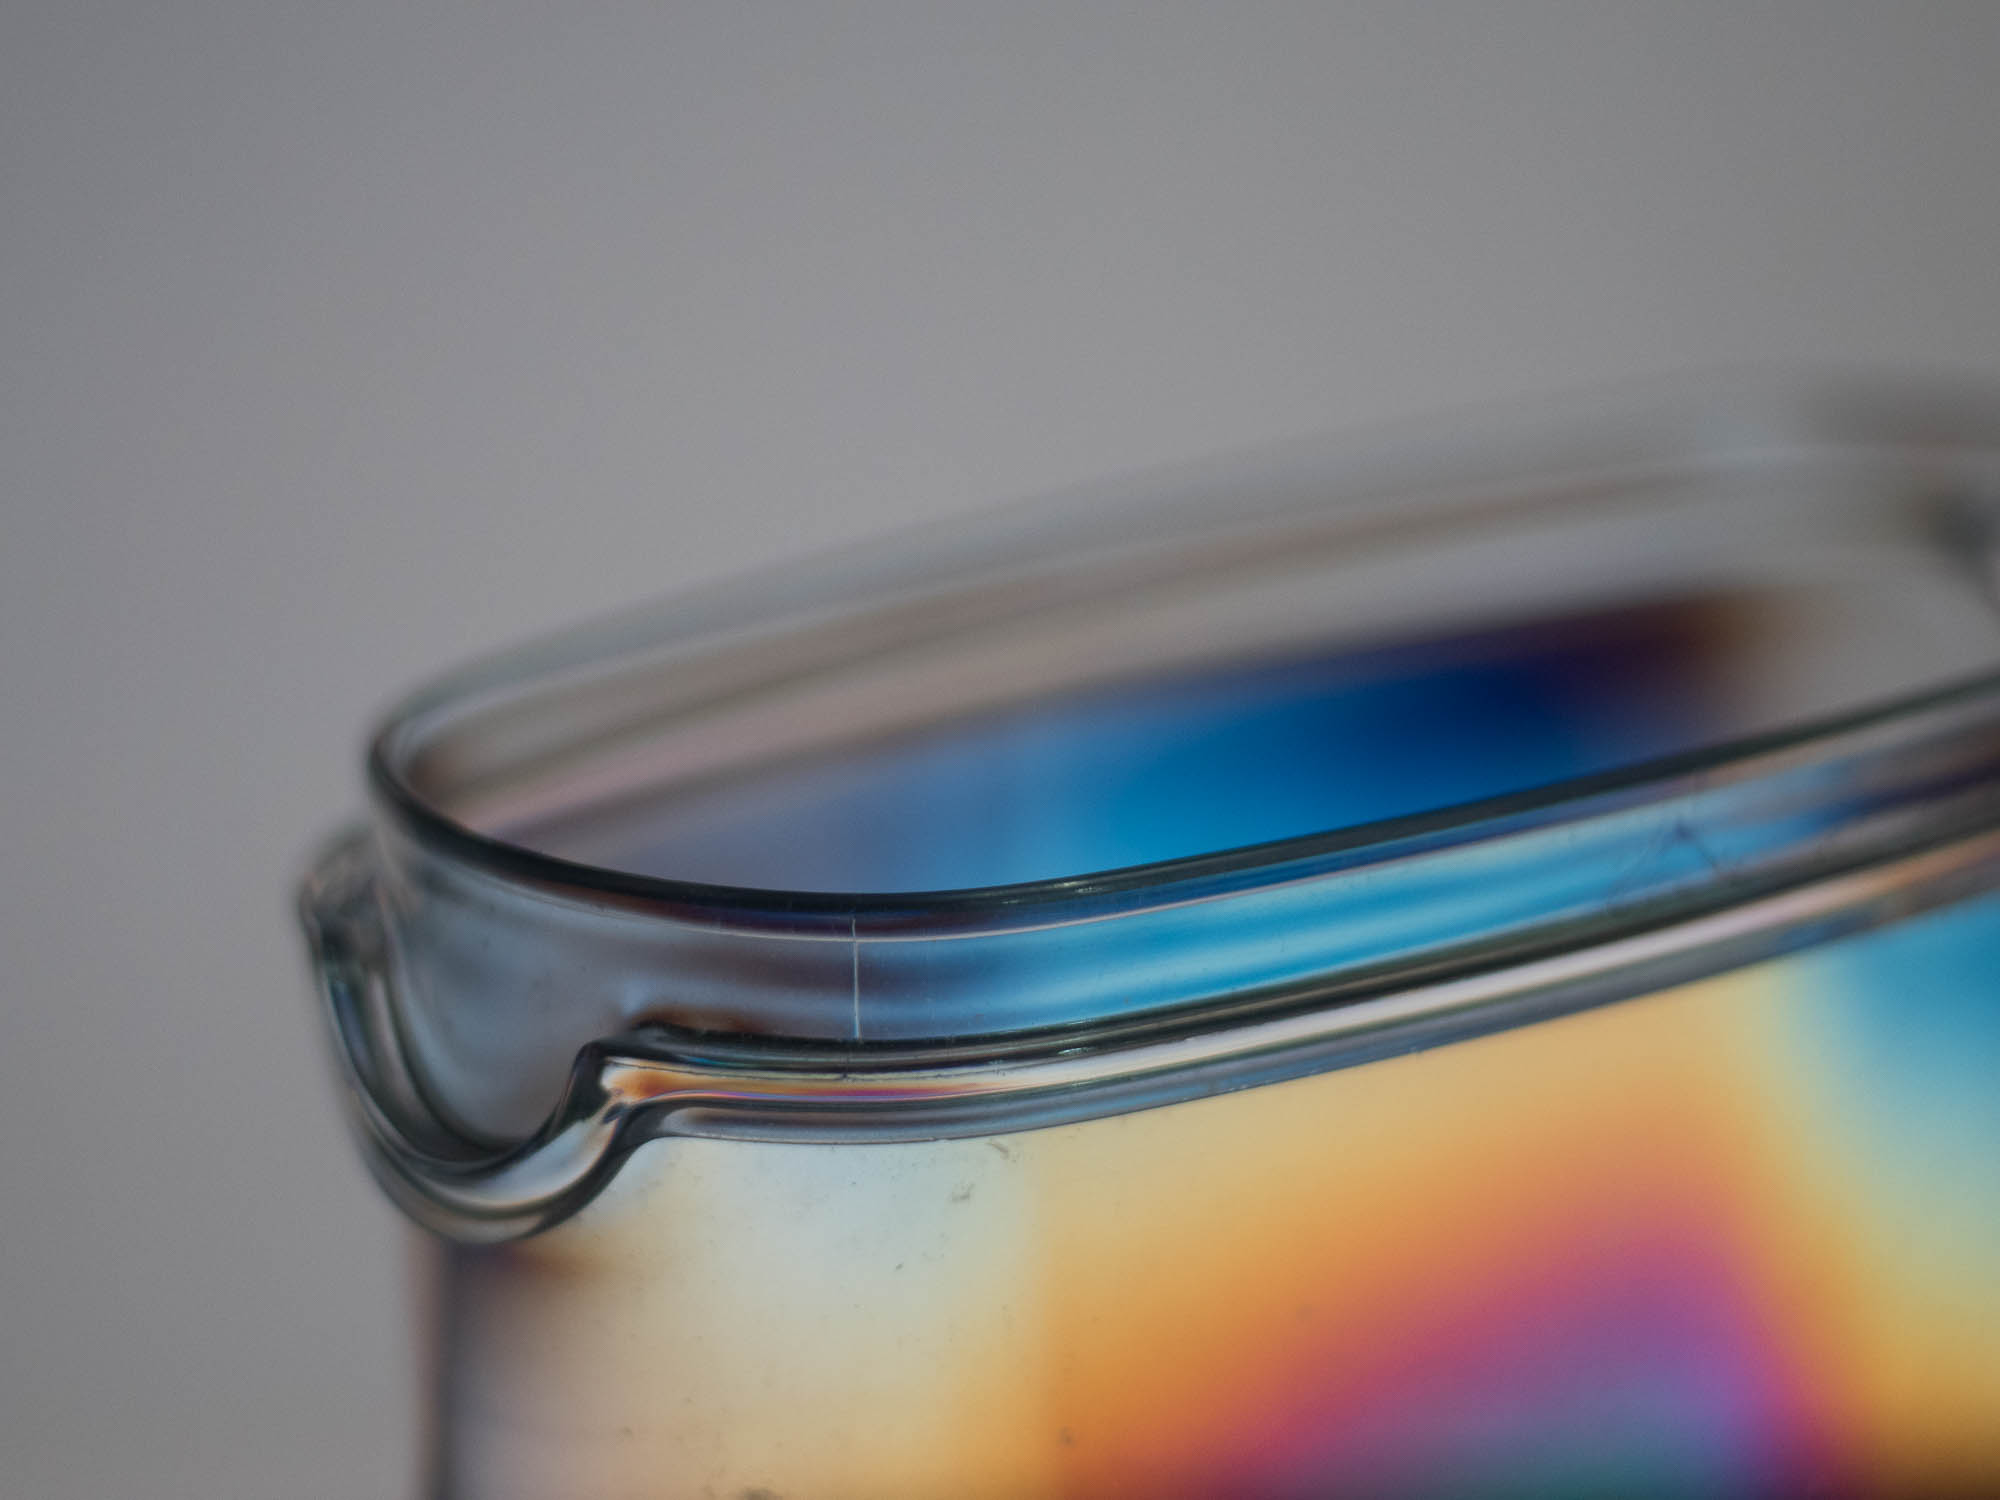
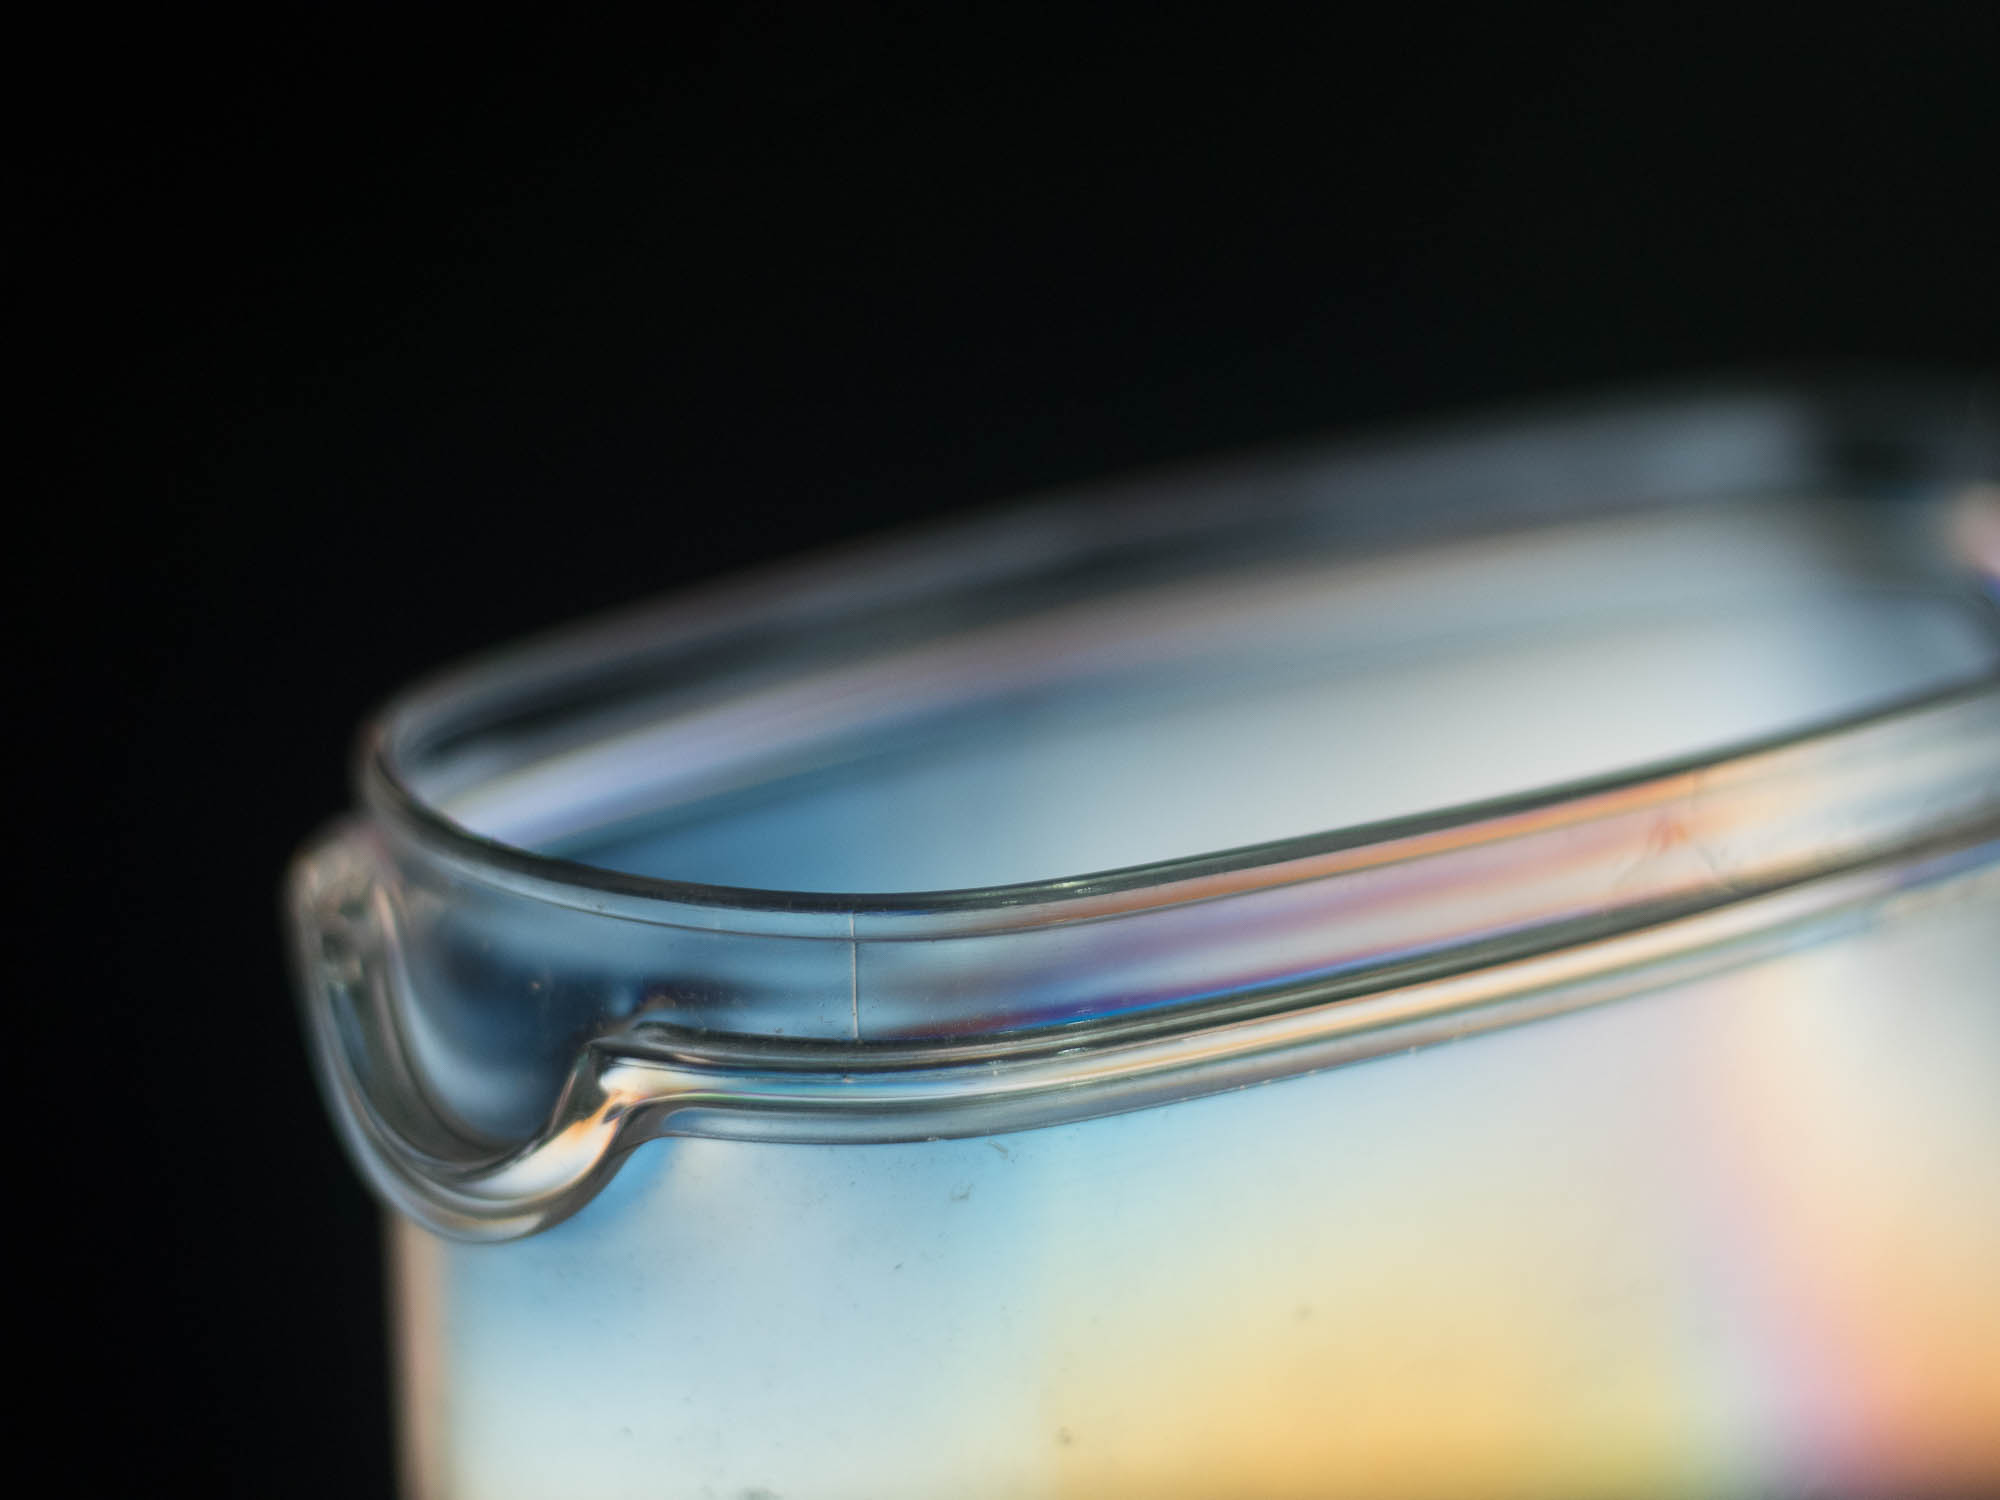
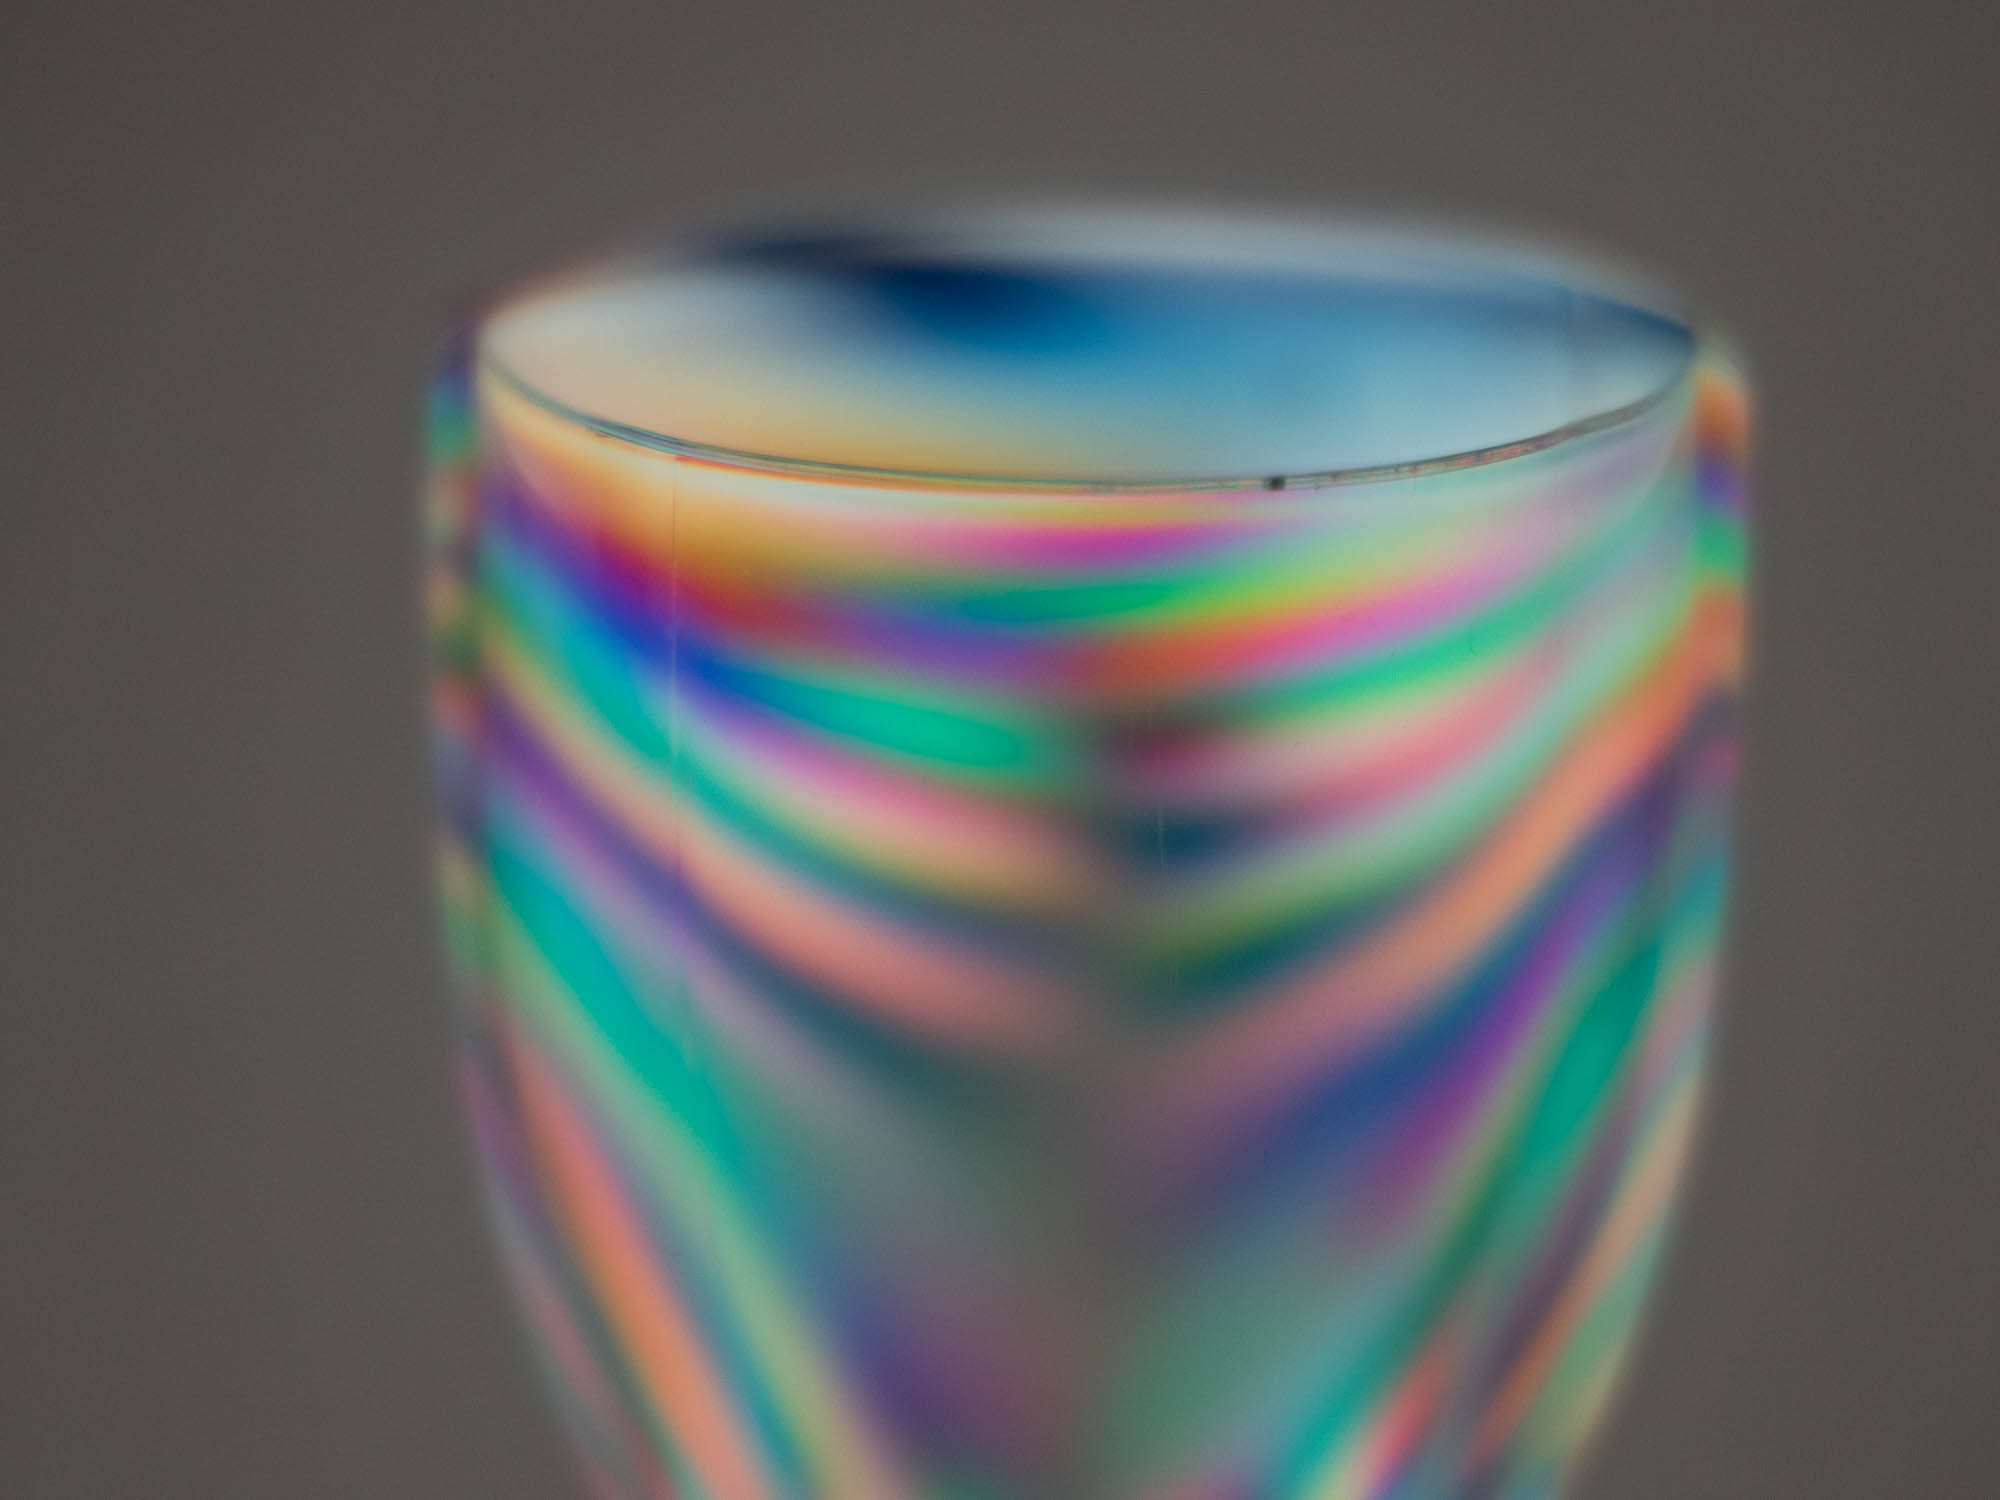
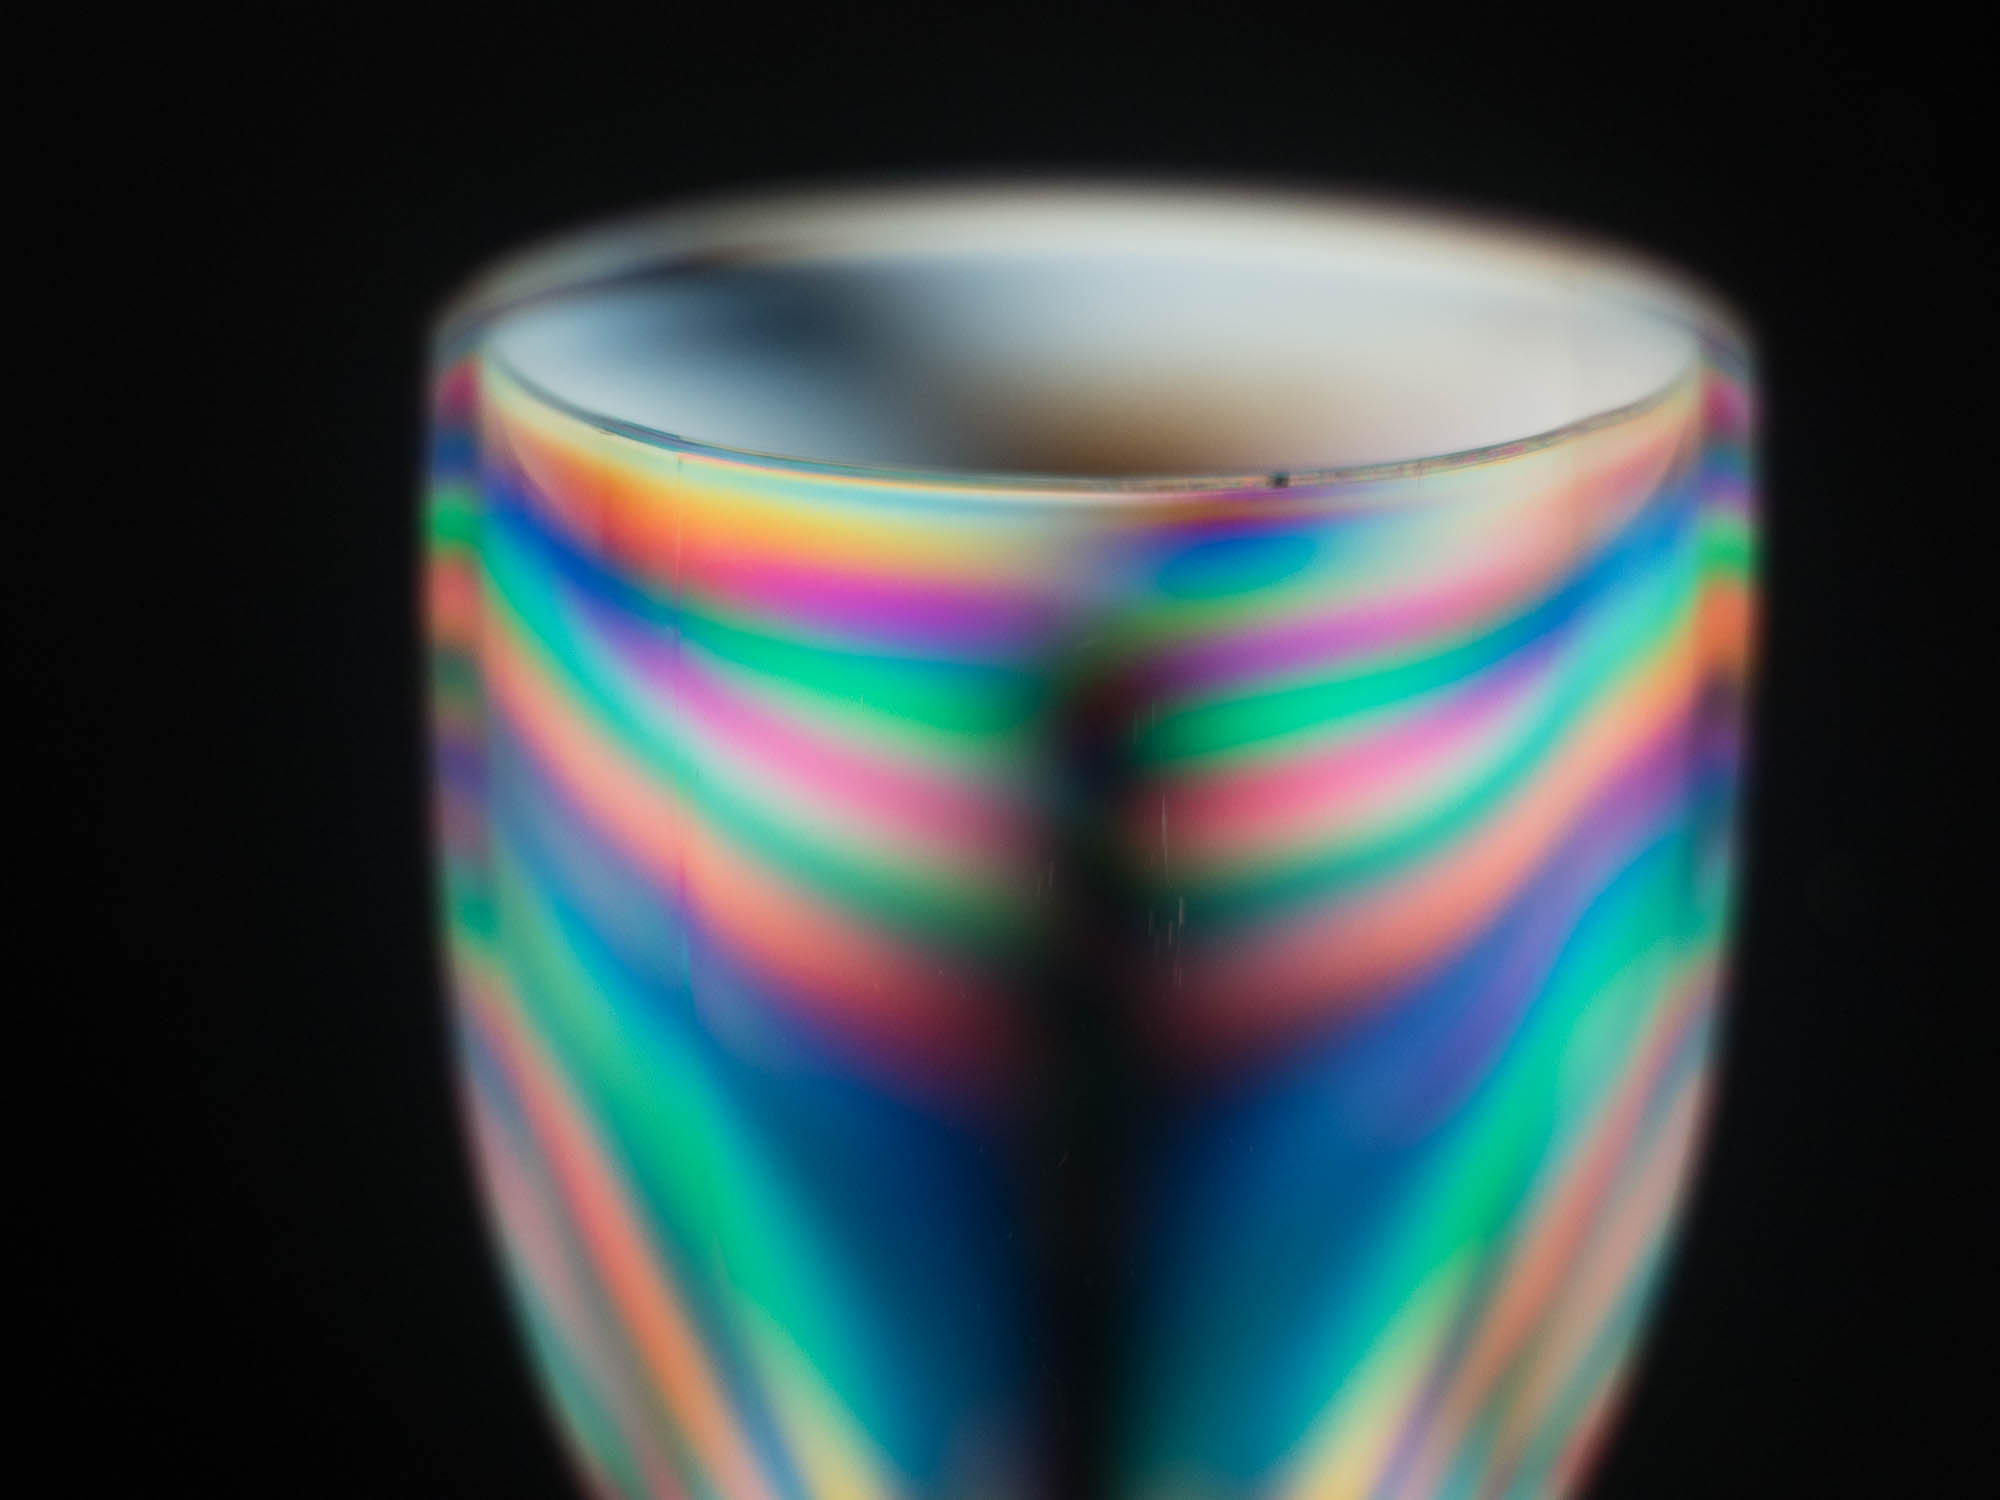
The cross polarising techniques is a simple one to create. Just place a polarising filter in front of the lens and photograph a stiff plastic object in front of an LCD computer screen. To illustrate the tip I attached a Hoyarex Linear Polarising filter* to the front of a digital camera.
I then positioned a plastic cereal container in front of my computer monitor (make sure the background is neutral grey and not a screen saver ) and mounted the camera on a tripod. You can hand hold if there’s enough light to get a camera shake free photo.
When you rotate the polariser you will see a rainbow of colour with the background colour of the monitor.
As you rotate the colours will become stronger and the background will go black.
I repeated the technique using a plastic wine glass
* Any polarising filter can be used – linear or circular . We have a selection for sale here in both screw in and system filters. Polarising filters for sale. The system filters are more practical as you can use one filter with a variety of lenses with different filter threads. Just get the filter, a holder, and a range of adaptor rings for the holder to attach to different lenses.
There is much confusion when trying to fathom which vintage filter to buy for a Twin Lens Reflex camera that has a bayonet mount such as a Rolleiflex or Yashicamat. The reason is there are three sizes. Rollei Bayonet I Rollei Bayonet II and Rollei Bayonet III. The Bayonet I is sometimes described without the I because there wasn’t a Bayonet II or Bayonet III when it was introduced.
Well wouldn’t it be easy if all filters were marked with Bay-1, Bay-2 or Bay-3? Life’s not that simple!
To make things confusing manufacturers often left off these simple markings on their filters. And to make things even more confusing they added measurements in mm so a Bay-1 filter may be marked 28.5mm, which doesn’t seem to relate to its diameter. And to add icing to the confusion these filters were often renamed B30 or B-30.
So to help here’s our interpretation of the system and an easy way to check if the filter you have found on ebay or in the junk shop, flea market, antique centre, camera shop is the one you need.
Bayonet 1
Also known as: Bay I / B30 / B-30
Outer measurement: 37mm
Inside diameter: 30mm
Sometimes marked: 28.5mm
Fits: Rolleicord and Rolleiflex (with f/3.5 Tessar / Xenar), Yashica EM, Yashicamat, Yashicamat-124, YashicaMat-124G Minolta Autocord
Bayonet 2
Also known as: Bay II
Outer measurement: 41mm
Inside diameter: 34mm
Sometimes marked: 34 or 36mm
Fits: Rolleiflex (with f/3.5 Xenotar and f/3.5 Planar)
Bayonet 3
Also known as: Bay III
Outer measurement: 46mm
Inside diameter: 38mm
Sometimes marked 38mm
Fits: Rolleiflex (with f/2.8 Xenotar or Planar)
Hope this helps clear things up…and if you know different i’m sure you will let us know 🙂
The Hoyarex filter system was really good: high quality filters.. Great variety of options in the range. Some glass filters. Solid holder. And a really useful rubber hood. But the Hoyarex System had a big flaw! And that has become evident over the years as more and more filters become scratched.
It’s not due to use either! These scratches occur when the filters are stored in their plastic case. The resin filter catches the edge of the case, which usually bends a bit in the middle. So after being jostled around in a camera bag the rubbing effect causes the resin to mark or scratch.
So here’s a tip to prevent further wear. Buy a packet of lens tissues and wrap one over the filter at the top end that sticks out of the case. Then the filter wont get rubbed. You can use toilet tissue, but a lens tissue is softer and has no fibres that will come off and cause dust problems.
The Hoyarex Skylight 1B filter – cat number 011 – is one of the most valuable filters in the Hoyarex range, yet is often overlooked, because its not a special effect filter.
But this underused filter will do two things to ensure your photography improves.
Firstly, and most importantly, the filter is a lens protector. The Hoyarex system is made so that when a filter is placed in the back slot it removes any possibility of dust reaching the lens. So if the holder is left on with a filter inserted the lens wont get dust falling on the surface or scratches. The skylight is the obvious choice as it has no special effect value. It’s also one of the few filters in the Hoyarex range that’s made from glass so optically very good.
But the filter has another use. A skylight filter has a very slight pink tint that has a warming effect when shooting in hazy days, so landscapes can be photographed with slightly more clarity.
A filter factor is highlighted on many filters as a multiple (or x). It’s simply the amount you need to increase the exposure by to compensate for light absorbed by the particular filter being used.
x2 is a one stop increase
x4 is two stops
x8 is three stops
x16 is four stops
If, for example, you have a x4 orange filter on the lens, the exposure has to be increased by four times – that is two full f/stops or shutter speed increments.
Lets say you have an exposure of f/5.6 (aperture) and 1/125sec (shutter speed) and add the x4 filter. You would either have to adjust the aperture two stops to f/2.8 or the shutter speed two stops to 1/30sec or both one stop so the exposure would be f/4 at 1/60sec.
Fortunately with modern through-the-lens (TTL) metering and automatic cameras the filter factor is taken care of, but you need to make the necessary adjustments when using manual cameras or manual exposure with flash.
To make things a little more complicated, some filters, such as the polariser, have variable exposure factors as you rotate the filter, and others have incremental factors such as 1.3x which makes it hard to adjust if you have an older camera with only full stop increments.
The Multi-purpose UV is similar to the skylight, absorbing the ultraviolet rays which often make scenic shots hazy and indistinct. Moreover, the UV, especially when used with black & white film, increases contrast, reduces haze and generally improves the “sharpness” of your photographs
Many photographers buy a UV filter for each lens and leave them screwed on to protect the lenses’ front elements.
UV filters are available in round type that screw into the lens in ever size imaginable.
The Neutral Density (ND) filter is one of the more useful filters you could include in your collection. Digital image processing can do many things but it can’t reduce the light reaching the film or CCD. That’s the job of the camera’s exposure system and an ND filter throws in a helping hand.
The name explains its purpose. It’s neutral (in colour) and it has a density (level of opaqueness).
Neutral Density filters come in a range of densities. The basic ND2 has a 2x exposure factor (or one f/stop) and an ND4 has 4x (two f/stops). There’s also an ND8 (8x or three f/stops) and a less common ND64 (64x or six stops). You can go even further with specialist ND filters such as the Big Stopper from Lee Filters. This one has ten stops light reduction. So a shutter speed of 1/30sec would need to be increased to 30 seconds!
The filter goes over the lens and reduces the light reaching the film by the exposure factor of the filter.
If, for example, you had an exposure of 1/125sec at f/11 and you added an ND8, the shutter speed would reduce to 1/15sec or the aperture would need to be opened to f/4.
The reason to use an ND filter suddenly become obvious. If you want to force a slow shutter speed, for motion blur, or you want the lens at the widest aperture, for shallow depth-of-field, the ND filter can help.
It can also be used in combination with a flash to effectively reduce the guide number for close range photography.
The ND2 is hardly worth bothering with so we’d suggest you’re first ND filter be a ND4.
And another interesting type is the variable ND, like the one illustrated above. These are variable in strength, but, as reviewers have found, tend to cause criss-cross patterned illumination at stronger settings.
Wratten is a brand name from Kodak used for their series of coloured gelatin correction and conversion filters.
There’s a wide range – each one identified by its Wratten number.
The filters are very thin so are optically very good, but can be easily damaged
Wratten filters can be held or taped in front of the lens (or flash). Alternatively you can buy a gelatine filter holder for most filter systems for a neater way to attach the filter to the lens. Example include the Hoyarex Gelatine Filter holder and the Cokin P-Series Gelatine Filter Holder
They are also used in the darkroom for colour printing using an enlarger with a filter drawer. Cyan, Magenta and Yellow are available in increments of 5CC. Owners of the Bowens Illumitran and other similar professional slide copiers can use the filters to correct colour casts when copying from one film to another.
Photographers can tape a wratten filter over their flash and have a cancelling one on the lens so anything illuminated by flash will be the correct colour while the background will be the colour introduced by the filter over the lens.
The top ten filters you should own will obviously vary from person to person and is dependent on the subjects you photograph. Our choice is most definitely the following:
Circular Polariser (glare reduction and colour saturation)
Great for landscapes, still lifes and architectural photography
Grey Grad 4x (balance sky brightness)
Great for landscapes
Skylight (protects lens)
All purpose photography
Neutral Density x4 (reduces overall exposure)
All purpose photography
81A (warms up skin tones)
Perfect for portraits but also useful for landscapes
Close up +4 (for the macro shots)
Ideal for nature also good for still lifes
Grey Grad 2x (a weaker variation on 2)
Great for landscapes
Neutral Density x8 (a stronger variation on 4)
All purpose photography but idea for blurry waterfalls
Softar style diffuser (best softener for when you cant be bothered doing it in Photoshop)
Perfect for wedding and portraits
Star 8 (Adds star burst)
Great for jewellery, also interesting for landscapes
Good selection? Let us know your favourite filters and what you use them for