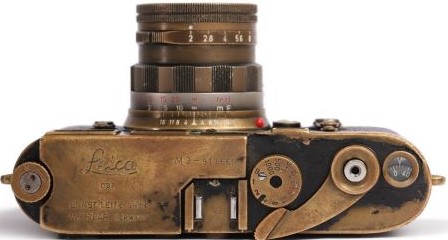
An extremely rare and very early double-stroke, black paint Leica M3 will go under the hammer in a sale of Photographica by Chiswick Auctions on Thursday 14th November, 2019.
This camera was delivered to the Magnum Photo Agency in Paris in 1958. Factory records show only 90 of these pre-series cameras were sent before the first official batch of black M3 rangefinders in 1959. It’s not known how many others are still in existence.
The majority were delivered to Sweden along with individual deliveries to Paris, New York and Germany. The serial number records it as the 15th black paint M3 camera to have been produced, and the second earliest example to be offered at auction. (The earliest example, the second of the batch, sold in 2014 for £320,000 in Hong Kong). This model has a conservative estimate of £60,000-£80,000, but, due to its popularity and rarity, it is expected to achieve much more.
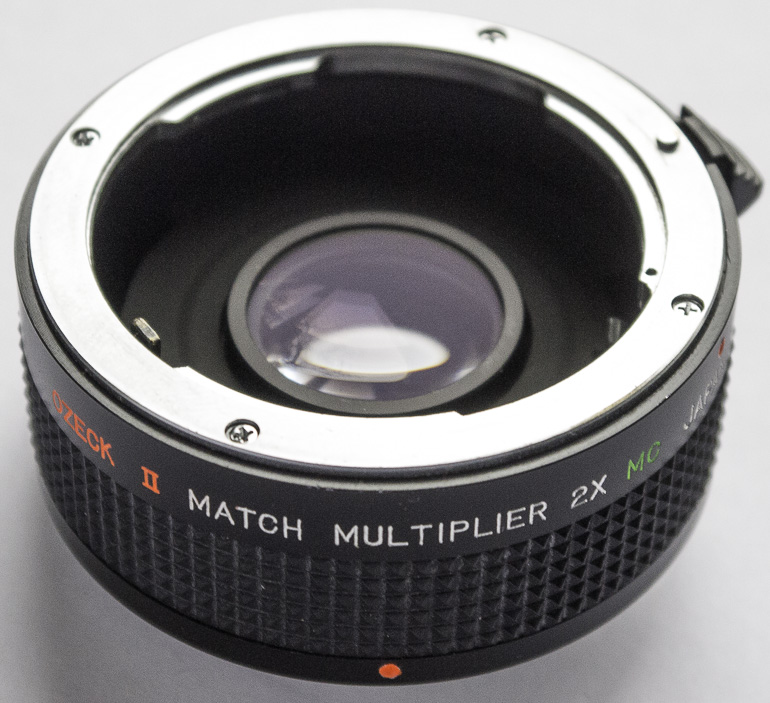
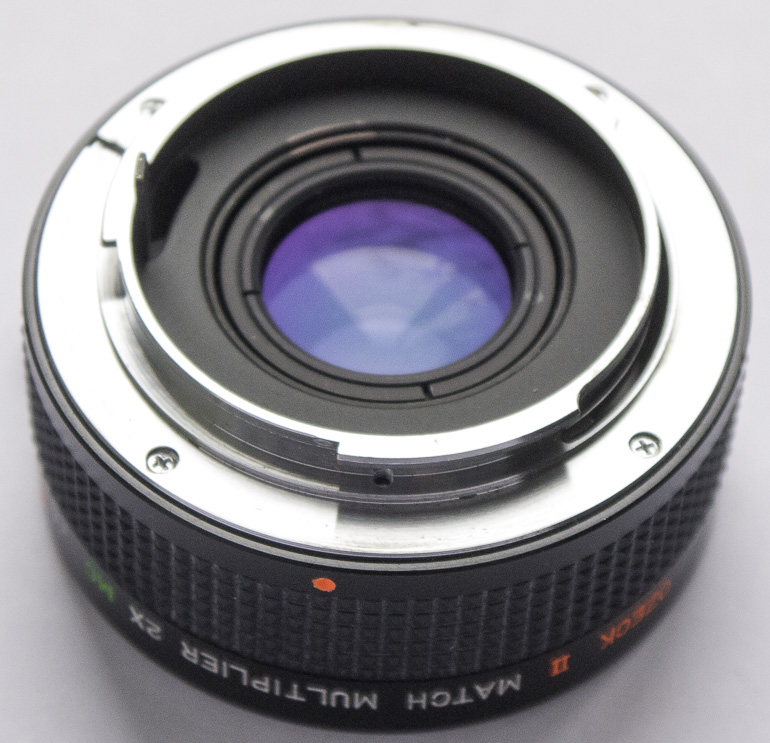
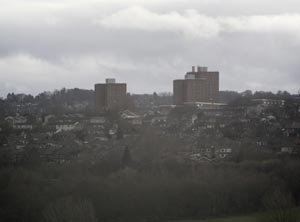
A teleconverter, also known as an extender, is a camera accessory that attaches between the lens and body of an interchangeable lens camera. They were made for 35mm and medium format cameras and are hard, if not impossible, to find for micro 4/3rd. That said this article is using one on a micro 4/3rds fitted with a Pentax K adaptor.
Whats does a teleconverter do?
A teleconverter increases the focal length of a lens by the number of x. The most common is 2x but models have also been made in 1.4x, 1.5x and 3x. With a 2x teleconverter your 300mm telephoto lens becomes 600mm.
What are the advantages of a teleconverter?
The main advantage is size and cost. A teleconverter and one lens takes up much less space than two lenses And it’s much cheaper to buy a teleconverter than a second lens.
Another advantage is the closest focusing distance of the lens doesn’t change when a teleconverter is attached so the magnification is doubled with a 2x from the same distance.
What are the disadvantages of a teleconverter?
The teleconverter adds a few more layers of glass for the light to travel through so there’s chance the image quality will be degraded. This is more noticeable on cheaper models where contrast can suffer as well as added distortion and reduced sharpness.
The teleconverter reduces the amount of light reaching the film/sensor by the same factor as the magnification. So a 2x converter loses two stops of light and a 3x converter loses three stops of light.
Can you use more than one teleconverter?
Its possible to add several teleconverters in a stack. Sharpness decreasing and light loss increasing with each one added. In this article Stacking five 2x teleconverters Petapixel stacked five teleconverters onto a 300mm lens to get a huge 9600mm telephoto.
A couple of test photos with a teleconverter
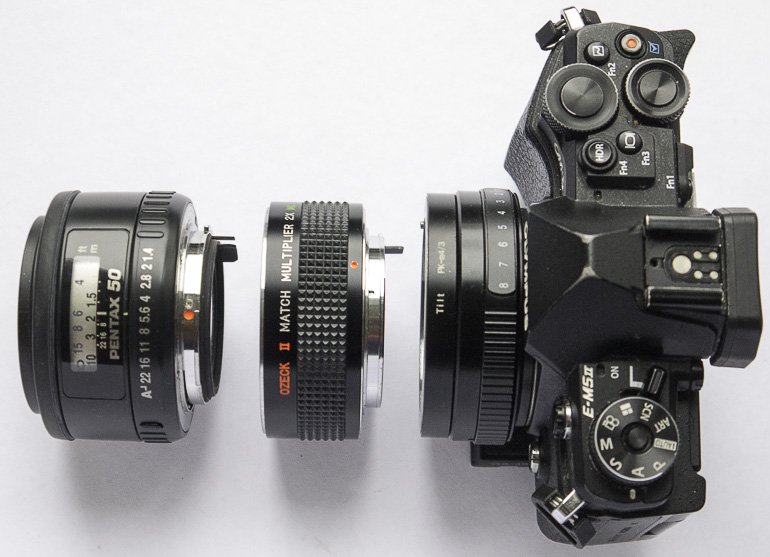
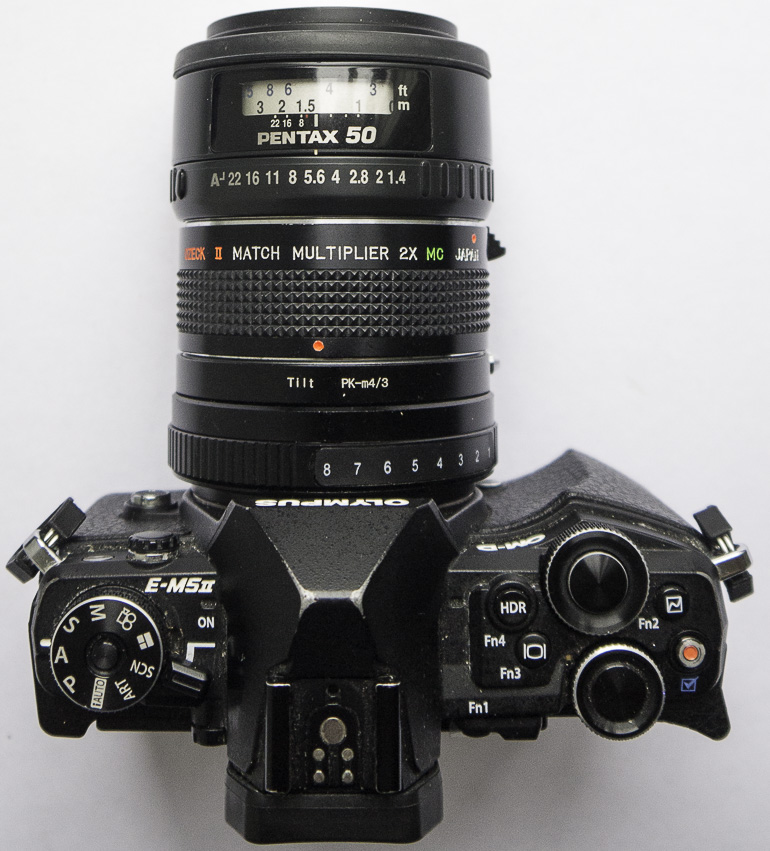
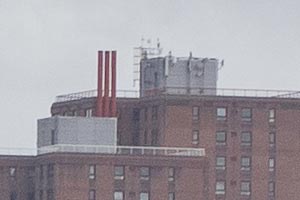
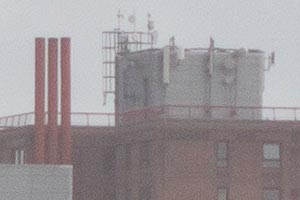
Below are examples of two subjects taken with the illustrated combination above – an Olympus OMD EM5 MkII with a 50mm f/1.4 Pentax lens and a budget priced Ozeck 2x teleconverter. The left photos are without the 2x teleconverter and the right hand ones are with the teleconverter. The map is taken at the closest setting of the lens, and the city view is with the lens at infinity. The bottom pair are highly cropped pics from the city scene. You can click on the four top pics to see the full size version.
For those viewing on a mobile device 1, 3 and 5 are without teleconverter and 2, 4, 6 are with teleconverter
As you can see the converter loses contrast, but sharpness is not as bad as many people have made out over the years, and a converter is certainly a good idea if your budget is tight.


We have a selection of second-hand teleconverters here at PhotographyAttic – used teleconverters
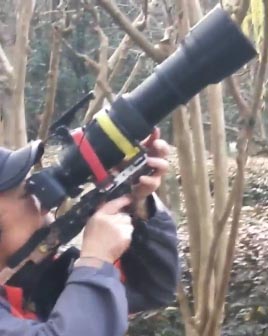 There’s a video doing the rounds at the moment titled Leon The Professional. It’s being shared by photographers who’re impressed by the featured photographer’s home made “shooting” accessory. The gent in question has adapted a wooden rifle stock to the bottom of his camera to create a comfortable hand holding gadget for long lens shooting …in this case bird photography.
Photographers who’ve been around before the digital age will remember this type of gadget is not new.
Back in the 70s they appeared in a kit from Russia called the PhotoSniper.
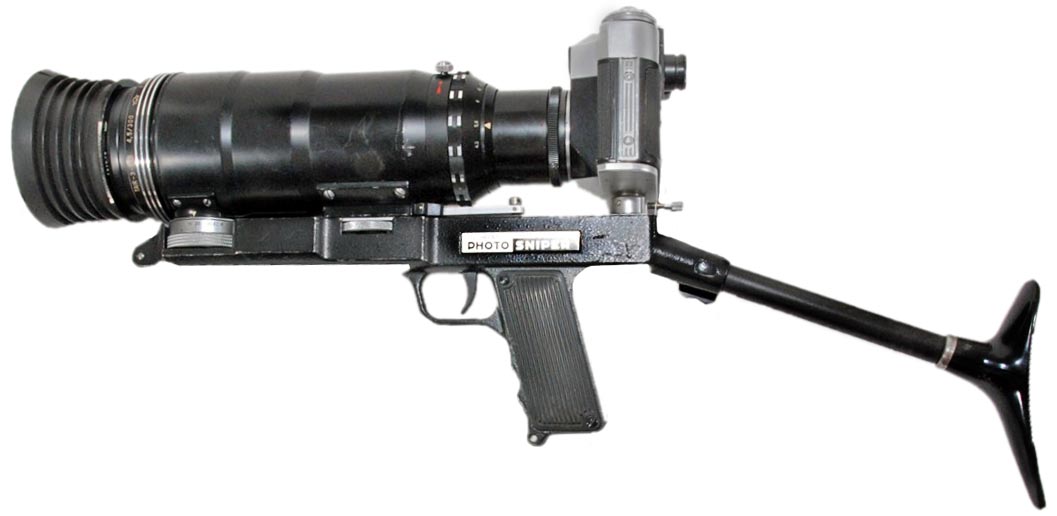 This was a Zenit camera with a chunky 300mm telephoto and a very realistic rifle grip below. Supplied in a metal box style case, at a very good bargain subsided price. But was seen as specialist gear as heavy and cumbersome for the majority of photographers.
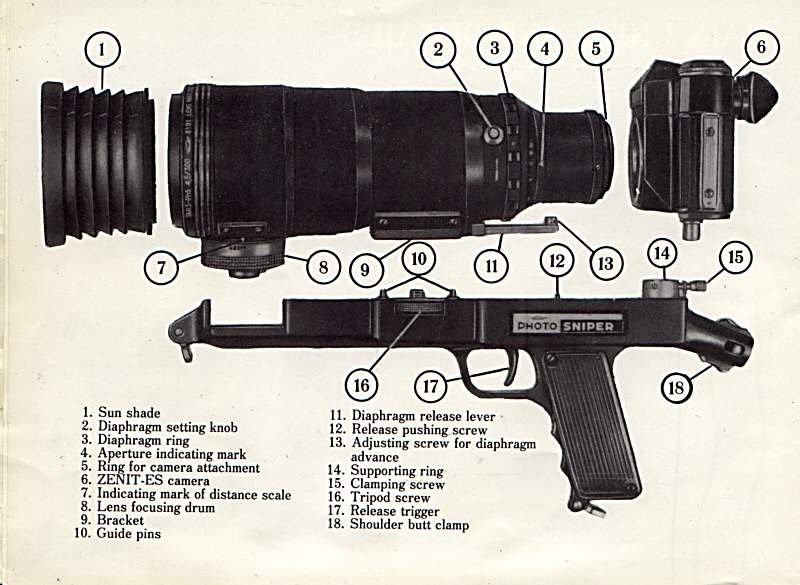
Way before this in the 1950s-60s Novoflex had added a handle grip to the base of their long lenses in a gadget called the Pistol Grip Follow Focus. Available in 400mm, 600mm and 640mm with a 560mm joining the range in the 70s. This gadget focused the lens when the trigger was squeezed…later models had a push pull action to focus. Lots of imnformation about the Novoflex system here NOVOFLEX accessory system for Exakta Varex at Photo but More
In the 70s-80s thanks to the popularity of the SLR and rise of camera accessory brands several budget Japanese/German products appeared from the likes of Rowi, Hama and Kaiser that could be attached to the base of your 35mm SLR to convert into a rifle grip. The Kaiser Kamera – Schulterstativ 6005 Rifle Grip was one such example.
These were light weight and had a cable release attached to the trigger to make rifle shooting simple. Camera Retailers Jessops and Dixons also sold rifle triggers for under £20.
And throughout the history of the 35mm camera, manufacturers have produced trigger grips that attach to the base of the camera to provide alternative and more comfortable ways of holding and firing the shutter. These are just a simple hand grip shaped handle which are much lighter and far less bulky than the rifle grip.
There’s a really interesting article about photographer John Duder going back and experimenting with filters he never got around to using in the 80s over on ePHOTOzine: Experimenting With Filters From the Eighties I Have Never Used – Come Check Out The Results
Also interesting that we’ve got many of the filters he used here on PhotographyAttic. check out our Cokin A-Series section and the Cokin P-Series
A stepping ring is an adaptor that screws into the front of your lens to change the filter thread size. The idea is you can make one filter fit a number of lenses with different filter thread sizes by attaching a stepping ring in between the filter and the lens.

Their are always two numbers on a stepping ring. The filter thread size of the lens, and the filter thread size of the filter. They always start with the lens filter thread size first. You use a step up ring to attach a larger filter on to a lens with a smaller filter thread size And you step down to use a smaller filter on a lens with a larger thread.

So a 49-58mm stepping ring is a step up ring and will let you screw a 58mm filter onto a lens with a 49mm thread (see pic above). While a 67-55mm stepping ring is a step down ring and will let you screw a 55mm filter onto a lens with a 67mm thread.
Generally its better to use step up filters on wide angle lenses to avoid vignetting where the smaller filter encroaches into the edges of the frame. A step down filter is better used on telephoto lenses.
Here at PhotographyAttic we have a wide range of stepping rings from a number of brands. And we’ve reduced the price so most unbranded ones are £2.00 and ones with brand name are £3.00. Buy here: Stepping Rings for sale

Extension tubes are tubes without any optical elements that you place between the camera and lens of an interchangeable lens camera. They extend the lens so it can focus closer, giving the lens macro capabilities. Some have full automatic couplings so the camera can continue to be used in all its auto and program exposure and focus modes. Some lower priced ones have no couplings, so the camera needs to be used in manual.
Tubes are often sold in sets of three. The set illustrated above has 13mm, 21mm and 31mm extensions, and these can be attached in any combination giving a total of seven different extensions:
- 13mm
- 21mm
- 31mm
- 34mm (13mm+21mm)
- 44mm (13mm+31mm)
- 52mm (21mm+31mm)
- 65mm (13mm+21mm+31mm)

Here a set of three tubes can be seen attached to a Nikon digital SLR camera.
 This photograph of a British one pound coin was taken using a nikon camera with a 55mm lens set to infinity and an extension tube added. The smaller coin on the left is with the 13mm and the coin on the right is with the three tubes attached giving 65mm extension. The lens was at f/2.8 to show how shallow depth of field is. When using tubes you either need to use a very small aperture or shoot the subject parallel to the CCD or film plane. Here the coin was at an angle so only a shallow strip across the centre is sharp.
Advantages of using Extension Tubes
Low cost macro
No optical degradation
Compact
Disadvantages of using Extension Tubes
Limited magnification variations
Fiddly changing between magnifications
Taking lens off increases risk of dust intrusion
We have a selection of extension tubes in different camera fittings
This seems like an interesting gadget to put on a Nikon SLR and convert the Laowa 12mm into a shift lens. ideal for architecture photographers.

The converter is designed exclusively for Sony FE lens mount and fits on cameras with a Nikon AI mount. It has a 1.4x magnification so the 12mm lens becomes an effective 17mm focal length and has a 1-stop aperture loss
With the 360g converter in place you get a +/- 10mm Shift
Combined cost of the 12mm and shift converter is about £1170.
You can find more info from the UK distributor here Laowa lenses
An amazing selection of snowflake macro photos and a article showing how to photograph snowflakes can be found on Alexey Kljatov’s ChaoticMind blog

If you have an SLR you can reverse your lens on the body using a reverse adaptor, or reverse a lens on a lens using a coupling ring (which has filter threads on both sides), or use extension tubes, close up lenses, macro lens or bellows. We have all these available on PhotographyAttic. If you cant find what you want contact us with specific requests
The I’m Back digital back turns your 35mm film camera into a digital camera. It will work with the following cameras:
Nikon F, Nikon F2, Nikon FM, Nikon FE, Nikon S2, Canon F1, Canon A1, Canon AE1, Pentax ME super, Pentax spotomatic, Pentax K1000, Praktica b200, Praktica MTL, Contax II, Contax RTS , Contax G2, Olympus OM1, Olympus OM2, Minolta Dinaxx 7000, Olympus OM10, Yashica JP, Yashica FX3, Leica M, Leica R, Diana F, Diana F mini.
There will also be a universal accessory, that can be adjusted to almost all 35mm cameras.

It features a 16mp Panasonic sensor and has a 2in touch screen display. Photos and videos can be transmitted through the WiFi and saved in a smartphone. You can also use the smartphone display as a bigger screen and control the camera through it.
For full details check out the Kickstarter Im Back Pro project page
Many film cameras for sale here. Second-hand 35mm Cameras for sale
The BPM bellows system around in the 70s was a versatile system with mounts to accommodate most camera and lens fittings. But it wasn’t the only one. The likes of Soligor, Hama, Russian, Kenlock and others made similar interchangeable systems, but with their own system of mounts. Im not sure which are interchangeable between bellows makers, but maybe the anatomy of a BPM mount may help you find out if the bellows you have can be used with a BPM mount.