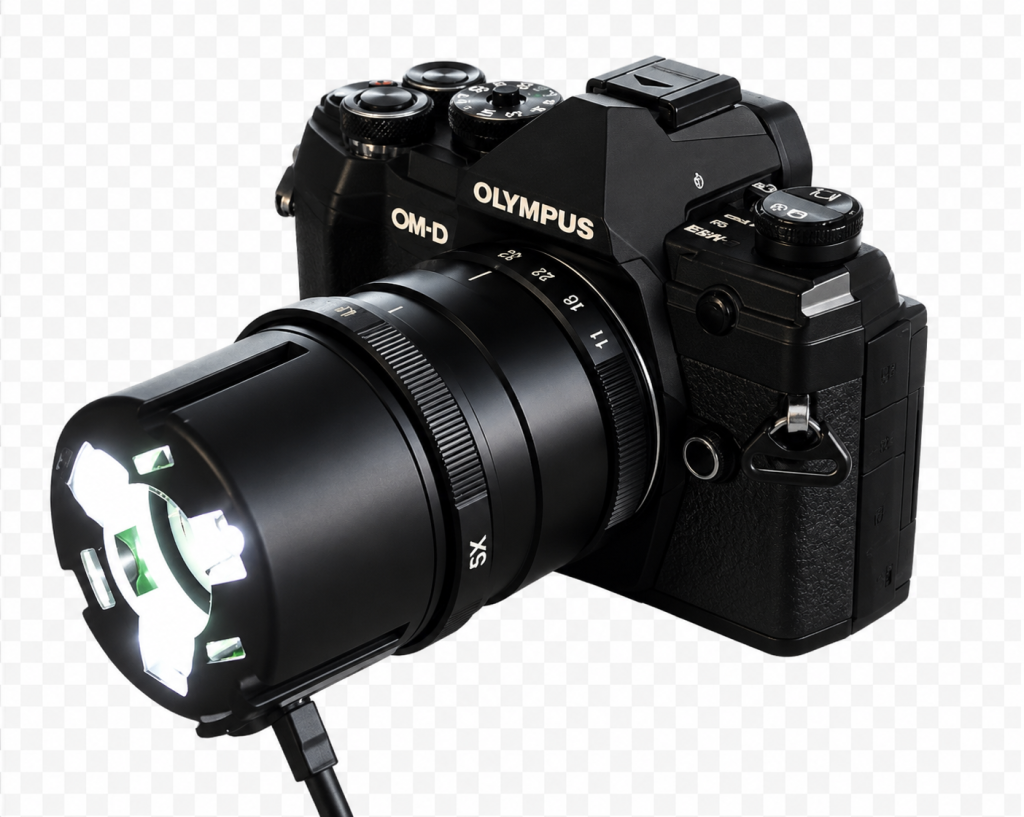
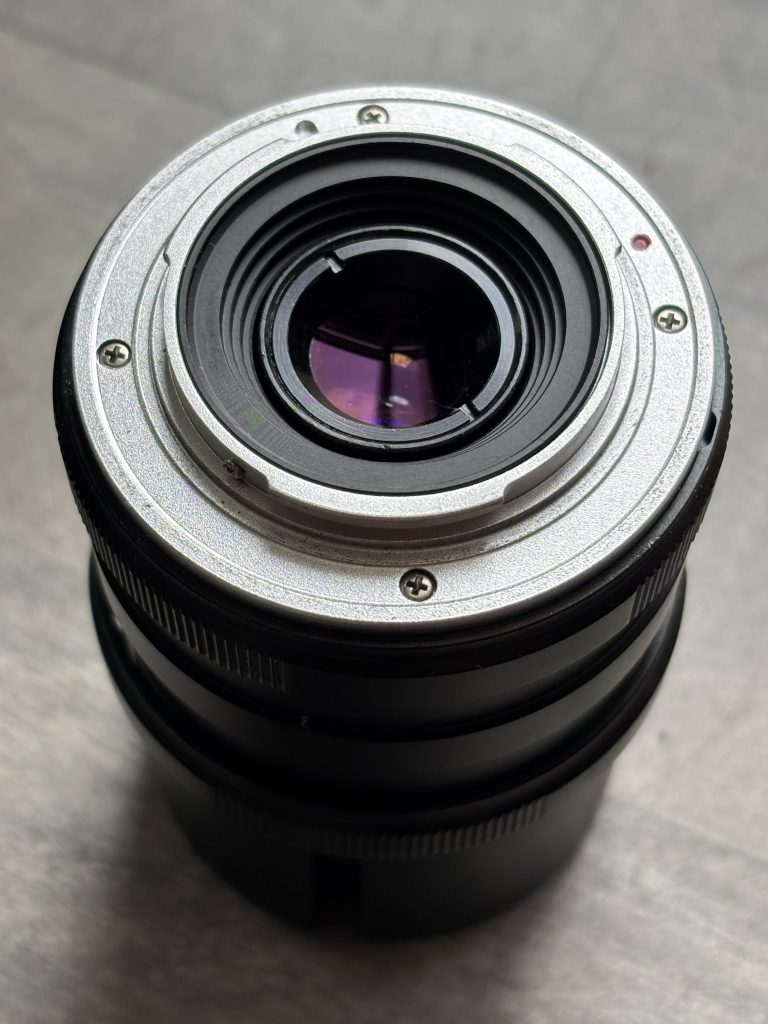
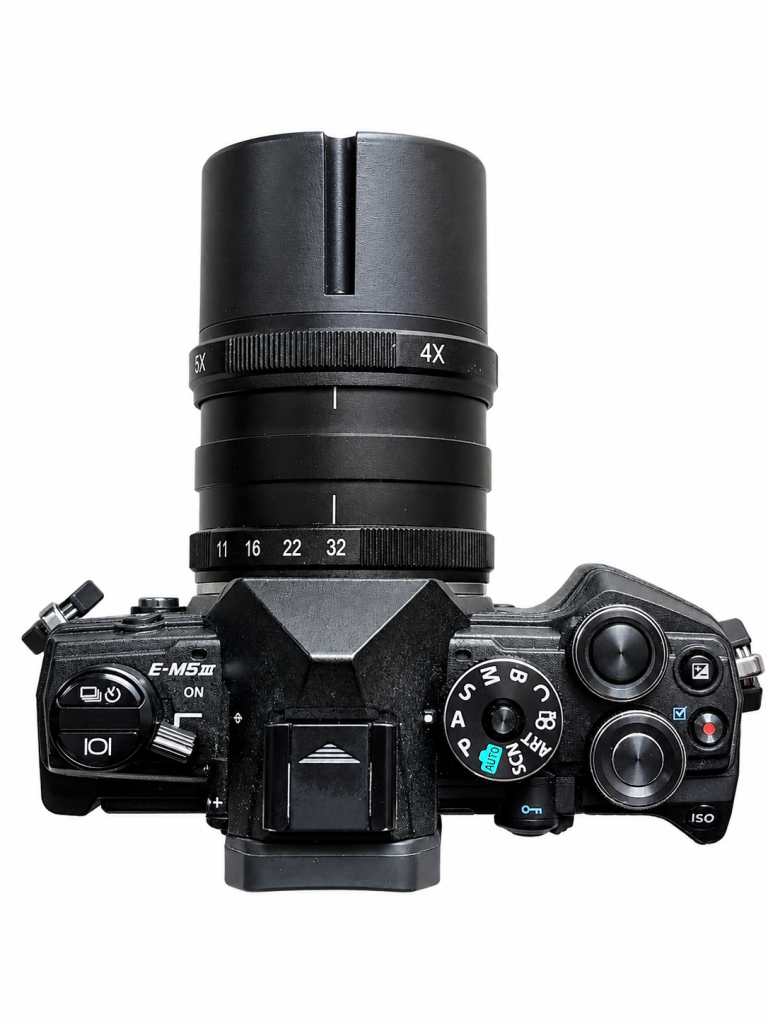
The Yasuhara Nanoha X5 is not a conventional macro lens. Most macro lenses provide a maximum reproduction ratio of 1:1 whereas the Nanoha operates at an extraordinary 4x to 5x magnification. At these levels, a subject measuring just 5mm across can completely fill the frame.
The lens allows photographers to capture intricate details in insects, flowers, minerals, electronic components, stamps, coins and countless other tiny subjects. It effectively bridges the gap between traditional macro photography and microscopy.
Key Specifications
● Magnification range: 4:1 to 5:1
● Aperture range: f/11 to f/32
● Optical construction: 10 elements in 7 groups
● Manual focus only
● Built-in LED illumination system
● Minimum working distance approximately 11–19mm
● Metal lens construction
● Weight approximately 310–360g depending on mount version
● Available for several mirrorless camera systems
Build Quality and Handling
The first impression of the Nanoha X5 is its solid construction with a predominantly metal body and precise controls.
There are only two main controls:
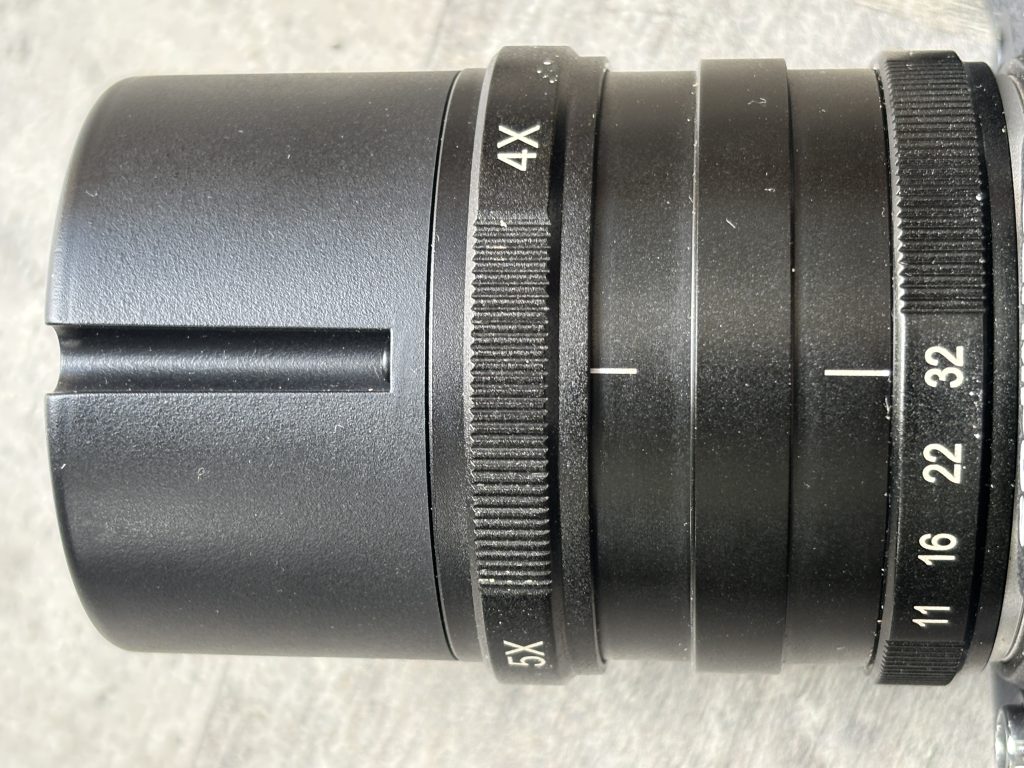
1. A magnification ring that changes reproduction ratio between 4x and 5x.
2. An aperture ring with settings from f/11 to f/32.
The lens is entirely manual. Autofocus would be virtually impossible at these magnifications, where depth of field is measured in fractions of a millimetre.
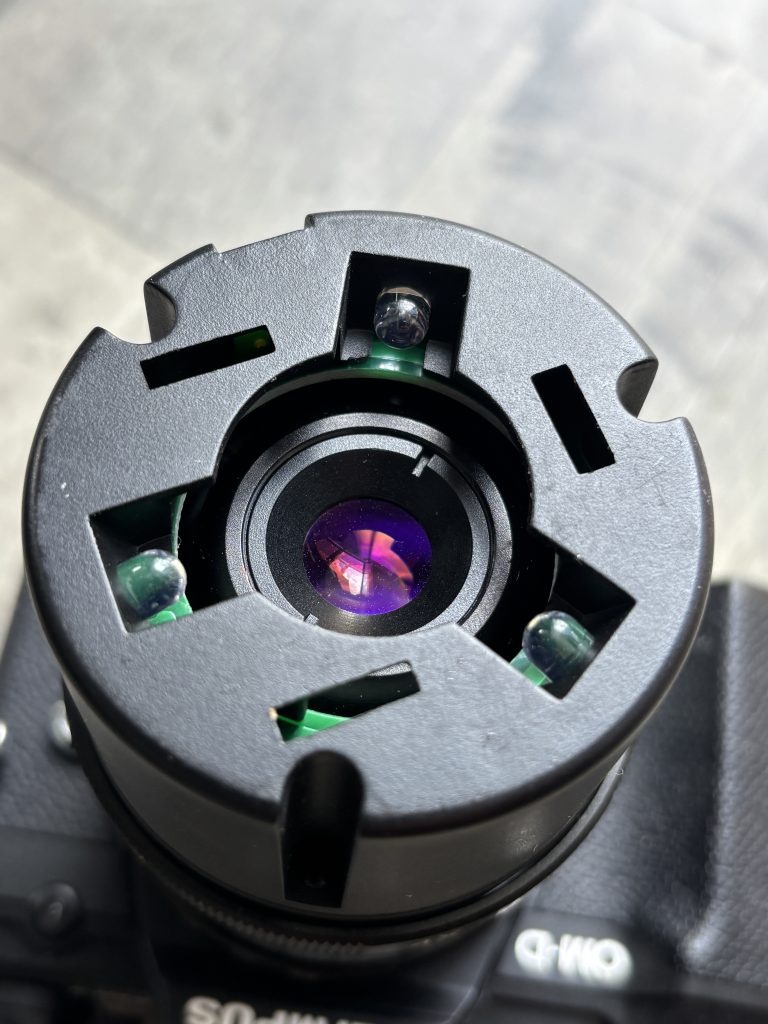
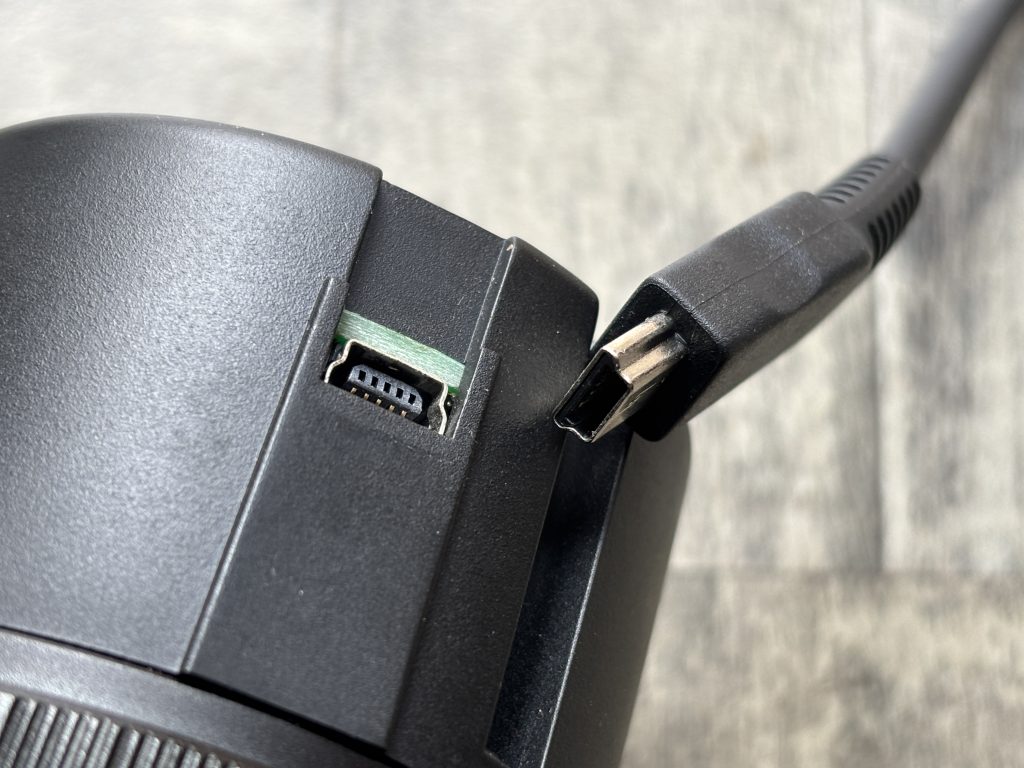
One of the lens’ most distinctive features is its LED lighting system. Three LEDs mounted around the front element provide illumination directly onto the subject powered via a USB cable. This is particularly useful because the lens must be positioned extremely close to the subject, often blocking ambient light.
Understanding 5x Magnification
To appreciate what 5x magnification means, consider a subject measuring 4mm across. At 5:1 reproduction, that tiny object is projected onto the camera sensor at approximately 20mm across.
This level of magnification reveals:
● Individual grains of pollen
● Insect eyes and mouthparts
● Fabric fibres
● Circuit board details
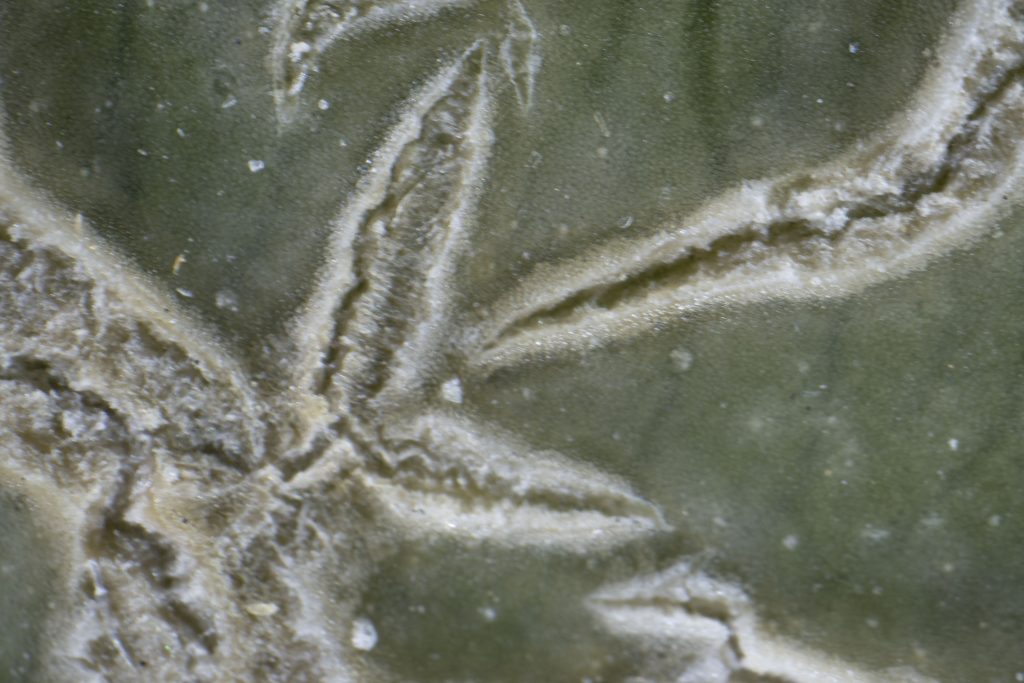
● Surface textures in minerals or, in the example below, the skin of a melon.
● Fine details in jewellery and watches
The effect is often more akin to scientific imaging than traditional photography.
Image Quality
Image quality is surprisingly good given the lens’ specialised purpose. Sharpness in the centre of the frame is excellent, and the lens is capable of resolving an impressive amount of detail to the edges of the frame.
The optics perform best when used carefully with a stable support system. Even the slightest movement can shift focus dramatically. Because the depth of field is so shallow, many photographers employ focus stacking techniques to create images with greater apparent sharpness from front to back.
At smaller apertures such as f/22 and f/32 diffraction begins to reduce overall crispness, but these settings are often necessary simply to gain enough depth of field for practical photography.
The Challenge of Working Distance
The Nanoha’s greatest strength is also its greatest limitation.
To achieve 4x–5x magnification, the front of the lens must be positioned extremely close to the subject. In practice, the working distance can be just a few millimetres from the front of the lens assembly.
This creates several challenges:
● Living insects may flee before the camera is close enough.
● Lighting can become difficult if you don’t use the built in LEDs.
● Wind movement becomes highly problematic outdoors.
● Camera vibration is greatly magnified.
For these reasons the lens is often best suited to static subjects photographed indoors using the built in LED lighting.
Best Subjects for the Nanoha X5
Coins and Stamps
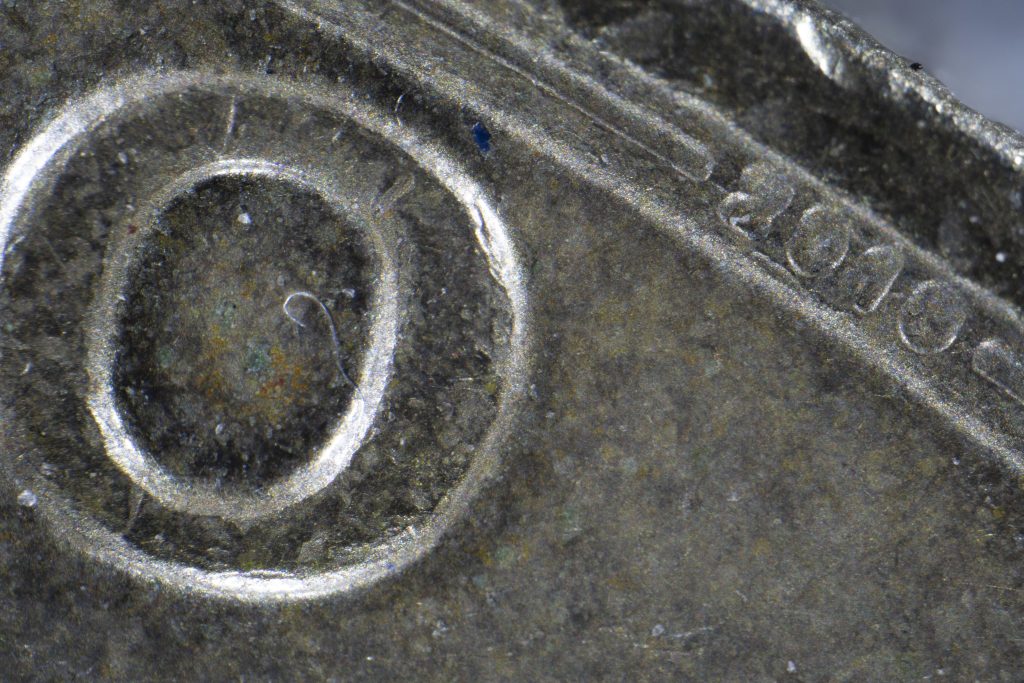
The lens reveals engraving detail, printing methods and wear patterns that are impossible to appreciate with the naked eye. The above photo is the full frame showing the O of One on a One Pound coin…notice the year of creation can be seen which is very hard to see with the naked eye.
Flowers and Plants
Pollen grains, stamens and petal textures become dramatic abstract landscapes.
Minerals and Crystals
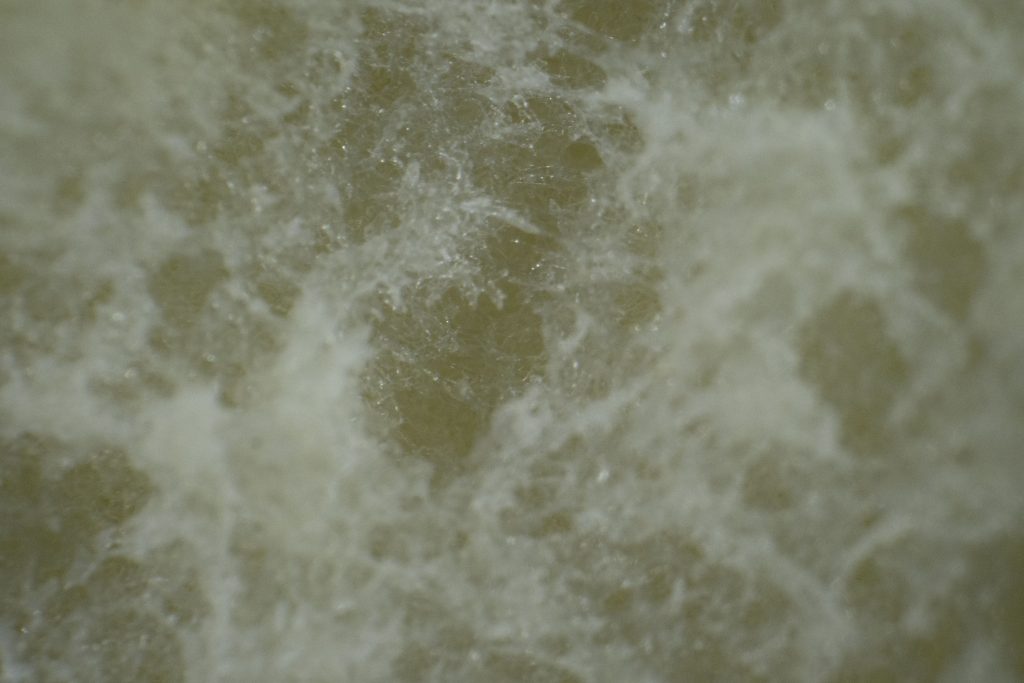
Crystal formations and surface structures are rendered with exceptional detail. Below is the texture of the pith of an orange
Electronic Components
Ideal for documenting circuit boards, solder joints and micro-components.
Scientific and Educational Work
The Nanoha can serve as an affordable alternative to dedicated microscope camera systems for many applications.
Tips for Successful Results
Use a Tripod
Handholding is generally impractical. A sturdy tripod combined with a focusing rail greatly improves accuracy.
Use Live View Magnification
Magnified live view helps identify the precise focus point.
Shoot in Still Air
Even tiny movements can ruin an image.
Experiment with Focus Stacking
Multiple images focused at different distances can be combined to overcome the extremely shallow depth of field.
Use Additional Lighting
The built-in LEDs are useful, but external LED panels or flash systems can provide more control.
Comparison with the Canon MP-E 65mm
The Nanoha X5 is often compared with the legendary Canon MP-E 65mm f/2.8.
Advantages of the Nanoha:
● Smaller and lighter
● Built-in LED illumination
● Lower cost
● Designed for mirrorless systems
Advantages of the Canon:
● Wider magnification range (1x–5x)
● Much longer working distance
● Greater flexibility in the field
The Nanoha is the more specialised tool, while the Canon remains the more versatile option.
Verdict
The Yasuhara Nanoha X5 is one of the most unusual photographic lenses ever produced. It transforms a mirrorless camera into a powerful close-up imaging system capable of revealing a hidden microscopic world.
Its extremely short working distance and razor-thin depth of field mean it is not a lens for casual users. However, photographers with patience and an interest in extreme macro work will discover creative opportunities unavailable with ordinary macro lenses.
For collectors, natural history enthusiasts, product photographers and anyone fascinated by miniature detail, the Nanoha X5 remains a unique and highly capable specialist lens. It may not be a lens you use every day, but when nothing less than 5x magnification will do, few alternatives can match its combination of image quality, portability and affordability.
Capturing the aurora borealis is part science, part patience, and part magic. Use this guide to give yourself the best chance of returning home with truly stunning images.
🎒 1. Preparation Before You Go
Check the Forecasts
Aurora activity (Kp Index): Look for Kp 3+ for mid-latitudes; Kp 2+ is often sufficient in the Arctic.
Cloud cover: Clear or mostly clear skies are essential.
Moon phase: New moon or low moonlight reduces sky brightness.
Don’t hold the phone – movement will ruin the shot.
Wipe the lens (phone lenses fog easily).
Avoid digital zoom; move closer instead.
Test different shutter lengths until stars remain sharp.
🌍 TOP TEN LOCATIONS TO PHOTOGRAPH THE NORTHERN LIGHTS These locations offer reliable aurora activity, dark skies, and dramatic landscapes.
1. Tromsø, Norway High aurora frequency, accessible city, incredible fjords. 2. Abisko, Sweden Famous “blue hole” microclimate keeps skies clearer than surrounding regions. 3. Fairbanks, Alaska, USA Strong aurora zone, easy access, long season. 4. Yellowknife, Canada Flat horizons create uncluttered sky views—excellent for wide-angle shots. 5. Reykjavik Region & Þingvellir, Iceland Volcanic landscapes and easy access to dark skies. 6. Finnish Lapland (Rovaniemi, Saariselkä) Snow-covered forests make perfect foregrounds. 7. Svalbard, Norway Auroras even in daylight during polar night. 8. Kangerlussuaq, Greenland Minimal light pollution and frequent clear skies. 9. Murmansk & Kola Peninsula, Russia High latitude with unique Arctic landscapes. 10. Scottish Highlands & Isle of Skye, UK Best low-latitude aurora spot in Europe during strong solar storms.
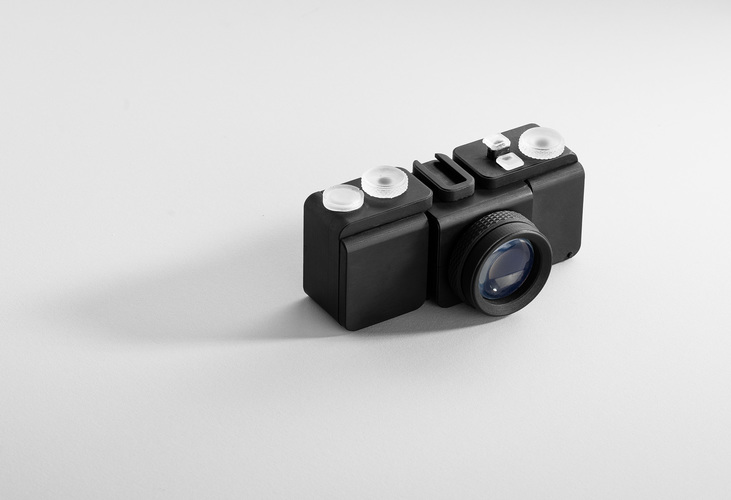
Engineer Amos Dudley has merge an age-old craft with cutting-edge technology and created the world’s first fully 3D printed, interchangeable lens camera. He’s sharing the design files on Pinshape so those with 3d printers can also create the camera.
Details of how the camera was made from concept to creation are here SLO 3D printed Camera
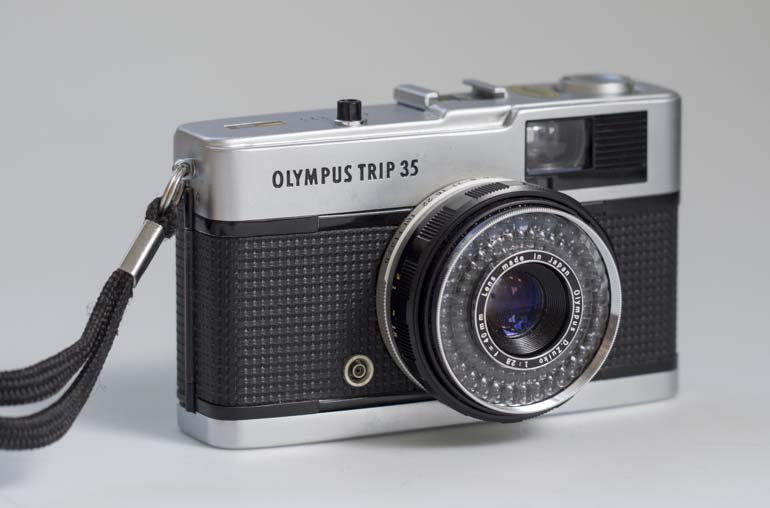
The Olympus Trip 35 is a 35mm metal bodied point & shoot compact camera that was produced from 1967 to 1984. In the 70s Olympus created an advertising campaign that featured British fashion photographer David Bailey. While famous in photography and fashion circles, he became a household name thanks to that campaign. People would say “I’m no David Bailey” when being asked about their photography.
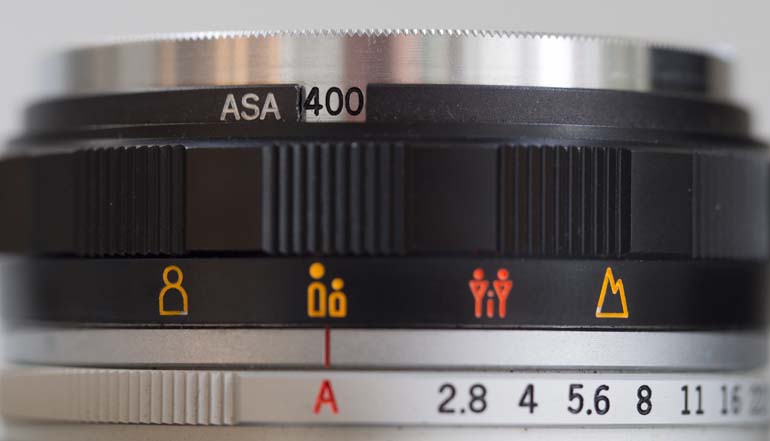
The Trip 35 looks like a rangefinder camera but is a much simpler design. Its Zuiko 40mm f/2.8 lens has four elements in three groups and just four zone focusing settings.
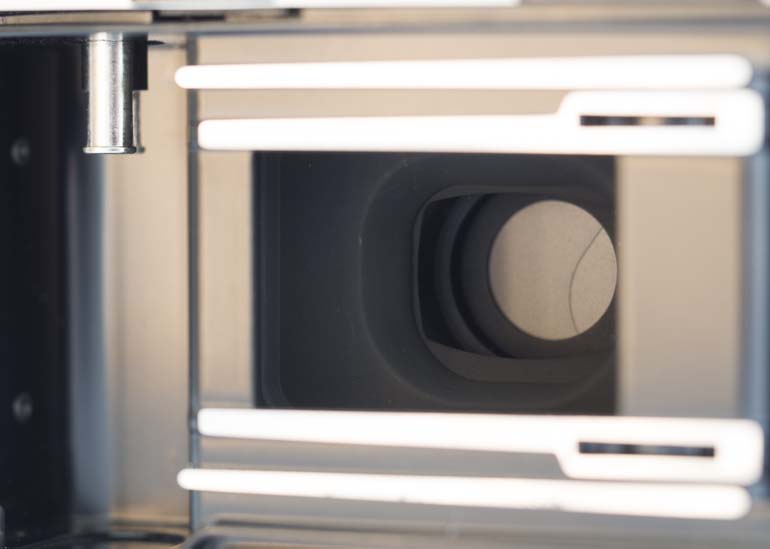
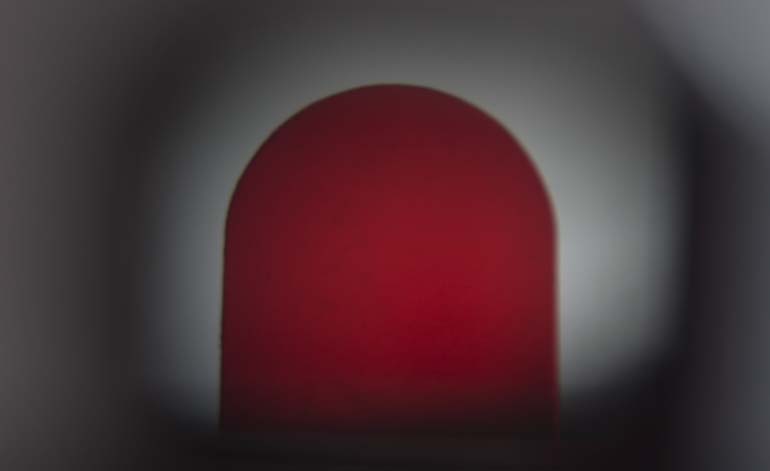
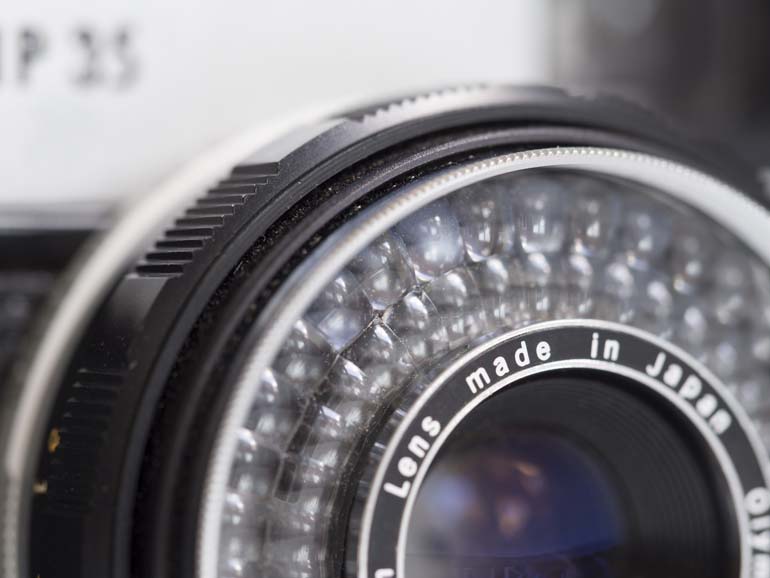
The exposure system is fairly basic too. A solar-powered selenium light meter around the lens provides a program auto exposure system when the camera is set to the ‘A’ mode. No batteries are required. It automatically sets 1/40th sec or 1/200th sec shutter speed and an aperture from f/2.8 to f/22. If the light levels are too low the shutter locks and a large red warning marker pops up in the viewfinder. Turn from the A setting and you have a manual option at all aperture ranges.
The camera has a flash PC sync socket along with a hot shoe and syncs with flash at 1/40sec. There’s an ISO range, set on a dial at the front of the lens, from 25 to 400 which at the time covered all the main film options.
It’s a great camera for point and shoot photography, solidly made and considering the price a very respectable performance with a sharp Zuiko lens. There are many available on the second hand market…eBay has dozens for sale at any one time, and you can usually find them at car boot sales and second hand dealers.
There are a few things to check before buying an Olympus Trip 35
The Trip 35 had a common fault with the meter. To test this rotate the film advance winder to cock the shutter, set the camera to A and hold your hand over the lens to block out the light. If the camera is faulty the shutter will fire. If it’s ok the red warning indicator will appear in the viewfinder and the shutter button will not press down.
Check the lens hasn’t got fungus in it. Angle it in the light or shine a torch into the lens and look for small patches of veins on the surface of the elements.
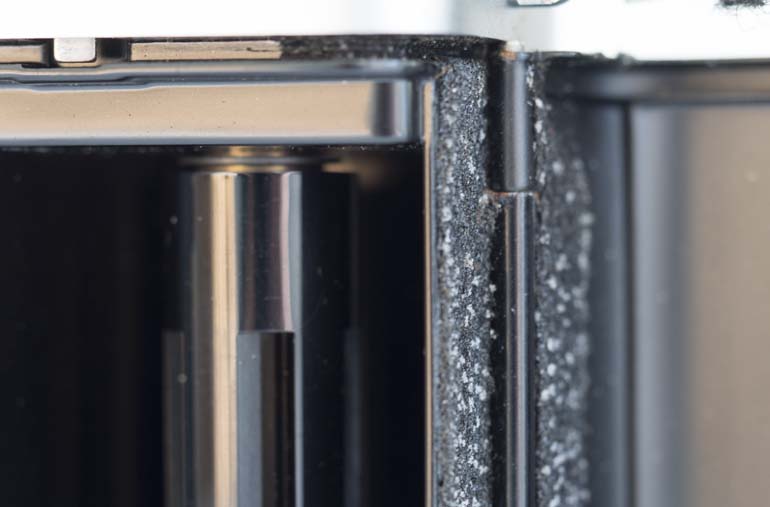
Look at the foam light seals inside the camera film chamber. It’s not a major issue if they are crumbling, replacements can be bought, but this will put up the overall cost.
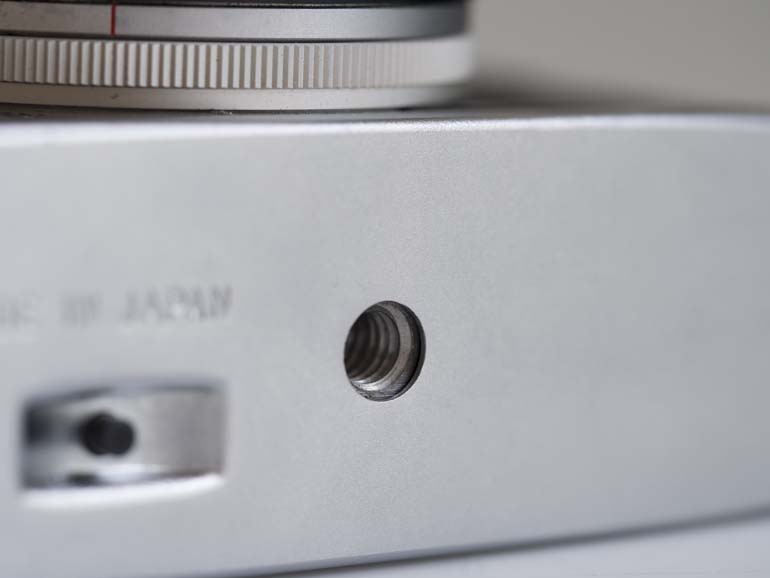
Check that the screw heads aren’t worn as that would indicate the camera has been repaired, by someone who’s less competent. Also make sure the tripod thread isn’t damaged.
Adjust the manual aperture setting and press the shutter release down. The lens aperture should go progressively smaller as you adjust from f/2.8 to f/22.
Try a flashgun attached via the PC socket and hot shoe to test both these connections.
How much to pay for a Trip 35
You can pay anything from a couple of quid to £60 for one of these Olympus Trip 35 cameras. A typical price for a good condition one is about £30-£40. They used to sell new for a similar price. Some photographers are buying them to refurb with a new skin, replacing the black plastic trim for wood veneer, leather or snake skin. These tend to resell for the higher prices, but look gorgeous.
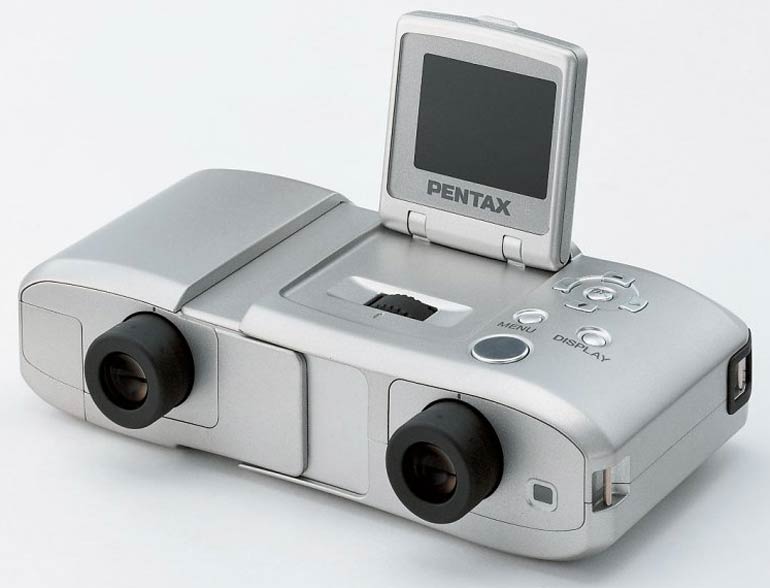
In this occasional series we’ll take a look at design concepts that have tried to revolutionize the way we take photos. The first in the series looks at digibinos. A hybrid product combining binoculars with a digital camera. Pentax came up with the innovation announcing their DB-100 model in March 2002.
Having a camera combined with binoculars wasn’t a new thing. Tasco produced a 110 film version back in the early 80s. It wasn’t a success, and neither was the Pentax .
What the Pentax had was interesting – a pair of 7x magnification binoculars and a digital camera with a focal length of 280mm (on a 35mm camera). What let it down was the low resolution of the camera at just 0.8Mp and the build quality. For £300 it felt like you were getting a cheap digital camera with a budget pair of binoculars that didn’t have the flexibility of normal compact binoculars. You could adjust the size for different width eyes by push pulling the case, but they didn’t feel as comfortable as ordinary binoculars.
The LCD viewing screen was also smaller than digital cameras at the time.
I was taking photos remotely the other day and used binoculars to view the distant scene. It made me think that having a camera built in would be a good thing…but I’d want the clarity and depth seen through the binoculars to be recorded by the camera. I still believe there’s a future for this kind of hybrid technology, but it has to be smarter than the previous attempt.
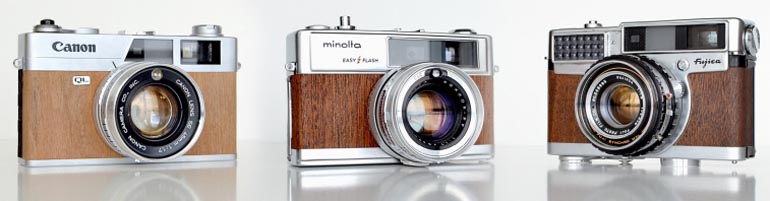
Illitt Vintage collects and restores vintage rangefinder cameras, replacing their original leather trims with beautifully crafted wood veneers. Veneers are made from Mansonia, Mahogany, Walnut and Cherry, each one being uniquely patterned to ensure each camera is equally unique.
The cameras look gorgeous and models restored so far include an Argus C3, Canon Demi EE17, Canonet QL17, Fujica V2, Konica Auto S2, Konica SII, Minolta AL, Minolta Hi-Matic 7, Minolta Hi-Matic 9 and Minoltina AL-S.
Once restored the cameras are used by Illitt Vintage and results are displayed in their online gallery. Cameras are made available for sale too along with some stylish camera straps. Ilott Vintage Store
Photographyattic has a few vintage cameras here if you fancy trying your own DIY restoration project 35mm Cameras for sale
Try using other materials such as leather or soft plastic.
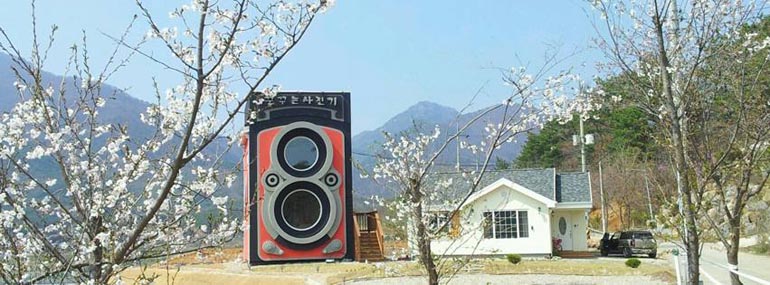
You’d be forgiven for thinking this was some kind of April Fool joke but it’s genuine. In South Korea there is a photo enthusiast who’s built a cafe in the shape of a huge Rolleiflex, twin lens reflex camera.
The windows of the two floor building are its lenses, and decorations throughout the cafe are photos and camera displays. It looks like a photographers dream place.
You may have a camera or accessory you want to sell and don’t know how much it’s worth.
If you’ve inherited the equipment and don’t know what you have in front of you, use Google to search. Look for any identifying features on the item. If it’s a camera it will have a make and a model number. These are usually enough to help you track down the item.
When searching Google switch to search by images. This is the quickest way to pinpoint your gear. When you find a photo that looks like your item open and view the web page. look for descriptive words that tie in with what you have. Sometimes there are different versions of the same product. The Vivitar 283 flash, for example, has been made in three different countries. Leica, for example, had many variations of the same camera differentiated by the serial number.
When you find the exact description of your item switch to eBay. Search items for sale using the description you’ve researched. Then click on Show Only > Completed Listings to get an idea what your item has sold for recently.
Now you’re ready to sell see our article of selling tips